The cost of a second-hand Fujifilm X-E4 is completely out of hand!
Before we get to that, let’s rewind this all a bit. Fujifilm released the X-E4 in late-February 2021. I preordered my copy, which arrived in early March. The X-E4 was the fifth in the X-E line, which began in 2012 with the X-E1, Fujifilm’s second interchangeable-lens X-series model (the X-Pro1 was the first). The X-E2 came out only one year later, and the nearly identical X-E2s was released three years after that. The X-E3 was released in 2017, and rumors floated around that it might be the last X-E camera.
The X-E line is much beloved by those who own them. It’s a combination of beautiful rangefinder styling, diminutive size, simplicity, and affordability, while producing images that are equally as good as the bigger and more expensive models. But sales have always been so-so. The X-E3, in particular, was a slow-mover, and it was possible to buy a brand-new copy for less than MSRP as recently as last year. Two years ago the X-E3 was on sale for $560. This is to say that the X-E line is niche, even within Fujifilm, which is itself sort of a niche brand; however, it’s a much loved series by many who have had the pleasure to use them. The X-E1 was my gateway into Fujifilm; today the X-E4 is my second-favorite camera, only behind the X100V.
With the X-E3 not moving particularly quickly, Fujifilm seriously considered discontinuing the X-E line. But with the discontinuation of the low-budget X-A and X-T000 cameras, plus a vocal outcry from their customers, I believe Fujifilm had a change of heart, so the X-E4, with its minimalistic design, was born. However, between the global parts shortage and the expected so-so sales, Fujifilm didn’t produce as many copies as other cameras. My guess is that they were concerned that unsold boxes of the X-E4 would be sitting around for years like with the X-E3 (and, to an extent, the X-E2s before that, and the X-E2 before that, and the X-E1 before that), so Fujifilm made the decision to discontinue the X-E4, and divert manufacturing resources to other cameras, like the X100V, X-T5, and X-S20.
What Fujifilm did not anticipate is that the sudden success of the X100V—thanks to social media and Film Simulation Recipes (to a degree)—would spill over to the X-E4. Since it became so hard to get a copy of the X100V, and new orders were being placed faster than Fujifilm could manufacture the camera—with backorder lists six months long—people began to look for alternatives. The X-E4, especially paired with the 27mm pancake, was a top alternative suggested for those who wanted an X100V but couldn’t get one. The X-E4, which was already hit-or-miss to find, was now sold out everywhere, and Fujifilm couldn’t manufacture new copies nearly fast enough.
Even though the X-E4 was suddenly super successful, Fujifilm inexplicably discontinued it back in March of this year, just two years after it was initially released. I believe that Fujifilm had already decided to discontinue it, and cease manufacturing at a certain point—not secure the necessary parts to make more copies—and they followed through with their plan despite the increased demand. In my opinion, this was a big mistake. Apparently, Fujifilm may have also planned to quietly discontinue the X-E line with the X-E4. My hope is that they change their minds and create an X-E5, but I’m not holding my breath, because it probably won’t happen. Maybe articles like this will convince them otherwise.
Working – Salt Lake City, UT – Fujifilm X-E4 & Fujinon 27mm f/2.8 – Kodak Vision3 250D
Since the X-E4 was discontinued while demand was high, the prices of used copies has skyrocketed, as reported by Fujirumors. I began this article prior to Patrick publishing his, but got busy with other things before finishing it, then I saw his post on the subject. I questioned if it was even worth publishing, but, after thinking about it, I decided to finish this article. I believe that I have a divergent-enough take on this topic that it’s worthwhile to publish anyway.
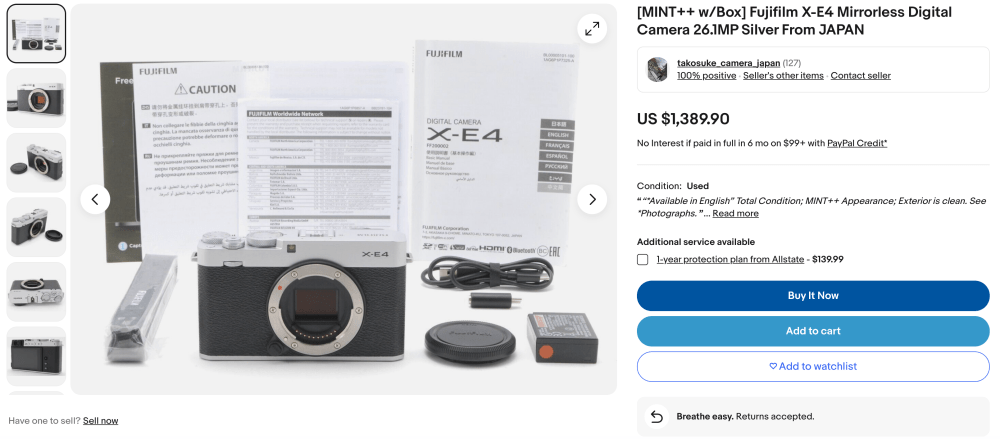
Used copies of the X-E4 are being listed for sale for 50% to 100% more (and sometimes higher!) than the camera cost when brand new. Crazy! It’s simple supply and demand. There’s a lot of demand, and Fujifilm didn’t manufacture nearly enough supply. So now, if you want an X-E4 you’re going to pay through the teeth. Even the X-E3 is selling for more than it was, although it still seems pretty affordable—if you can’t find an X-E4, buy an X-E3 instead. I love my X-E4, but I wouldn’t recommend buying one for these prices. What it really shows is that Fujifilm should make an X-E5, or start manufacturing more X-E4 bodies. It’s a wasted opportunity.
Below are some screenshot examples I found of the insanely inflated X-E4 prices. If you are trying to buy one, I sincerely wish you the best of luck finding one for a reasonable cost.
What’s better, the Ricoh GR III or the Fujifilm X-E4 with a Fujinon 18mm f/2 lens? They’re both compact APS-C cameras that are reasonably affordable. They are both capable of producing excellent straight-out-of-camera JPEGs that don’t require editing. But which one is the best? If put head-to-head, which one will come out on top? Let’s find out!
The biggest pro for the Ricoh GR—and let’s be honest, this is the reason to own it—is its super compact size—the smallest APS-C camera, in fact. The GR III easily fits into my pants pockets or nearly anywhere. It’s perfect for travel or for just carrying around. The inconspicuous design lends itself well for street photography. The GR III has IBIS, albeit a mediocre one that’s not particular necessary with an 18mm lens (but, still, it has it). Snap focus is a pretty useful feature. Ricoh just gave it a new Image Control Effect (their version of a Film Simulation) with a Kaizen firmware update, something Fujifilm hasn’t done in a long time. Perhaps the second biggest pro to the Ricoh GR III is that you can actually buy one without too much difficulty.
The biggest con for the Ricoh GR is that it has a fixed lens. That could be good or bad, depending on your perspective, but for certain it lacks versatility—the GR III is a one-trick pony, but of course it does that one trick very well. Another big con is that it lacks a viewfinder; because the LCD doesn’t move, the camera can be hard to use in harsh light conditions. I don’t like that it has a PASM dial, as I much prefer the manual tactile controls found on most Fujifilm cameras. While the camera-made JPEGs do look good, I prefer those from the Fujifilm X-E4, as I think Fujifilm’s JPEGs are a little better than Ricoh’s. Finally, the GR III is now over four years old, and it’s perhaps beginning to feel slightly dated.
For the Fujifilm X-E4, the biggest pro is Fujifilm’s renown JPEG output and the large number of Film Simulation Recipes available for it. For straight-out-of-camera photography, it’s very hard to beat this camera! The X-E4 has an electronic viewfinder, as well as a tilting LCD. You can attach any number of different lenses to it; the Fujinon 27mm f/2.8 is my favorite. The Fujinon 18mm f/2 is a full stop brighter than the f/2.8 lens on the Ricoh GR III, which can occasionally be a big deal, but most of the time isn’t. The X-E4 has the traditional camera controls that Fujifilm cameras are known for. Fujifilm released the X-E4 two years after Ricoh released the GR III, and to a small extent you can tell.
The biggest con for the Fujifilm X-E4 is that it’s difficult to find, and, if you do, it might be at an inflated price. Due to parts shortages, Fujifilm couldn’t keep up with demand, and then they (inexplicably) discontinued the camera. Good luck finding one. While the X-E4 is small and pocketable if your pockets are large enough, it’s significantly bigger than the Ricoh GR III. It doesn’t have IBIS, although with the 18mm lens it’s not really necessary. The Fujifilm X-E4 paired with the Fujinon 18mm f/2 has an MSRP of $1,450, while the Ricoh GR III has an MSRP of only $900.
Comparing the Ricoh GR III to the Fujifilm X-E4 with the Fujinon 18mm f/2 lens isn’t really fair. They’re two different tools for two different purposes. But there are enough similarities and crossover that they do make some sense to test side-by-side. I like the Fujifilm X-E4 better—much better, in fact—than the Ricoh GR III, but that doesn’t mean it’s the best camera. Best is subjective, and it kind of depends on your goals and how you’ll use the cameras.
The Ricoh GR III is significantly cheaper and you can buy it right now without too much trouble. The Ricoh GR III is easier to carry around and is more inconspicuous. The Fujifilm X-E4 offers a more fun shooting experience and is much more versatile. I prefer the pictures from the X-E4, but those from the Ricoh GR III are still very good. Ultimately the winner is the one that makes the most sense to you. I own both cameras, and I use the Fujifilm X-E4 probably ten or maybe fifteen times more often than the Ricoh GR III, so it is my winner; however, you might prefer the GR III for various reasons, so it could be your winner. Even though I use the X-E4 much more often, there are times that the GR III is more practical to have with me, so I’m glad that I own it.
Below are some pictures that I recently captured with a Ricoh GR III and a Fujifilm X-E4 with a Fujinon 18mm f/2 lens.
According to Fujirumors, some camera stores are beginning to mark the Fujifilm X-E4 as discontinued. It’s not uncommon for cameras to be marked as such prior to the announcement of its successor, but I don’t think that’s the case here.
I own and love my X-E4. I’ve always had a special place in my heart for the X-E line because my very first Fujifilm camera was an X-E1, which was my gateway into the Fujifilm family. The X-E4 was my most-used camera body in 2022. It’s an especially great camera for travel photography due to its small size and minimalistic design, and I’m so glad that I preordered it when it was announced.
Of course, it wasn’t without controversy. Fujifilm probably went a step or two too far in their attempt at minimalism, removing a couple of things they probably shouldn’t have. No camera is perfect. Despite that, the X-E4 has been in-demand since its release, with sales often exceeding Fujifilm’s ability to manufacture new bodies. The camera has been on backorder for the majority of the time since its release a little over two years ago. If you are a camera maker, best case scenario is that a camera’s demand exceeds your ability to make them, and they are already sold before they even reach the end of assembly. The X-E4 was one such model.
The reason why Fujifilm couldn’t keep up with demand is the global parts shortage that affected so much within the industry. Fujifilm didn’t prioritize securing parts and manufacturing efforts for the X-E4 for two reasons, I believe: 1) other models were even more in-demand, and 2) other models have higher profit margins. I don’t have any proof of that, it’s just my assumptions. Cameras like the X100V and X-T5 are more in-demand than the X-E4, and more money is made per camera sold than the X-E4, so less of an effort was made to produce more X-E4 bodies. Instead of trying to fulfill the full demand, Fujifilm prioritized other models. It’s fine that they did that, because something had to give somewhere, and Fujifilm made their tough decisions.
My guess is that parts are running especially thin now for the X-E4, so Fujifilm is telling camera stores that they cannot fulfill more orders. I think more bodies have been made and are en route to the stores, and possibly more are on the assembly line right now, but after that there will be no more. Some of those who have it backordered will get their camera, and some won’t. That’s all just a guess and so take it with a large grain of salt. I have zero inside information.
Coastal Blooms – San Simeon, CA – Fujifilm X-E4 – Pacific Blues Recipe
Instead of trying to secure more parts and manufacture more copies of the X-E4, I think Fujifilm is trying to move onto X-Trans V as quickly as they can. I suspect that the X-Pro3 is no longer manufactured, and Fujifilm and camera stores are waiting for the current stock to dry up. I think the X-T30 II is on it’s last production run, and will soon be discontinued. My guess is that all of the X-S10’s that will be made have been already, and it’s a matter of the current stock running out. Same for the X-T4. The X100V is another story. I think Fujifilm will continue to manufacture it as long as demand remains sky-high, which will likely be until the day the X100Z (or whatever they will call it) is released; however, I do think they are giving manufacturing priority to the X-T5, X-H2, and X-H2S. Again, this is all speculation and nothing more.
Supposedly, the next Fujifilm camera to be announced will be the X-S20 sometime next month, but Fujifilm cancelled their April X Summit. Maybe they weren’t as ready for the X-S20 as they thought they would be. I think Fujifilm should prioritize the next X100-series camera, but my suspicion is that 2024 will be the year of the X-Pro4 and X100Z, and not 2023. I do think the plan is for one more X camera to be announced this year (aside from the X-S20, in or around September), but it will likely be an affordable (budget) model, such as the X-T40 (they might call it X-T50).
Old Saguaro – Buckeye, AZ – Fujifilm X-E4 – Arizona Analog Recipe
Fujifilm has three low-budget lines: X-S, X-E, and X-T00. They used to have other lower-budget lines, but that end of the camera market dried up so they discontinued them. I don’t believe that Fujifilm will continue with three models competing against each other. My guess is that either the X-T00 or X-E line is done for. Since Fujifilm has flirted in the past with discontinuing the X-E line, that series is likely on the chopping block, or at least being discussed as such within Fujifilm management. Don’t be surprised if there is no X-E5.
If the autumn camera isn’t the X-T40, what could it be? Fujifilm would be smart to prioritize the next X100-series model. That should be near the very top of their to-do list (after fixing the Cam Remote app). I wouldn’t be surprised if Fujifilm introduced a new mid-tier PASM line in-between the X-S20 and X-H2/X-H2S—I have no idea if that’s in their plans or not, but it does seem like a gap in the lineup. I’ve heard of plenty of demand for a non-PASM flagship model, but I don’t think that’s currently in the cards. Of course, I’d love to see an X80 or monochrome-only model—those are the only cameras that I’m personally interested in right now—but I’m not holding my breath. Most likely, 2023 is the year for the X-S20 and X-T40.
I hope the X-E line isn’t done for. I hope there is an X-E5. If they do make it, the series has historically been announced near the end of a sensor’s lifecycle, so perhaps we will see one in 2025, just before X-Trans VI is introduced. We’ll see.
This post contains affiliate links, and if you make a purchase using my links I’ll be compensated a small amount for it.
Fading Flowers in the Desert – Buckeye, AZ – Fujifilm X-E4 & 27mm – “Superia Summer”
I almost always have several experimental Film Simulation Recipes programmed into each of my Fujifilm cameras. Sometimes these developmental settings become Recipes and sometimes they don’t (more don’t than do). Occasionally I forget the story behind an experimental Recipe—why the settings are the way they are, and what I was intending to mimic. It might have been a film photograph I saw, or a film stock someone requested I copy, or a certain photographer’s aesthetic—whatever it was, I just don’t remember. That’s the case with this Recipe: it was programmed into C5 on my Fujifilm X-E4 with the custom name “Exp 9/21” and no further details. I suppose I initially created it back on September 21, but I don’t remember why. The story of it is a complete mystery to me.
Just recently I noticed this Recipe in my camera, and—not remembering what it was—I decided to shoot with it. And I was blown away. The results were stunning! Why didn’t I use it back in September? I don’t know. What I do know is that it produces beautiful analog-like pictures. It reminds me of Fujicolor Superia—maybe 200 or 400—overexposed by about a stop, and shot with a warming filter (such as an 81a or 81b) or maybe with a Takumar lens that has turned yellow due to the thorium coating—perhaps printed on Kodak paper, too, instead of Fujifilm Crystal Archive. It has a strong warm cast, but still retains that distinct Superia palette, so I’m calling it Superia Summer. I cannot overstate just how much I like it!
2nd Story Windows – Buckeye, AZ – Fujifilm X-E4 & 90mm – “Superia Summer”
This Superia Summer Film Simulation Recipe is compatible with the Fujifilm X-T4, X-S10, X-E4, and X-T30 II cameras. Because Blue is rendered more deeply on X-Trans V cameras, set Color Chrome FX Blue to Off in order to use it on the X-T5, X-H2, or X-H2s (or any other X-Trans V camera that is released after this writing). For the X100V and X-Pro3, I recommend using the Fujicolor 100 Gold Recipe or Superia Xtra 400 Recipe instead, which produce similar results, or simply set Highlight to -1 and Shadow to 0. For best results, use the Superia Summer Film Simulation Recipe in sunny daytime light; it does alright in cloudy conditions, too, as long as it’s not thick overcast.
Classic Negative Dynamic Range: DR400 Highlight: -1.5 Shadow: -0.5 Color: +1 Noise Reduction: -4 Sharpness: -1 Clarity: -4 Grain Effect: Weak, Small Color Chrome Effect: Off Color Chrome Effect Blue: Weak White Balance: 5300K, +3 Red & -6 Blue ISO: Auto, up to ISO 6400 Exposure Compensation: +1/3 to +1 (typically)
Example photographs, all camera-made JPEGs using this “Superia Summer” Film Simulation Recipe on my Fujifilm X-E4:
Desert Creek – Buckeye, AZ – Fujifilm X-E4 & 27mm
Wildflower Creek – Buckeye, AZ – Fujifilm X-E4 & 27mm
Riverbed – Buckeye, AZ – Fujifilm X-E4 & 27mm
Rocks in the Water – Buckeye, AZ – Fujifilm X-E4 & 27mm
Desert Stump – Buckeye, AZ – Fujifilm X-E4 & 27mm
Hiding Stump – Buckeye, AZ – Fujifilm X-E4 & 90mm
Water & Stone – Buckeye, AZ – Fujifilm X-E4 & 27mm
Young Giant – Buckeye, AZ – Fujifilm X-E4 & 27mm
Cholla in the Flower Field – Buckeye, AZ – Fujifilm X-E4 & 90mm
Red-Tipped Cacti – Buckeye, AZ – Fujifilm X-E4 & 27mm
Saguaro Wren – Buckeye, AZ – Fujifilm X-E4 & 90mm
Saguaro Sky – Buckeye, AZ – Fujifilm X-E4 & 27mm
Palm Tree Three – Buckeye, AZ – Fujifilm X-E4 & 27mm
Roof Vent – Buckeye, AZ – Fujifilm X-E4 & 90mm
Bougainvillea Villa – Buckeye, AZ – Fujifilm X-E4 & 90mm
Vibrant Red – Buckeye, AZ – Fujifilm X-E4 & 90mm
Morning Light – Buckeye, AZ – Fujifilm X-E4 & 90mm
Falling Door – Litchfield Park, AZ – Fujifilm X-E4 & 27mm
Abandoned Building Through Broken Window – Litchfield Park, AZ – Fujifilm X-E4 & 27mm
Blurry Building – Litchfield, Park, AZ – Fujifilm X-E4 & 27mm
Crack of Light – Buckeye, AZ – Fujifilm X-E4 & 27mm
Chairback Window – Buckeye, AZ – Fujifilm X-E4 & 90mm
Comparison:
Superia Summer Recipe
Fujicolor 100 Gold Recipe
Fujicolor Xtra 400 Recipe
This post contains affiliate links, and if you make a purchase using my links I’ll be compensated a small amount for it.
Nobody pays me to write the content found on fujixweekly.com. There’s a real cost to operating and maintaining this site, not to mention all the time that I pour into it. If you appreciated this article, please consider making a one-time gift contribution. Thank you!
I had an epiphany today. It’s been building in my mind for several days now, but it was only today that I believe I fully understood it: photograph wherever you are. Whichever place it is that you find yourself, capture it with your camera.
When I was 16-years-old, my family moved to a small unincorporated community in Texas called Culleoka, which is north of Dallas near Lake Lavon. At that time it was in the middle of nowhere—and it still is—but the city has been inching closer and closer, and is now at its doorstep. I finished high school while there and enrolled in college. I studied photography for two years before leaving home—and Texas—at 19. That was a long time ago; however, my parents still live in the same house in Culleoka.
I bring up all of this because I realized that, despite learning photography while I lived there, and despite all of the times that I’ve visited over the years, I’ve never photographed Culleoka. I never thought this place was photographically interesting. I always traveled elsewhere with my camera, whether it was McKinney, Plano, Dallas, or any number of other towns in the region. I never photographed where I lived.
Visiting my parents now, for some reason—maybe because I’m older—I find Culleoka to be a much more interesting place. Yes, there’s still not much to see. If you blinked while driving through you’d miss it. There’s a gas station. A Dollar General, which is a fairly new addition. An auto body shop. A fireworks stand. A couple of churches. Maybe a couple hundred people live in Culleoka, many in mobile homes. There’s access to Lake Lavon at the far edge.
I regret now not photographing where I was, because there’s actually a lot of opportunity, if only I had had an open mind. I didn’t see it before. I just thought it was a boring place. Those “other places” were much more fascinating. I had to drive somewhere else to capture interesting pictures. Perhaps you can relate. Maybe you believe that wherever it is you are isn’t worth your camera’s attention, and because you see it day in and day out it is difficult to view it with fresh eyes.
How do you view a highly familiar location with fresh eyes? For me, I think it was just being away for a few years. Actually, I saw some interesting sunlight on the gas station, and a lightbulb went off in my mind. I was reminded of Wim Winders book Written in the West, which inspired me to photograph Culleoka using my Fujifilm X-E4 programmed with the Kodachrome 64 Film Simulation Recipe. Some ideas are to envision yourself as a tourist experiencing the place for the first time, simply keeping a photographic eye out for interesting light, or reading photography books where some pictures are similar to your current location.
Just because you believe that where you are is uninteresting, doesn’t mean there aren’t things worth photographing. You have to keep a constant eye out. Maybe you need to view it through a fresh perspective. Perhaps you just need to get out with your camera on a regular basis and keep at it until you finally “see it” as some new inspiration hits you—I think just getting out with your camera is the best advice that I have.
Don’t be like me and fail to photograph where you are. Just because you don’t think it is worthwhile doesn’t mean that it’s not worthwhile—with a fresh perspective, you’re likely to find things that actually are interesting, things you maybe passed by hundreds of times and it never caught your attention. You have a great opportunity, and perhaps an interesting series of pictures will emerge from it.
It’s an easy trap to think that you have to go someplace else in order to capture interesting pictures. I certainly believed that for awhile, even though I used to say that the job of a photographer is to find the extraordinary in the mundane. I didn’t always practice what I preached—I assumed that where I was wasn’t interesting enough—but my statement was correct: it’s my job to find what others overlook in the places I find myself, and create compelling pictures with my camera. I hope that I’ve accomplished that this time around.
Some of the pictures that I captured in Colleoka, Texas, over the last few days:
Snow on the Stormy Mountain – Farmington, UT – Fujifilm X-E4 – “Pushed CineStill 800T”
This “Pushed CineStill 800T” Film Simulation Recipe came about after I stumbled across an amazing picture that was captured on CineStill 800T film during daytime with an overcast sky. It turned out that the film was push-processed, but I never learned by how many stops (I’m guessing one-stop). After some extensive Googling, I was able to find several more examples of push-processed CineStill 800T film shot in overcast daytime light. I then set out to mimic that aesthetic on my Fujifilm camera.
Interestingly enough, even though this recipe is intended for daytime photography, it does quite well at night, too; however, I do believe it more faithfully mimics the film in cloudy daytime conditions. It does produce nice results in daylight or night, so feel free to use it anytime. Film can look different depending on how it is shot, developed, or scanned (among many other things). This recipe doesn’t replicate pushed CineStill 800T film under all circumstances, but in certain conditions it’s a good facsimile. I really like how this one looks, and I think some of you will really appreciate it, too!
Book & Minolta – Farmington, UT – Fujifilm X-E4 – “Pushed CineStill 800T”
Because this “Pushed CineStill 800T” recipe uses the Eterna Bleach Bypass film simulation, it is only compatible with the Fujifilm X-T4, X-S10, X-E4, and X-T30 II cameras. It’s possible that this recipe is also compatible with the GFX100S and GFX 50S II, but I’ve never tested it to be certain. This was a Fuji X Weekly App Patron Early-Access Recipe, so App Patrons have had access to it since October, but now it’s available to everyone! A new Early-Access Recipe replaced it find—it in the Fuji X Weekly App!
Eterna Bleach Bypass Dynamic Range: DR400 Highlight: -0.5 Shadow: -1.5 Color: +3 Noise Reduction: -4 Sharpness: 0 Clarity: -3 Grain Effect: Strong, Large Color Chrome Effect: Strong Color Chrome Effect Blue: Strong White Balance: 7700K, -9 Red & +5 Blue ISO: Auto, up to ISO 6400 Exposure Compensation: -1/3 to +2/3 (typically)
Example photographs, all camera-made JPEGs captured using this “Pushed CineStill 800T” Film Simulation Recipe on my Fujifilm X-E4:
Happy Birthday Wish – Farmington, UT – Fujifilm X-E4
Ready To Go Nowhere – Farmington, UT – Fujifilm X-E4
Pipe Door – Farmington, UT – Fujifilm X-E4
Night Urban Path – Farmington, UT – Fujifilm X-E4
Empty Parking Garage – Salt Lake City, UT – Fujifilm X-E4
Empty Harmons Fuel Stop – Farmington, UT – Fujifilm X-E4
Night Hydrant – Farmington, UT – Fujifilm X-E4
Wet White Blooms – Farmington, UT – Fujifilm X-E4
Little Wild Berries – Farmington, UT – Fujifilm X-E4
Clouds Building Over Green Ridge – Farmington, UT – Fujifilm X-E4
Pumpkins In A Patch – Farmington, UT – Fujifilm X-E4
Nobody pays me to write the content found on fujixweekly.com. There’s a real cost to operating and maintaining this site, not to mention all the time that I pour into it. If you appreciated this article, please consider making a one-time gift contribution. Thank you!
As you might know, I’m currently on a road trip. We passed through Amarillo, Texas, and stopped at The Big Texan restaurant for dinner. The Big Texan is famous for their 72 ounce steak that, if you can eat it in under an hour, is free. Most who attempt it don’t succeed. I didn’t try, but someone did while I was there, which was neat to see. I don’t know if he was successful or not because he was still at it when I left.
I always try to carry around a camera, because you never know when a photographic opportunity will present itself. If I don’t have a Fujifilm camera with me, I have RitchieCam on my iPhone (if you have an iPhone, be sure to download the app!) or a Ricoh GR. On this occasion I had my Fujifilm X-E4 with the Fujinon 27mm f/2.8 attached to it, which is a great combination for travel! I snapped a few pictures while I was at The Big Texan, mostly while waiting for our table to be ready.
A restaurant might not seem like a good place for photography. This spot, which is along old Route 66, is quirky and fun, and anyplace that’s quirky and fun is likely to produce at least one good picture. The Big Texan didn’t disappoint, photographically and taste-wise. The food was delicious! The portions were Texas-sized. The photographs turned out alright I think.
I published last year my “ultimate” travel kit, which consists of a small camera bag, with the Fujifilm X-E4 and Fujifilm X100V inside. This is perfect to ensure that I have a camera with me all of the time, so that I don’t miss any opportunities to capture interesting pictures. You never know what you’ll find, so it’s best to be ready for anything—even a quirky steak restaurant in Amarillo, Texas.
I was cleaning out the notebook on my road trip two months ago—it was a whirlwind to the Grand Teton National Park and to the furthest northwest corner of Oregon—and I was trying to figure out what to write about. The remaining pictures are a hodgepodge, but I wanted to share them nonetheless. I then realized that many of the remaining images were captured with a Fujifilm X-E4 and Fujinon 90mm combination. Suddenly I had my article idea!
You might recall that the 90mm lens doesn’t fit into my “ultimate” travel camera kit, so I couldn’t bring it with me; however, my wife, Amanda, brought it in her camera bag to use with her X-T4. The three lenses that she likes to use are the Fujinon 10-24mm zoom, the Fujinon 27mm f/2.8, and the 90mm f/2, and the 27mm is her (and my) favorite. I had the 27mm in my bag on the X-E4, so on several occasions we swapped. This arrangement ended up working out pretty well for both of us.
Snake River Sun Rays – Grand Teton NP, WY – Fujifilm X-E4 & 90mm – “Ferrania Solaris FG 400“
The Fujinon 90mm is one of my favorite lenses, but the 135mm full-frame-equivalent focal-length isn’t always easy to use. It’s great for headshots, but definitely challenging for landscape and travel photography. Challenges are actually good if you embrace them because they force you to think outside-the-box and try new things, which will make you a better photographer. While this lens is one of the absolute best in the Fujinon lineup, it’s not always easy for this type of photography; however, if you are up for the challenge you will certainly be rewarded.
The lens isn’t especially compact or lightweight, either. I find that it balances better on bigger camera bodies, such as the X-T4 or X-H1. Using it on the small X-E4 can be a bit awkward, especially if you’ll be shooting all day with it. In other words, it’s not a convenient option. Those who obsess over ergonomics will hate this camera and lens combination. If you can get past that, though, the X-E4 and 90mm will deliver excellent images. Both the camera and lens are highly capable photographic tools, and together, from an image quality point-of-view, they’re a dream team!
Columbia River Rainbow – Hammond, OR – Fujifilm X-E4 & 90mm – “Velvia v2“
If you have an X-E4, should you pair the 90mm with it? I love the camera and I love the lens, and they’re great when used together, but they’re not without their difficulties. They’re philosophical opposites. The X-E4 is about “less”—less size, less weight, less complications—while the 90mm is about “more”—more reach, more sharpness, more bokeh. With the Fujifilm X-E4, less is more. With the Fujinon 90mm f/2, more is more. They don’t belong together, yet the images they create together speak for themselves. The pictures are what matter most, and you do what you’ve got to do to create them. That means dealing with the challenges as they come, and, for me, using these two great tools together.
This post contains affiliate links, and if you make a purchase using my links I’ll be compensated a small amount for it.
Working – Salt Lake City, UT – Fujifilm X-E4 & 27mm f/2.8 – “Kodak Vision3 250D”
One of my favorite Film Simulation Recipes is Kodak Vision3 250D. It produces wonderful warm tones, and has a vague cinematic feel. Colors pop but not overly so. There’s a lot of contrast, yet it rarely feels like too much, and shadows aren’t overly deep. If you have an X-Trans IV camera and haven’t tried this recipe, you really should!
The Kodak Vision3 250D recipe is intended for the X-T3 and X-T30 cameras, but with some slight modifications it can be used on “newer” X-Trans IV cameras, like my Fujifilm X-E4: I set Clarity to 0, Color Chrome FX Blue to Off, and Grain size to Small. If you have an X-H1, which has the Eterna film simulation, you can also use this recipe, but it will look slightly different because you don’t have Color Chrome Effect. Also, I used this recipe with much success on a GFX 50S camera, as seen in the video below.
In the last SOOC broadcast, Fujifilm X-Photographer Nathalie Boucry and I introduced the Kodak Vision3 250D recipe as the recipe-of-the-month. Shoot with this recipe and upload your pictures here to be included in the next SOOC episode, which will be live on May 12. Also, all those who upload their images captured with this recipe will have a chance to win a one-year subscription to the Fuji X Weekly App.
If you missed the last episode of SOOC, you can watch it below. Also, Season 02 Episode 03 is already scheduled, so be sure to mark your calendars and set a reminder. We will finish our discussion of the Kodak Vision3 250D recipe, showcase your images, and introduce the next recipe-of-the-month: Fujicolor Superia 800. It will be a great time—both fun and educational—and I hope that you can join us! SOOC is interactive, so the more that can tune-in and participate, the better the show is.
I captured the photographs in this article recently using my Fujifilm X-E4 with the Fujinon 27mm f/2.8 lens attached to it. I love this combo! It’s great for travel, street, or just everyday walk-around photography. And the Kodak Vision3 250D recipe works great on it! It doesn’t matter if it’s street, landscape, or candid portrait photography—or almost anything else—this recipe does quite well.
The Kodak Vision3 250D recipe, along with over 200 others, is on the Fuji X Weekly App. If you don’t have it on your phone, be sure to download it now!
Dancing Joy – Salt Lake City, UT – Fujifilm X-E4 & 27mm f/2.8 – “Kodak Vision3 250D”
No Fun – Salt Lake City, UT – Fujifilm X-E4 & 27mm f/2.8 – “Kodak Vision3 250D”
Urban Daisies – Salt Lake City, UT – Fujifilm X-E4 & 27mm f/2.8 – “Kodak Vision3 250D”
I’m a Fujifilm fanboy, but this new Nikon looks quite nice.
Maybe you can relate: I’m a sucker for retro-inspired cameras, and the Nikon Zfc had me drooling the day that it was announced. I love Fujifilm, yet I have nothing against Nikon—I used to shoot with Nikon DSLRs, and a few of my favorite photographs were captured on Nikon cameras. I figured that if I’m interested in the Zfc, maybe some of you are, too, so I purchased one to try. At the very least I could compare it to Fujifilm X-Trans cameras, and explain the similarities and differences.
At first glance the Zfc looks like it’s in the same class as the Fujifilm X-T30. There are certainly some similarities between the two models. The Zfc has a rear screen and knob arrangement that’s more like the X-T4, so I thought it could, perhaps, even fall in-between those two models somewhere, and serve as an upper-mid-tier APS-C mirrorless camera. It’s hard to tell from looking at pictures, but that’s what I was expecting.
When I pulled the Zfc out of the box, a few things surprised me. First, the camera is bigger than I expected. It’s much larger and noticeably heavier than the Fujifilm X-E4 that I frequently shoot with. It’s a little larger and slightly heavier than my X-T30. It’s almost as big as an X-T4, although much lighter. The Fujifilm camera in my collection that’s most similar in size and weight to the Zfc is the Fujifilm X-T1.
The Nikkor 28mm f/2.8 lens (that came with the camera) is massive, too. I thought, perhaps, there’d be some similarities between the Fujinon 27mm f/2.8 lens and the Nikkor glass, but other than maximum aperture and similar focal-length, these two lenses are much different. The Fujifilm lens is smaller, lighter, sharper, and superior in pretty much every way. That’s not to say that the Nikkor lens is bad, but it’s definitely not as good as the Fujinon, which happens to be my favorite lens. Nikon didn’t include an aperture ring on the 28mm f/2.8 (or any other Z glass), which I think is a big oversight.
Another surprise is how plasticky the Zfc feels. It doesn’t look plasticky, and its weight suggests that it’s not all that plasticky, but it definitely feels plasticky when you use it. I wouldn’t trust this camera to survive a hard fall. It doesn’t appear to be a cheap camera (and its price tag would confirm this), but when you use it, the feeling is that it’s a budget body, and not mid-range.
After considering where it best compares to Fujifilm models, the one I think the Zfc is most comparable to is the X-T200. If Fujifilm had put markings on the customizable unmarked knobs, the two cameras would be very similar (aside from size and weight). For those who don’t know, the X-T200 was Fujifilm’s budget option, with a price of $700 for the body or $800 bundled with a kit zoom. The X-T200 didn’t last long (both introduced and discontinued in 2020) because it didn’t sell well. Perhaps the Zfc sits a little above the X-T200, but in my opinion that’s the most similar Fujifilm model.
One last surprise is that the shutter and ISO knobs are more for looks than practical use. You see, there’s a PASM switch, and only when you are in the correct PASM position do the knobs actually do anything. If this camera had been designed correctly, PASM would be completely unnecessary, and the knobs would always do something if you turned them. It’s a much different user experience than what most Fujifilm cameras deliver, and maybe more confusing.
I understand that those who don’t have a background in classic film cameras and have only used PASM might be intimidated when trying Fujifilm X cameras for the first time. I think that’s one reason why the X-T200 and X-S10 cameras were designed the way they were: intended to be less intimidating to the uninitiated. So perhaps Nikon had that in mind with the Zfc, but this was certainly an opportunity to break the mold and offer a different experience to their users, and they just couldn’t do it—it really is a missed opportunity.
Fujifilm is known for their Film Simulations and JPEG output. I’ve published over 200 Film Simulation Recipes to achieve various looks straight-out-of-camera. I even made an App (available for both Android and Apple) for these JPEG recipes. Fujifilm used their vast experience with film to create profiles that are modeled after film. For many Fujifilm photographers, Film Simulations (and recipes) are an intrinsic element of the user experience and picture aesthetic. For Nikon, their lesser-known equivalent is called Picture Control, with a subset called Creative Picture Control. While Fujifilm’s Film Simulations are inspired by film, Nikon’s Picture Controls are inspired by feelings and mood. It’s a much different take, and not necessarily better or worse—simply a divergent approach that’s worth noting. Fujifilm infuses an analog soul into their digital images, while Nikon infuses emotions that may or may not be analog-esque into their images.
Those who are regular readers of the Fuji X Weekly blog already know this, but for those who don’t, I’m a JPEG shooter. Many years ago I was a RAW guy, but Fujifilm cameras changed that for me. Shooting JPEG saves me time while making the process more enjoyable, as I get the look I want straight-out-of-camera without the need to edit. That’s my perspective.
It’s clear to me that, over the last decade, Fujifilm has invested more R&D dollars and time into their JPEG output than Nikon has. The Zfc is a new camera, but the JPEG quality is closer to X-Trans I—which is 10-years-old now—than X-Trans IV, which is very soon to be replaced by X-Trans V. When viewing on social media or the internet, you can’t tell, but when pixel-peeping, the Fujifilm X-E4 (for example) produces sharper, more detailed images, with more pleasing noise and fewer banding and artifact issues than the Zfc. It’s not a night-and-day difference (and I’m not suggesting that the JPEGs from the Zfc are bad), but it’s definitely noticeable when viewed closely, and I personally prefer the pictures produced by the X-E4; however, it only really matters if you are pixel-peeping, cropping deeply, or printing posters, and otherwise doesn’t matter.
If you want the full Fujifilm photography experience, there’s no substitute for Fujifilm. The Nikon Zfc looks like it could deliver a similar experience, but it falls short in multiple ways. I would suggest the Fujifilm X-T30 II or X-E4 instead, which are similarly priced (cheaper actually), and are better cameras, in my opinion. The Fujifilm X-T3 WW is another solid option with a similar price point (slightly more expensive). With that said, the Zfc is still a very beautiful camera that’s fun to use and produces quality pictures.
If you already own a Nikon Z camera and lenses but like retro-styling, the Zfc is for you. An advantage of Nikon Z is that Z lenses are compatible with their full-frame mirrorless line. So perhaps you start with the Zfc and 28mm lens, but then you later add a couple lenses to your collection, and even later buy a Z7 II. Or maybe it’s the other way around: your Z7 II is big and heavy, so you add a Zfc for travel and walk-around photography, and the lenses you already own are compatible. This is why you buy a Nikon Zfc, I think.
Obviously, they’re hoping that the Zfc will convince those from other brands to try Nikon. My first thought is that those “moving up” from Micro-4/3 will be tempted by this model, although I’m not sure that this camera is convincing enough. Those dissatisfied by Sony, Canon, and Pentax might consider this model, if based on nothing more than looks, which is most likely what it would be based on because the Zfc lacks innovation that would attract photographers from other brands.
I don’t think the Zfc will snag very many from Fujifilm. Maybe if you’ve never liked the lack of PASM—maybe. But other than good-looks, which your Fujifilm camera already offers, the Zfc doesn’t give you a good reason to switch brands. I can tell you with certainty that I won’t be switching brands anytime soon.
If you like your cameras to have retro-styling, the Nikon Zfc is one of your options. It’s a good camera that’s fun to use, but it’s not as good or as fun as a Fujifilm X-Trans model, like the X-T30 II or X-E4, which are slightly less expensive. My recommendation is to buy the Nikon Zfc only if you are already invested into the Z system, or if you are planning to get into that system for the long-term. Otherwise, there are better options, and if you are looking for those better options, let me point you towards Fujifilm.
This post contains affiliate links, and if you make a purchase using my links I’ll be compensated a small amount for it.
Nobody pays me to write the content found on the Fuji X Weekly blog. There’s a real cost to running this website. I also put a lot of my own time into writing the posts. If you’ve found something on Fuji X Weekly helpful to you and you’d like to give back, this is a good place to do it. You can donate to this blog using PayPal by clicking below. I appreciate it! Thank you for your support! Please do not feel obligated to give, but do so only if you want to.
No Trespassing – Farmington, UT – Fujifilm X-E4 – “Old Kodak”
I was inspired to create this film simulation recipe after viewing some old pictures captured on various Kodak films. These pictures reminded me of the Vintage Kodachrome and Kodachrome 1 film simulation recipes, but they weren’t exactly the same. I thought if I tweaked those recipes I could get closer to mimicking the aesthetic of the old Kodak pictures that I was looking at (which is why I call this recipe Old Kodak). If you like the Vintage Kodachrome and Kodachrome 1 recipes, you’ll really appreciate this one, too!
Old Kodak was a Patron Early-Access recipe on the Fuji X Weekly App, and App Patrons have had access to it for nine months; however, it’s been replaced by a different Early-Access recipe, so now it’s available to everyone! The best App experience is reserved for Patrons, and early-access to some new film simulation recipes is one of the Patron benefits. If you are a Patron, be sure to look for the new Early-Access recipe that replaced this one.
Wet Radio Flyer – Farmington, UT – Fujifilm X-E4 – “Old Kodak”
Because this recipe uses 0.5 adjustments to Highlight and Shadow, plus the Auto White Priority white balance, it’s only compatible with the Fujifilm X-T4, X-S10, X-E4, and X-T30 II cameras. If you have an X-Pro3 or X100V, if you set Highlight to +3, Shadow to -1, and white balance to Auto, it will be similar but not exactly the same (don’t be afraid to try it anyway). While the “typical exposure compensation” is between -1/3 and +1/3, in situations with strong highlights you might have to go -2/3 or even -1 on occasion to prevent the highlights from clipping.
Classic Chrome Dynamic Range: DR400 Highlight: +3.5 Shadow: -0.5 Color: +3 Noise Reduction: -4 Sharpening: -2 Clarity: -2 Grain Effect: Strong, Small Color Chrome Effect: Strong Color Chrome Effect Blue: Strong White Balance: Auto White Priority, +1 Red & -6 Blue ISO: Auto, up to ISO 6400 Exposure Compensation: -1/3 to +1/3 (typically)
Example photographs, all camera-made JPEGs using this “Old Kodak” film simulation recipe on my Fujifilm X-E4:
Salt Lake Marsh Evening – Farmington, UT – Fujifilm X-E4
Big Sky Over Marsh – Farmington, UT – Fujifilm X-E4
Rural Red Barn – Farmington, UT – Fujifilm X-E4
Holland Deere – Farmington, UT – Fujifilm X-E4
Open Gate – Farmington, UT – Fujifilm X-E4
Old Wheel – Farmington, UT – Fujifilm X-E4
Rusty Bolts In A Fence – Farmington, UT – Fujifilm X-E4
Suburban Storm – Farmington, UT – Fujifilm X-E4
The Joy of Writing – Farmington, UT – Fujifilm X-E4
Gumby on a Table – Farmington, UT – Fujifilm X-E4
Blue Pallets – Kaysville, UT – Fujifilm X-E4
Kaysville Pond – Kaysville, UT – Fujifilm X-E4
Sunset Light on Winter Mountain – Farmington, UT – Fujifilm X-E4
Nobody pays me to write the content found on fujixweekly.com. There’s a real cost to operating and maintaining this site, not to mention all the time that I pour into it. If you appreciated this article, please consider making a one-time gift contribution. Thank you!
Autumn on Kodachrome – Layton, UT – Fujifilm X-E4 – “Kodachrome 25”
The Kodachrome name has been used for many different films over the years. The first Kodachrome product was a two-glass-plate color negative that was introduced in 1915. Like all other color photography methods of its time, the results weren’t particularly good and the product not especially successful.
In 1935, Kodak released its next Kodachrome product: a positive color transparency film. This Kodachrome was the first film that produced reasonably accurate colors, and, because of that, was the first commercially successful color film. It became the standard film for color photography for a couple decades, and was even Ansel Adams’ preferred choice for color work. The December 1946 issue of Arizona Highways, which was the first all-color magazine in the world, featured Barry Goldwater’s Kodachrome images. While the most popular Kodachrome during this time was ISO 10, Kodak also produced an ISO 8 version, as well as a Tungsten option in the 1940s.
Kodak made significant improvements to Kodachrome, and in 1961 released Kodachrome II. This film boasted more accurate colors, sharper images, finer grain, and a faster ISO of 25. While it was still somewhat similar to the previous Kodachrome, it was better in pretty much every way. A year later Kodachrome-X was introduced, which had an ISO of 64, and produced more saturation and increased contrast, but was grainier.
Golden Red Berries – Farmington, UT – Fujifilm X-E4 – “Kodachrome 25”
In 1974, because Kodak created a less-toxic development process, Kodachrome II was replaced by Kodachrome 25 and Kodachrome-X was replaced by Kodachrome 64. This generation of Kodachrome is what most people think of when they picture (pun intended) the film, gracing the pages of magazines like National Geographic. Due to Kodachrome’s sharpness, grain, color, contrast, and archival characteristics, it was a great all-around option that worked well in most circumstance. Steve McCurry, who is perhaps the best-known photographer to extensively use this era of Kodachrome, said of the film, “It has almost a poetic look with beautiful colors that were vibrant and true to what you were shooting.”
This film simulation recipe is intended to mimic Kodachrome 25 color transparency film. I was fortunate to shoot a few rolls of Kodachrome 25. It was a beautiful film, and probably the sharpest color film ever made, but its low ISO made it difficult to use. Kodachrome 64, which was still a low-ISO film, was about 1 2/3 stops faster. The major differences between the two Kodachrome emulsions is that the ISO 25 version was sharper and less grainy, while the ISO 64 version was more contrasty, vibrant and a hair warmer. Both were very similar, though, and it would be hard to spot the differences without a close inspection. Some people preferred the slightly more subtle tones and finer detail of Kodachrome 25, and some preferred the faintly punchier pictures rendered on Kodachrome 64. I liked Kodachrome 64 a little more, and so that’s what I most often used.
Below are a couple examples of this Kodachrome 25 recipe compared to my Kodachrome 64 recipe:
Kodachrome 25 recipe
Kodachrome 64 recipe
Kodachrome 25 recipe
Kodachrome 64 recipe
In the example below, I made massive crops so that you could more easily see the subtle differences in sharpness and grain between the two Kodachrome recipes. The differences in warmth are also more obvious. If the Kodachrome 25 recipe could have a .25 adjustment warmer, and if the Kodachrome 64 recipe could have a .25 adjustment cooler, it would likely be more accurate, but alas we’re limited by what Fujifilm gives us. In the case of this recipe, a Color Chrome FX Blue Medium would be a nice option, but it doesn’t exist.
Kodachrome 25 recipe
Kodachrome 25 crop
Kodachrome 64 crop
When Kodak discontinued Kodachrome in 2009, it shocked the photographic community; however, the deeper blow was that Kodak discontinued the chemicals required to develop it. Even if you had an old roll of the film (which I did), you couldn’t develop it, except as a black-and-white film from a specialty lab. By the end of 2010, the Kodachrome era was officially over for good. Fortunately, if you have a Fujifilm camera, the spirit of Kodachrome still lives.
This Kodachrome 25 recipe is only compatible with the Fujifilm X-T4, X-S10, X-E4, and X-T30 II cameras. You can modify this for the X-Pro3 and X100V by setting Highlight to 0 and Shadow to -1 instead of what it calls for—I don’t like it quite as much, but it’s pretty similar.
Classic Chrome Dynamic Range: DR400 Highlight: +0.5 Shadow: -0.5 Color: +1 Noise Reduction: -4 Sharpening: +3 Clarity: +3 Grain Effect: Off Color Chrome Effect: Strong Color Chrome Effect Blue: Strong White Balance: Daylight, +2 Red & -4 Blue ISO: Auto, up to ISO 1600 Exposure Compensation: 0 to +2/3 (typically)
Example photographs, all camera-made JPEGs using this new Kodachrome 25 film simulation recipe on my Fujifilm X-E4:
Pedestrian Bridge – Farmington, UT – Fujifilm X-E4
Empty Stairs – Farmington, UT – Fujifilm X-E4
Red Box – Farmington, UT – Fujifilm X-E4
Locked Fire Box – Farmington, UT – Fujifilm X-E4
Three Bike Boxes – Farmington, UT – Fujifilm X-E4
Trains Can’t Stop – Farmington, UT – Fujifilm X-E4
Ceiling Conduit – Farmington, UT – Fujifilm X-E4
Delivering Boxes – Roy, UT – Fujifilm X-E4
Josh in Shadow – Farmington, UT – Fujifilm X-E4
Orange Leaves – Layton, UT – Fujifilm X-E4
Path Through A Fall Forest – Farmington, UT – Fujifilm X-E4
Golden Light on Mountain – Farmington, UT – Fujifilm X-E4
Last Light on Francis Peak – Farmington, UT – Fujifilm X-E4
Nobody pays me to write the content found on fujixweekly.com. There’s a real cost to operating and maintaining this site, not to mention all the time that I pour into it. If you appreciated this article, please consider making a one-time gift contribution. Thank you!
Light on the Rock – Farmington, UT – Fujifilm X-E4 – “Ferrania Solaris FG 400”
Ferrania is an Italian film manufacturer that’s been making photographic film since the 1920’s. For a long time they were owned by 3M. They were perhaps best known for producing films for “generic” brands, but they also had their own products that they sold. One Ferrania brand line was called Solaris, a color negative emulsion available in ISO 100, 200, and 400 varieties. The history of the Solaris line is a little vague. There have been a number of different versions produced from perhaps the 1980’s until very recently, and some of these had significantly different aesthetics. This recipe seems to be close to Ferrania Solaris FG 400, which was sold in the late-1990’s and early-2000s. It was known for having a lot of contrast (for a color negative film), low saturation, and a slight warm cast (a bit unusual for a European film). Ferrania Solaris FG 400 Plus, which came out later, definitely had a different look (more similar to Superia), and this recipe is not a close match for that emulsion.
I didn’t set out to mimic the look of Ferrania Solaris FG 400—it just so happens to look like it. This recipe is actually Kodak Portra 400 v2 (and also Vintage Vibes) except with the Eterna Bleach Bypass film simulation (instead of Classic Chrome and Classic Negative, respectively). Those two recipes are personal favorites, so it’s not too surprising that simply changing the film simulation produces good results. This recipe does a good job of (unintentionally) mimicking Ferrania Solaris FG 400, but one flaw is that it’s a bit too warm (compared to the film), and it’s more like shooting the film with a warming filter attached to the lens (a common technique when shooting film).
Bike in the Steely Sky – Farmington, UT – Fujifilm X-E4
Because this recipe uses the Eterna Bleach Bypass film simulation, it’s only compatible with the Fujifilm X-T4, X-S10, X-E4, and X-T30 II cameras. As a reminder, Clarity slows the camera down considerably, as it takes a noticeable moment to save the exposure to the card. You could, alternatively, instead of Clarity, use a diffusion filter, such as the 5% CineBloom filter or 1/8 Black Pro Mist, with this recipe.
Eterna Bleach Bypass Dynamic Range: DR400 Highlight: 0 Shadow: -2 Color: +2 Noise Reduction: -4 Sharpening: -2 Clarity: -2 Grain Effect: Strong, Small Color Chrome Effect: Strong Color Chrome Effect Blue: Weak White Balance: 5200K, +1 Red & -6 Blue ISO: Auto, up to ISO 6400 Exposure Compensation: +1/3 to +1 (typically)
Example photographs, all camera-made JPEGs using this new Eterna Bleach Bypass film simulation recipe on my Fujifilm X-E4:
Wet Berries 1 – Farmington, UT – Fujifilm X-E4
Wet Berries 2 – Farmington, UT – Fujifilm X-E4
BrightLeaves in a Dark Forest – Fruit Heights, UT – Fujifilm X-E4
Pumpkin & Stem – Farmington, UT – Fujifilm X-E4
Leaves Around A Tree – Farmington, UT – Fujifilm X-E4
Leaves of Autumn – Fruit Heights, UT – Fujifilm X-E4
Dead Leaf – Fruit Heights, UT – Fujifilm X-E4
Blackberry Bush Under Tree Trunks – Farmington, UT – Fujifilm X-E4
Heart of Nature – Fruit Heights, UT – Fujifilm X-E4
Girl in the Forest – Fruit Heights, UT – Fujifilm X-E4
Girl with Pumpkin Head – Fruit Heights, UT – Fujifilm X-E4
Plant on Books – Farmington, UT – Fujifilm X-E4
Shelf Decor – Farmington, UT – Fujifilm X-E4
Clouds Around The Mountain – Layton, UT – Fujifilm X-E4
Hill & Storm – Farmington, UT – Fujifilm X-E4
Francis Peak Peeking – Farmington, UT – Fujifilm X-E4
Nobody pays me to write the content found on fujixweekly.com. There’s a real cost to operating and maintaining this site, not to mention all the time that I pour into it. If you appreciated this article, please consider making a one-time gift contribution. Thank you!
A Fuji X Weekly reader asked me to mimic the look of some photographs that he shared with me. These were digital pictures that had been edited with software, but he was hoping to achieve this look straight-out-of-camera, if at all possible. It turns out that it is possible (although I only had three images to study, so I’m not completely certain this is an exact match, but I believe it is pretty close); however, it requires the Eterna Bleach Bypass film simulation, which, unfortunately, his camera does not have. If your camera does have Eterna Bleach Bypass, than you are fortunate because you can use this very interesting recipe!
What film does this recipe most closely mimic? The most similar film might be the (now discontinued) Konica Impresa 50, although it is certainly not an exact match. There are also some similarities to Portra that’s had the bleach skipped, although I wouldn’t say that this is an exact match for that, either. I don’t think this film simulation recipe is a faithful facsimile of any film, yet it produces a nice analog aesthetic anyway. It has strong contrast and very muted colors—almost monochrome. In a way, it’s the closest thing to black-and-white in color photography.
First Light on the Ridge – Farmington, UT – Fujifilm X-E4 – “Muted Color”
This recipe is only compatible with the Fujifilm X-E4, X-S10, X-E4, and X-T30 II cameras. If you have one of those cameras, I invite you to give this recipe a try! I know that it will be an instant favorite for some of you.
Eterna Bleach Bypass Dynamic Range: DR400 Highlight: -0.5 Shadow: +1 Color: -4 Noise Reduction: -4 Sharpening: 0 Clarity: -2 Grain Effect: Weak, Small Color Chrome Effect: Strong Color Chrome Effect Blue: Weak White Balance: Auto, +3 Red & -8 Blue ISO: Auto, up to ISO 6400 Exposure Compensation: 0 to +2/3 (typically)
Example photographs, all camera-made JPEGs captured using this “Muted Color” film simulation recipe on my Fujifilm X-E4:
Girl in Beanie – Farmington, UT – Fujifilm X-E4
Just Hangin’ Around – Farmington, UT – Fujifilm X-E4
At the Schoolyard – Farmington, UT – Fujifilm X-E4
Monkey Bars – Farmington, UT – Fujifilm X-E4
Neighborhood Fire Hydrant – Farmington, UT – Fujifilm X-E4
Grass & Leaves – Farmington, UT – Fujifilm X-E4
Berry Bush – Farmington, UT – Fujifilm X-E4
Pink Rose – Farmington, UT – Fujifilm X-E4
Single Rose – Farmington, UT – Fujifilm X-E4
Red Leaf – Farmington, UT – Fujifilm X-E4
Cross – Farmington, UT – Fujifilm X-E4
Mountain Trees in Autumn – Layton, UT – Fujifilm X-E4
Nobody pays me to write the content found on fujixweekly.com. There’s a real cost to operating and maintaining this site, not to mention all the time that I pour into it. If you appreciated this article, please consider making a one-time gift contribution. Thank you!
Wrong Way Shadow – Farmington, UT – Fujifilm X-E4 – “Silver Summer”
This film simulation recipe, called Silver Summer, was a Patron early-access recipe on the Fuji X Weekly App, and Patrons have had access to it since July. One benefit of being an app Patrons is that you get early-access to some new film simulation recipes, and this was one of them, but now it is available to everyone, since a different early-access recipe is now on the app. The Silver Summer recipe has some unintentional similarities to Lomography Cine 200, but it’s definitely not an exact match. I wasn’t intending to mimic a specific film, but a specific aesthetic that I was asked to create. While it’s not modeled after a specific film, it definitely has an analog look. I really like how this one turned out, and I think some of you will really appreciate it, too!
I found that this recipe is particularly well suited for sunny days. It uses the Eterna Bleach Bypass film simulation, and produces a silvery look similarly to film that’s had the bleach skipped. If you are looking for a film-like-look that’s a bit “different” than what everyone else is shooting, this is a recipe you’ll want to try.
This film simulation recipe is compatible with the Fujifilm X-T4, X-S10, X-E4, and X-T30 II X-Trans IV cameras. Unfortunately, because it requires Eterna Bleach Bypass, it’s not compatible with the X100V or X-Pro3, and because it uses Clarity and Color Chrome FX Blue, it’s not compatible with the X-T3 or -T30.
Eterna Bleach Bypass Dynamic Range: DR400 Highlight: -1 Shadow: +1 Color: +4 Noise Reduction: -4 Sharpening: -2 Clarity: -3 Grain Effect: Strong, Small Color Chrome Effect: Strong Color Chrome Effect Blue: Strong White Balance: 5300K, -3 Red & -6 Blue ISO: Auto, up to ISO 6400 Exposure Compensation: +1/3 to +1 (typically)
Example photographs, all camera-made JPEGs captured using this “Silver Summer” film simulation recipe on my Fujifilm X-E4:
Bee on a Thistle – Farmington, UT – Fujifilm X-E4
Lily – Sundance, UT – Fujifilm X-E4
Tree Branch and Creek – Sundance, UT – Fujifilm X-E4
Nobody pays me to write the content found on fujixweekly.com. There’s a real cost to operating and maintaining this site, not to mention all the time that I pour into it. If you appreciated this article, please consider making a one-time gift contribution. Thank you!
What is DR-P? It’s basically a tone curve intended to maximize dynamic range. There are four options: Off, Auto, Weak, and Strong. When DR-P is Off, the camera uses DR (DR100, DR200, DR400) instead, and when DR-P is On (Auto, Weak, or Strong), DR is disabled. When DR-P is On, Highlight and Shadow are “greyed out” so those can’t be adjusted—the curve is built into DR-P. You get what you get. DR-P Weak is similar to using DR400 with both Highlight and Shadow -2, but with a very subtle mid-tone boost. This recipe calls for DR-P Auto, and the camera will usually select DR-P Weak unless there is a bright light source (such as the sun) in the frame, such as the picture below.
Big Grass Leaves – Farmington, UT – Fujifilm X-E4 – “Scanned Superia”
This recipe was inspired by pictures I found that were captured with Fujicolor Superia 100 film scanned with a Frontier SP-3000. Of course, how the film was shot, or even the scanner settings selected, can effect the exact aesthetic of an image. Even the same emulsion captured the same way and scanned on the same scanner can look a little different if the settings on the scanner are different (more on this in an upcoming article). I didn’t spend a lot of time trying to precisely match this recipe to those scans—it was more of a quick attempt, but I liked the results so I didn’t fine-tune it any further. It has a pretty good feel, I think, that produces pleasing results in many circumstances, although it isn’t the best for artificial light, and you might consider using Auto White Balance when not in natural light situations. This recipe is compatible with the Fujifilm X-Pro3, X100V, X-T4, X-S10, X-E4, and X-T30 II cameras.
Classic Negative Dynamic Range: D-Range Priority Auto Color: +3 Noise Reduction: -4 Sharpening: -3 Clarity: +3 Grain Effect: Weak, Small Color Chrome Effect: Weak Color Chrome Effect Blue: Weak White Balance: Daylight, -2 Red & +3 Blue ISO: Auto, up to ISO 6400 Exposure Compensation: -1/3 to +1/3 (typically)
Example photographs, all camera-made JPEGs using this “Scanned Superia” film simulation recipe on my Fujifilm X-E4:
RADAR Peak – Farmington, UT – Fujifilm X-E4
Colorful Blooms of Summer – Farmington, UT – Fujifilm X-E4
Last Red Rose – Farmington, UT – Fujifilm X-E4
White Rose of Summer – Farmington, UT – Fujifilm X-E4
Yellow Country Flowers – Farmington, UT – Fujifilm X-E4
Little Yellow Flowers in the Wetlands – Farmington, UT – Fujifilm X-E4
Suburban Reeds – Farmington, UT – Fujifilm X-E4
No Parking Any Time – Farmington, UT – Fujifilm X-E4
Nobody pays me to write the content found on fujixweekly.com. There’s a real cost to operating and maintaining this site, not to mention all the time that I pour into it. If you appreciated this article, please consider making a one-time gift contribution. Thank you!
When Thomas Schwab shared with me his Fujicolor Super HG film simulation recipe, he also sent me an alternative recipe that uses Astia instead of Classic Negative. I gave it a try and thought that it worked quite well for landscape photography, particularly in sunny conditions. It can produce interesting results indoors or on cloudy days, but I think it really shines in sunshine. It’s called “Super HG Astia” because it is a modification of the Super HG recipe, but with Astia.
This “Super HG Astia” recipe wasn’t intended to mimic any particular film; however, it does have some resemblance to Fujichrome Provia 100F. For whatever reason, Fujifilm programmed the Provia film simulation to look more like Astia film, and the Astia film simulation to look more like Provia film, although neither are an exact match. This recipe brings the Astia film simulation closer to resembling Provia film (albeit unintentionally). It’s definitely not a perfect facsimile, but it does nonetheless produce a very nice Fuji color-reversal film aesthetic.
Green Pines – McCall, ID – Fujifilm X-E4 – “Super HG Astia”
This recipe is compatible with the Fujifilm X-Pro3, X100V, X-T4, X-S10, and X-E4 cameras. I accidentally used Large grain for some of my pictures, and the results were fine, but Small grain is better in my opinion—feel free to use whichever Grain size you’d prefer. For the X-T3 and X-T30, you can use this recipe by ignoring Grain size, Clarity and Color Chrome FX Blue—the results will be slightly different, but pretty close. For X-Trans III cameras, you’ll have to additionally ignore Color Chrome Effect; again, the results will be a little different but still very similar. If you’ve got an X-Trans III or newer camera, I invite you to try this recipe. I want to give a special “Thank you!” to Thomas for creating and sharing this recipe!
Astia Dynamic Range: DR400 Highlight: +2 Shadow: +1 Color: +2 Noise Reduction: -4 Sharpening: -1 Clarity: +2 Grain Effect: Weak, Small Color Chrome Effect: Weak Color Chrome Effect Blue: Weak White Balance: Fluorescent 2, -3 Red & -1 Blue ISO: Auto, up to ISO 6400 Exposure Compensation: +2/3 to +1 (typically)
Example photographs, all camera-made JPEGs using this Super HG Astia film simulation recipe on my Fujifilm X-E4:
Blue Dumpsters – Phoenix, AZ – Fujifilm X-E4
This Sucker’s Electrical – Phoenix, AZ – Fujifilm X-E4
Gas Pipe – Phoenix, AZ – Fujifilm X-E4
Ms Pac-Man – Phoenix, AZ – Fujifilm X-E4
Pen – Phoenix, AZ – Fujifilm X-E4
Missing Boxer – Phoenix, AZ – Fujifilm X-E4
Watching A Two-Screen Movie – Scottsdale, AZ – Fujifilm X-E4
Nobody pays me to write the content found on fujixweekly.com. There’s a real cost to operating and maintaining this site, not to mention all the time that I pour into it. If you appreciated this article, please consider making a one-time gift contribution. Thank you!
Lilac Sun – McCall, ID – Fujifilm X-E4 – “Fujicolor Super HG v2”
When Thomas Schwab sent me his settings that would later be called Fujicolor Super HG, he asked me if there were any changes that I would make. I tried his recipe, and then created a couple of alternate versions. I concluded that I liked his recipe as-is with no changes; however, I thought that one variation I created was interesting, so I shot with it, too, and turned it into its own recipe. I call it Fujicolor Super HG v2. While it’s a collaboration between Thomas and I, he contributed the most to it.
Fujifilm introduced the Super HG line in 1986, with versions in ISOs between 100 and 1600. It saw several iterations and improvements before being replaced by the Superia line is 1998. Thomas Schwab’s Fujicolor Super HG recipe and this Fujicolor Super HG v2 recipe are more similar to Super HG 100 or Super HG 200 film. One film can have many different looks depending on how it was shot, developed, printed or scanned. The differences between the Fujicolor Super HG and Fujicolor Super HG v2 recipes might be like the differences produced by using different film scanners.
Joshua Wall – Scottsdale, AZ – Fujifilm X-E4 – “Fujicolor Super HG v2”
While both Super HG recipes look great, I prefer the Fujicolor Super HG recipe for natural light photography, and I prefer the Fujicolor Super HG v2 recipe for artificial light photography. I invite you to try both, and see which version you like better. You might find that you prefer one in a certain situation and the other in a different situation. Because this recipe uses the new Auto White Priority white balance, it’s only compatible (as of this writing) with the Fujifilm X-T4, X-S10 and X-E4 cameras (and maybe the GFX100S?). If you have the X-Pro3 or X100V, you can use Auto white balance instead, and in natural light you’ll get identical results, although in artificial light it won’t look quite the same.
Classic Negative Dynamic Range: DR400 Highlight: -1 Shadow: +1 Color: +2 Noise Reduction: -4 Sharpening: 0 Clarity: +2 Grain Effect: Weak, Large Color Chrome Effect: Weak Color Chrome Effect Blue: Strong White Balance: Auto White Priority, -3 Red & -1 Blue ISO: Auto, up to ISO 6400 Exposure Compensation: +2/3 to +1 (typically)
Example photographs, all camera-made JPEGs using this Fujicolor Super HG v2 film simulation recipe on my Fujifilm X-E4:
Crocodile – Scottsdale, AZ – Fujifilm X-E4
Library Lamp – Scottsdale, AZ – Fujifilm X-E4
Books on a Table – Scottsdale, AZ – Fujifilm X-E4
Wood Workshop – Scottsdale, AZ – Fujifilm X-E4
33 RPM – Scottsdale, AZ – Fujifilm X-E4
Tired Lake Water – McCall, ID – Fujifilm X-E4
Children Playing With Sand – McCall, ID – Fujifilm X-E4
Nobody pays me to write the content found on fujixweekly.com. There’s a real cost to operating and maintaining this site, not to mention all the time that I pour into it. If you appreciated this article, please consider making a one-time gift contribution. Thank you!
Thomas was photographing using the Provia 400 film simulation recipe, which requires a Fluorescent 2 (also called “Warm White Fluorescent” or “Neon 2”) White Balance. He wanted to see how that not-often-used White Balance would look with some other film simulations, and, after several adjustments, came up with this recipe. He shared it with me, and I shot with it and really liked the results! We wondered if it closely resembled any particular film—it seemed to be in the general ballpark of several Fujifilm emulsions without matching any. After digging a little deeper, and after a chance encounter with a box of prints from 1992, it was determined that Fujicolor Super HG, which is a predecessor to the Superia line, was a surprisingly close match. This recipe wasn’t intended to resemble Fujicolor Super HG film, but fortunately it does!
Smokey Sunrise – Farmington, UT – Fujifilm X-E4 – “Fujicolor Super HG”
I thoroughly enjoyed shooting with this recipe, as it produces some great analogue-like results! Because it requires Classic Negative, Color Chrome FX Blue, and Clarity, it is only compatible with (as of this writing) the Fujifilm X-Pro3, X100V, X-T4, X-S10 and X-E4 cameras. I want to give a big “Thank you!” to Thomas Schwab for creating this great recipe and allowing me to share it with you—thanks, Thomas!
Classic Negative Dynamic Range: DR400 Highlight: 0 Shadow: +1 Color: +2 Noise Reduction: -4 Sharpening: 0 Clarity: -3 Grain Effect: Weak, Large Color Chrome Effect: Weak Color Chrome Effect Blue: Strong White Balance: Fluorescent 2, -3 Red & -1 Blue ISO: Auto, up to ISO 6400 Exposure Compensation: +1/3 to +2/3 (typically)
Example photographs, all camera-made JPEGs using this Fujicolor Super HG film simulation recipe on my Fujifilm X-E4:
Hole in the Wall – Scottsdale, AZ – Fujifilm X-E4
Locked Bike – Scottsdale, AZ – Fujifilm X-E4
Free College – Scottsdale, AZ – Fujifilm X-E4
College Hunks – Scottsdale, AZ – Fujifilm X-E4
Arizona Neighborhood – Scottsdale, AZ – Fujifilm X-E4
Hidden Home – Scottsdale, AZ – Fujifilm X-E4
Window Desk – Scottsdale, AZ – Fujifilm X-E4
Suburban Patriotism – Farmington, UT – Fujifilm X-E4
Ceiling Lights – Scottsdale, AZ – Fujifilm X-E4
Carousel Top – Scottsdale, AZ – Fujifilm X-E4
Super Shock Control – Scottsdale, AZ – Fujifilm X-E4
Giant Metal Gorilla – Scottsdale, AZ – Fujifilm X-E4
Nobody pays me to write the content found on fujixweekly.com. There’s a real cost to operating and maintaining this site, not to mention all the time that I pour into it. If you appreciated this article, please consider making a one-time gift contribution. Thank you!
I’ve never sponsored a video before. I never thought that I would. Companies sponsor videos, and I’m just a guy posting his camera settings on a blog, so why would I do this? For a couple of years I’ve wanted someone to sponsor me, but here I am, sponsoring someone else’s content.
My hope is that this sponsorship simply gets the word out. Hopefully it will reach some new people. Why is this important? Why might it be “worth it” to do this?
First, I appreciate Andrew and Denae’s YouTube channel. They’ve been publishing solid content for years. Their channel has been helpful to many photographers, and especially Fujifilm photographers. I’m very happy to support them, because I want Andrew and Denae to continue to create great content. It’s good for the Fujifilm community.
Second, the film simulation recipes that I’ve published on the Fuji X Weekly blog and the Fuji X Weekly App are having a real impact on photography. I was speaking recently to an official Fujifilm X-Photographer, and she explained to me how the film simulation recipes are opening up photography to people who are intimidated by photo editing software, or don’t have the time (or maybe the desire) to learn it, or perhaps don’t have the resources to obtain it. There are people who are photographing with Fujifilm cameras using recipes who otherwise would not be photographing. That’s amazing! Besides that, people are having a lot of fun with them—I often get messages or comments stating how the recipes have made photography a more enjoyable experience. People also tell me how they’re more productive since using these camera settings, as it saves them time. These are great things! Recipes are having a positive effect on real people across the world. It’s a real honor to impact photography in these ways.
While many people in the Fujifilm community are familiar with Fuji X Weekly and film simulation recipes, there are also many who aren’t. I want to reach those people, and maybe have a positive effect on their photography. I hope they’ll find something helpful on this website and the app. By sponsoring Andrew and Denae’s video, I’m supporting their work, which is helping people, and I’m bringing awareness to what’s going on over here, which is helping people, so it’s a win-win.
If you’re a company who’s interested in sponsoring me, I’d love to hear from you. If it’s a win-win situation for the Fujifilm community, I’m sure we can work something out. For everyone else, I hope that you enjoy Andrew and Denae’s video about the Fujifilm X-E4, which you’ll find at the top of this article—if you’re thinking about buying that camera, you’ll find some good advice that might help you decide.