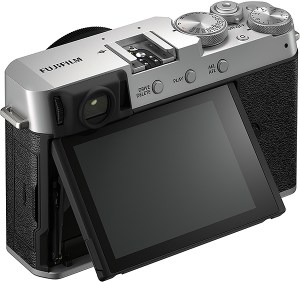
Fujifilm X-E4 Thoughts….

I wasn’t intending to write this article. I had other things that I wanted to talk about. There are a couple new film simulation recipes I’ve created that I plan to share. I want to give my thoughts on the new GFX100S. I want to talk more about the GFX-50S that Fujifilm sent me to use. There are a couple of lens reviews that I’ve been procrastinating on. The Android version of the Fuji X Weekly App is edging closer to being finished. But, the upcoming Fujifilm X-E4 has been turning inside my brain all day, so that’s why I’m writing about it instead.

I think a lot of people had high hopes and expectations for the Fujifilm X-E4, and nobody really predicted what it ended up being. It’s like when the X-Pro3 was announced, and everyone was scratching their heads. With the X-Pro3, even though so many didn’t understand it, I think there was a pretty large curiosity towards it, and a lot of people came around to it after awhile. The X-E4 has a similar lack of understanding surrounding it, but it doesn’t carry that same curiosity, so it will likely be fairly ignored. It’s already been overshadowed by other gear announcements.

There was a post I published back in July called Shrinking Camera Market: What Fujifilm Should Do in 2021 & Beyond. I suggested that Fujifilm should make a less-expensive 100MP GFX camera. Guess what? They did! Another thing I suggested is that Fujifilm should do more to differentiate the X-E4 from the X-T30 (and the eventual X-T40) because the X-E3 and the X-T20 were so very similar (aside from camera shape). Well, it looks like they did that, too. My apologies.

The question is: what was Fujifilm thinking when they designed the X-E4? What was their vision? That’s tough to know until the tell us, if they tell us, as they might not. Until then, we’re left guessing, and most of the guesses seems to be along the lines of, “They cheapened the X-E line.” I really don’t believe that was their intention.

As I’ve thought about this, I believe the X-E4 is intended to be a minimalist’s “just shoot” camera. Looking at all of the aspects of an X-E3, the designers asked themselves, “Is this necessary?” If the answer was yes, it stayed, perhaps repositioned or redesigned. If the answer was no, to the chopping block it went! I question if the rear wheel and focus-type-selector were really unnecessary, because I think they’re both quite handy. But someone obviously didn’t think so. An ISO dial on the shutter knob (like the X100V) would have been a great addition, but that didn’t happen, unfortunately. I do believe the design of the X-E4 was very intentional, and there was a purpose to the decisions, even if I don’t fully understand them myself.

Besides being a “just shoot” camera, I think the X-E4 was intended to be a smaller pocketable-ish camera, like the X100V or the X70. Remember the X70? It was the short-lived baby-brother to the X100T, with an 18.5mm fixed-lens. Sony suddenly stopped production of the X-Trans II sensor, which the X70 used, and that killed the camera. The X-Trans III sensor was too hot to place inside the small X70 body, so an X80 never happened. Is the X-E4 actually an interchangeable-lens X80? Maybe. Attach one of Fujifilm’s pancake lenses—the 18mm f/2 or 27mm f/2.8—to the X-E4 and it could pass as an X70 successor. It wasn’t very long ago that Fujifilm said there would be no X-E4, that the X-E3 was the end of the line, so maybe the initial vision of this camera wasn’t X-E at all. Just a thought.

Where I think the Fujifilm X-E4 makes the most sense is as a lightweight, compact, carry-everywhere camera. It could nicely complement the X100V. It might be a good option to replace an aging X70. Or, if you never purchased an X70 but always wanted to, this might be a solid alternative. Maybe the XF10 never interested you because of its sluggish performance, Bayer sensor, and PASM dial, but you’d love a compact X-Trans option. Well, now you have one.

My opinion is that if you can make peace with the minimalistic redesign, and you get yourself the 18mm f/2 and/or the 27mm f/2.8—maybe even use a wrist strap instead of a neck strap—this camera could be a very nice travel/street/have-with-you-wherever-you-go option. Is it perfect? No, but what camera is?

Like a lot of you, I’m disappointed that the Fujifilm X-E4 isn’t the camera that many of us thought it could or should be, but as I’ve pondered what it is exactly that Fujifilm created, I can see its place and it does make some sort of sense. If you embrace it for what it is, and perhaps think of it more as an interchangeable-lens X80 than an X-E camera, than I think the X-E4 could actually be a wonderful and fun option.

I say all of this, but I’ve never used or even held an X-E4, so this rant should be taken with a grain of salt. I was initially bummed by the camera because my expectations were off, but now that I’ve had time to dwell on it I’m actually beginning to warm up to it. I think the X-E4, like many of the X-E cameras that came before, will go under the radar and will be under appreciated, but for those who own one, it will be a joy to use.

This post contains affiliate links, and if you make a purchase using my links I’ll be compensated a small amount for it.

Fujifilm X-E4 (Body Only)   Amazon  B&H
Fujifilm X-E4 (w/27mm f/2.8)   Amazon  B&H

New: Fujifilm X-E4

Fujifilm just announced the brand-new X-E4. This will be the smallest interchangeable-lens camera in the X series, and comes in at a modest $849 (body only) price tag. Plenty has been said about it, and I wanted to add my own quick opinions.

The X-E4 is a camera that I am excited for. Why? Because my Fujifilm journey began with the X-E1, and I love the X-E line. I appreciate the size and design. The X-E4 is the X-Pro3’s and X100V’s little brother; sometimes little brothers get overlooked. I could be wrong, but I bet this will be last camera with the X-Trans IV sensor, and the next Fujifilm X camera will feature a new X-Trans V sensor.

This latest version of the X-E camera, which will be released on March 11, is the smallest. It’s also the first with a tilting screen. There are some curious design choices. I’m not surprised that the D-Pad was removed, but I am surprised that the back wheel and some other buttons have been taken away. Fujifilm really embraced a minimalist camera back, which I suppose fits a philosophy that helps to separate this camera from the X-T30 and X-S10, but I wonder if that was actually a good idea. I’m personally disappointed the shutter speed knob doesn’t have an ISO dial like the X100V. It’s still such a beautiful camera body!

The GFX100S, which was announced the same day and really has received most of the attention online, and perhaps deservedly so, was given a new film simulation, called Nostalgic Negative. Strangely, the X-E4 won’t have this new film simulation (but it will have Classic Negative and Eterna Bleach Bypass). This puzzles me because 1) my assumption is that the majority of GFX users shoot RAW and not JPEG (although there are certainly many who do) and 2) this could have been a selling point for the X-E4 and would have generated more excitement for the camera. It would have made more sense to me to have included this film simulation on both cameras, or if it was going to be on only one it should have been the X-E4. My guess is that we’ll start seeing Nostalgic Negative on whatever X series camera comes after the X-E4.

I haven’t preordered the X-E4, but I’m considering selling my X-T30 and replacing it with the X-E4. I don’t think that’s necessarily an upgrade (maybe arguably in some sense, and maybe arguably a downgrade in some other sense, but mostly roughly a lateral move overall), but I just love the X-E line. I haven’t decided yet what I’ll do.

The X-E4 is a compact, lightweight Fujifilm X camera that embraces minimalism, simplicity and retro goodness. It seems like such a fun camera that’s especially great for travel or street photography. Introduced at the same time is the new 27mm f/2.8 pancake. This one is weather sealed (the X-E4 isn’t) and has an aperture ring (both are great upgrades!) yet with the same great image quality, so it’s a lens that I hope to add to my collection someday. You can buy the X-E4 bundled with the Fujinon 27mm pancake lens for $1,050.

If you’d like to preorder the camera, you can use the links below:

Fujifilm X-E4 (Body Only) Amazon B&H
Fujifilm X-E4 (w/27mm f/2.8) Amazon B&H

This post contains affiliate links, and if you make a purchase using my links I’ll be compensated a small amount for it.

I’m on the FujiLove Podcast!

FujiLove Magazine has a podcast, and on their latest episode I’m the special guest! If you have 45 minutes to spare and want to listen to a conversation about Fujifilm, film simulation recipes, and the Fuji X Weekly App, be sure to check it out!

This is a big deal because they’ve had some really big names, not just in the Fujifilm community, but the photography community, on their show. You’ll find episodes with Pete Souza, Kevin Mullins, Jack Graham, Adam Gibbs, and many, many more. I’m very honored and humbled. Thank you, FujiLove, for having me on your show!

Snow Fun with Fujifilm X-T4 & Fujinon 90mm + New Film Simulation Recipe: Amanda’s Classic Negative

Fujifilm X-T4 & Fujinon 90mm – Photo by Amanda Roesch

My wife, Amanda, has a Fujifilm X-T4. She uses it for both stills and video. Amanda pretty much runs the video side of Fuji X Weekly, as that’s something she’s good at, but she also does some occasional portrait and product photography. A few days ago she borrowed my Fujinon 90mm lens, attached it to her X-T4, and on a snowy morning captured some pictures of our kids sledding at a local park (I was shooting with a GFX-50S, you can see some of those pictures here).

Amanda showed me the photographs that she had captured, and I liked the picture aesthetic, so I asked her what settings she used. She told me she just picked some that she thought might look nice, and went with that. She made her own recipe! It’s based on Classic Negative, which is such a great film simulation. I asked her if I could share her pictures and recipe here, and she agreed. Thanks, Amanda!

Fujifilm X-T4 & Fujinon 90mm – Photo by Amanda Roesch

This film simulation recipe is only compatible with the Fujifilm X-T4 and X-S10 (most likely the X-E4, too, when that comes out next month). If you like this recipe or these pictures, be sure to let Amanda know by leaving her a comment.

Classic Negative
Dynamic Range: DR200
Highlight: +1
Shadow: +1.5
Color: +3
Noise Reduction: -4
Sharpening: +1
Clarity: 0
Grain Effect: Weak, Small
Color Chrome Effect: Strong
Color Chrome Effect Blue: Weak
White Balance: Auto, 0 Red & 0 Blue
ISO: Auto, up to ISO 6400

Exposure Compensation: +1/3 to +1

All of the pictures in this article are camera-made JPEGs captured by Amanda Roesch using this Classic Negative film simulation recipe on her Fujifilm X-T4.

Fujifilm X-T4 & Fujinon 90mm – Photo by Amanda Roesch

This post contains affiliate links, and if you make a purchase using my links I’ll be compensated a small amount for it.

Fujifilm X-T4 Amazon B&H
Fujinon 90mm Amazon B&H

Help Fuji X Weekly

Nobody pays me to write the content found on fujixweekly.com. There’s a real cost to operating and maintaining this site, not to mention all the time that I pour into it. If you appreciated this article, please consider making a one-time gift contribution. Thank you!

$2.00

Fujifilm GFX-50S Film Simulation Recipe: Ektachrome

Lookout Tower – Layton, UT – Fujifilm GFX-50S

Ektachrome is a brand of Kodak color transparency film that’s been around (off and on) since the 1940’s. There have been several eras of the film, and even more variations; the name Ektachrome has been given to many different emulsions. While Kodachrome was more iconic, Ektachrome was more widely used, thanks in part to its easier development process and (typically) faster ISOs. While Ektachrome was more popular, it was much more prone to color fading. Kodachrome was a tad warmer, while Ektachrome was a tad more vibrant, depending on the version, of course. I shot plenty of rolls, and several different versions, of Ektachrome back in the day.

The Classic Chrome film simulation is, I believe, largely based on Ektachrome; set to defaults, Classic Chrome has a similar aesthetic to the film. I tweaked the settings so that Classic Chrome would more closely resemble Ektachrome, but I used my memory of the film and didn’t study actual examples of it. Fujifilm has a term for this: memory color. It basically means that it’s more important to have the right feel than to be perfectly accurate. I’m not exactly sure how accurate this recipe is to the film, or which exact emulsion it would be closest to (maybe 100G? 100GX?), but it feels right to me.

Winter Tree – Farmington, UT – Fujifilm GFX-50S – “Ektachrome”

This Ektachrome film simulation is intended for GFX cameras. I know that it’s compatible the GFX-50S and GFX-50R, and I believe that it’s compatible with the GFX100, but I’m not 100% certain. You can also use it on the Fujifilm X-T3 and X-T30, and it will produce nearly identical results; on the X100V, X-T4, X-Pro3 and X-S10, set Clarity to 0 (or -2 if you prefer), Color Chrome FX Blue Off, and Grain to Weak Small.

Classic Chrome
Dynamic Range: DR400
Highlight: +1
Shadow: +1
Color: +3
Color Chrome Effect: Weak
Sharpening: +1
Noise Reduction: -4
Grain Effect: Weak
White Balance: 7100K, -6 Red & +5 Blue
ISO: Auto up to ISO 6400
Exposure Compensation: +1/3 to +2/3 (typically)

Sample photographs, all camera-made JPEGs, captured with a Fujifilm GFX-50S using this Ektachrome recipe:

Forest Creek – Farmington, UT – Fujifilm GFX-50S
Log Chair Boy – Farmington, UT – Fujifilm GFX-50S
Three Poles – Farmington, UT – Fujifilm GFX-50S
Pole Twists – Layton, UT – Fujifilm GFX-50S
End Post – Layton, UT – Fujifilm GFX-50S
Boardwalk in the Marsh – Layton, UT – Fujifilm GFX-50S – “Ektachrome”
The Roundabout – Layton, UT – Fujifilm GFX-50S
Signs Along the Boardwalk – Layton, UT – Fujifilm GFX-50S
Ice Tracks in the Reeds – Layton, UT – Fujifilm GFX-50S
Marsh Ice Tracks – Layton, UT – Fujifilm GFX-50S
Hairpin Curve – Layton, UT – Fujifilm GFX-50S
Birdseye View – Layton, UT – Fujifilm GFX-50S
Rural Boardwalk – Layton, UT – Fujifilm GFX-50S
Fence in the Grass – Layton, UT – Fujifilm GFX-50S
Tiny Islands in a Frozen Pond – Layton, UT – Fujifilm GFX-50S
Winter Grass – Layton, UT – Fujifilm GFX-50S
Frozen March Water – Layton, UT – Fujifilm GFX-50S
Cold Marsh – Farmington, UT – Fujifilm GFX-50S
Reed & Snow – Farmington, UT – Fujifilm GFX-50S
Snow Day Girl – Farmington, UT – Fujifilm GFX-50S
Sled Hill Photography – Farmington, UT – Fujifilm GFX-50S
Needle Snow – Farmington, UT – Fujifilm GFX-50S
Winter Pine – Farmington, UT – Fujifilm GFX-50S

This post contains affiliate links, and if you make a purchase using my links I’ll be compensated a small amount for it.

Fujifilm GFX-50S  Amazon  B&H
Fujinon GF 23mm f/4  Amazon  B&H

Help Fuji X Weekly

Nobody pays me to write the content found on fujixweekly.com. There’s a real cost to operating and maintaining this site, not to mention all the time that I pour into it. If you appreciated this article, please consider making a one-time gift contribution. Thank you!

$2.00

Fujifilm X100V Film Simulation Recipe: Ilford Ortho Plus 80

760 – Farmington, UT – Fujifilm X100V – “Ilford Ortho Plus 80”

Many years ago I used to develop my own black-and-white film. It required removing the film from the cassette, winding it around a developing reel, and placing the reel into a developing canister—all in complete darkness! It was very tricky. If you didn’t get the film wound onto the reel quite right, it could ruin the film during development. When people think of darkrooms, they often think of dipping photosensitive papers into tubs of chemicals in dim amber light. This red light is called a safelight, and it’s safe for photographic paper, but not safe for undeveloped photographic film—that’s why you have to get the film from the cassette to the canister in complete darkness.

Ilford Ortho Plus 80 film is different, as it’s orthochromatic, which means it’s sensitive to blue and green light but not red, making it possible to transfer the film from the cassette to the canister under a safelight. This film was introduced in 2019, so it hasn’t been around very long. It produces sharp, fine-grain images that are fairly contrasty for a low-ISO film, and reds will be rendered dark. I’ve never used this film myself, so I relied on pictures I found on the internet to create this recipe. With film, how it’s shot, developed, and printed or scanned can have a big impact on how it looks, and that’s certainly a challenge for creating a facsimile on Fujifilm cameras, but I think this one is pretty close from the pictures I’ve seen. It also seems to be in the neighborhood of Washi S 50.

Monochrome Country – Salt Lake City, UT – Fujifilm X100V – “Ilford Ortho Plus 80

I set Monochromatic Color (Toning) to WC +1 because many of the examples that I found had some warm toning (not sure if it’s in-software after scanning or from toned prints or both), but it’s completely optional, you can set WC to 0 if you prefer. This recipe is intended for newer X-Trans IV cameras, such as the Fujifilm X100V, X-T4, X-Pro3 and X-S10, and isn’t compatible with other cameras; however, if you disregard Clarity you can achieve something similar on the X-T3 and X-T30, but it won’t be exactly the same (feel free to try).

Monochrome+G
Dynamic Range: DR400
Highlight: +2
Shadow: +3
Noise Reduction: -4
Sharpening: +2
Clarity: -2
Toning: WC +1, MG 0

Grain Effect: Weak, Small
Color Chrome Effect: Strong
Color Chrome Effect Blue: Off
White Balance: 7000K, -5 Red & 0 Blue
ISO: Auto, up to ISO 6400
Exposure Compensation: +1/3 to +1 (typically)

Example photographs, all camera-made JPEGs using this Ilford Ortho Plus 80 film simulation recipe on my Fujifilm X100V:

Thorns of Nature – Farmington, UT – Fujifilm X100V
Monochrome Berries – Farmington, UT – Fujifilm X100V
Icy River – Farmington, UT – Fujifilm X100V
Zipping – Farmington, UT – Fujifilm X100V
Playground Boy – Farmington, UT – Fujifilm X100V
Silhouette Playground – Farmington, UT – Fujifilm X100V
Canvas Moon – Farmington, UT – Fujifilm X100V
Cat & Salmon – Salt Lake City, UT – Fujifilm X100V
Fedex Delivery – Farmington, UT – Fujifilm X100V
Locked Box – Farmington, UT – Fujifilm X100V
Emotion Through Glass – Farmington, UT – Fujifilm X100V
Tablet Play – Farmington, UT – Fujifilm X100V
Arizona Film – Farmington, UT – Fujifilm X100V

See also: Film Simulation Recipes

This post contains affiliate links, and if you make a purchase using my links I’ll be compensated a small amount for it.

Fujifilm X100V Black    Amazon   B&H
Fujifilm X100V Silver   Amazon   B&H

50557680816_8cb5645e93_c

Help Fuji X Weekly

Nobody pays me to write the content found on fujixweekly.com. There’s a real cost to operating and maintaining this site, not to mention all the time that I pour into it. If you appreciated this article, please consider making a one-time gift contribution. Thank you!

$2.00

New X-Trans I Patron Early-Access Film Simulation Recipe on App!

Cradle Tree Branch – Farmington, UT – Fujifilm X-M1 – “Provia”

There’s a new Fuji X Weekly Patron early-access film simulation recipe available now on the Fuji X Weekly app! If you are a Patron, you can use it today! This new recipe is for X-Trans I cameras (X-E1, X-Pro1 and X-M1), and it replaces the Classic Analog recipe, which was a Patron early-access recipe, but is now available to everyone. Yea!

Below are a few examples of this new recipe, which is simply called Provia, captured with a Fujifilm X-M1. Bricks in the Wall (below) was captured by my daughter, Joy, who I let use the camera.

Sun over Country Horses – Farmington, UT – Fujifilm X-M1
Target – Farmington, UT – Fujifilm X-M1
Bricks in the Wall – Farmington, UT – Fujifilm X-M1 – Photo by Joy Roesch
Strollin’ Jo – Farmington, UT – Fujifilm X-M1

Fujifilm X-M1 (X-Trans I) Film Simulation Recipe: Classic Analog

Sticks & Dry Leaves – Farmington, UT – Fujifilm X-M1 – “Classic Analog”

I wanted to create a Portra recipe for X-Trans I cameras, such as the Fujifilm X-M1. All of my Portra recipes are based on the Classic Chrome film simulation, but X-Trans I cameras don’t have Classic Chrome. I did create a recipe for mimicking Kodachrome without Classic Chrome, but that’s intended for X-Trans II cameras, and, while the results are similar, it doesn’t look exactly the same on X-Trans I. This recipe was my attempt at Portra without Classic Chrome, but it’s not quite Portra enough for me to name it Portra. It’s close but no cigar, but it does look nice nonetheless, and I like how it renders pictures on my X-M1.

This was a Patron early-access recipe on the Fuji X Weekly app. Fuji X Weekly Patrons have had the opportunity to use it since December 1st, but now it’s available to everyone! There’s a new Patron early-access recipe for X-Trans I on the app in its place. If you have the app, go check it out!

E.T. – Farmington, UT – Fujifilm X-M1 – “Classic Analog”

This recipe also marks the first one that includes a photograph captured by my 11-year-old son, Jonathan. I let him use my X-M1, and I liked one of the pictures he made, which you’ll find further down this article, entitled Frozen Pond Scum. The Fujifilm X-M1 can be found for cheap, and would make a great “first real camera” for a kid. Maybe I’ll give him mine at some point in the future.

Provia/STD
Dynamic Range: DR400
Highlight: -2
Shadow: -1
Color: -2
Sharpness: 0
Noise Reduction: -2
White Balance: Daylight/Fine, +1 Red & -6 Blue
ISO: Auto, up to ISO 3200
Exposure Compensation: +1/3 to +2/3 (typically)

Example photographs, all camera-made JPEGs made using this Classic Analog film simulation recipe on a Fujifilm X-M1:

Thin Ice – Farmington, UT – Fujifilm X-M1
Falling Water – Farmington, UT – Fujifilm X-M1
Autumn Overcast – Farmington, UT – Fujifilm X-M1
Night at the Lake – Farmington, UT – Fujifilm X-M1
Frozen Drain – Farmington, UT – Fujifilm X-M1
Frozen Pond Scum – Farmington, UT – Fujifilm X-M1 – Photo by Jonathan Roesch
Irrigation Cover – Farmington, UT – Fujifilm X-M1
Quadruple U’s – Farmington, UT – Fujifilm X-M1
Improbable – Farmington, UT – Fujifilm X-M1
Evening Euonymus – Farmington, UT – Fujifilm X-M1
Blue Sky Reeds – Farmington, UT – Fujifilm X-M1
Yellow, Lamp – Farmington, UT – Fujifilm X-M1
50557680816_8cb5645e93_c

Help Fuji X Weekly

Nobody pays me to write the content found on fujixweekly.com. There’s a real cost to operating and maintaining this site, not to mention all the time that I pour into it. If you appreciated this article, please consider making a one-time gift contribution. Thank you!

$2.00

Fujifilm GFX-50S Film Simulation Recipe: Classic Negative Industrial

January Forest – Farmington, UT – Fujifilm GFX-50S – “Classic Negative Industrial”

One of my favorite film simulation recipes is Fujicolor 100 Industrial, which is intended for Fujifilm X-T30 and X-T3 cameras. X-Trans IV recipes for the X-T30 and X-T3 plus X-Trans III recipes are compatible with the GFX-50S, but the results seem to be very slightly different. I programmed the Fujicolor 100 Industrial recipe into the GFX-50S. Later I updated the firmware, which added the Classic Negative film simulation; it just so happened that the Fujicolor 100 Industrial recipe was selected, and I changed the film simulation from PRO Neg. Std to Classic Negative with this recipe still programmed. I immediately loved the results!

This film simulation recipe, with Classic Negative instead of PRO Neg. Std, doesn’t mimic real Fujicolor 100 Industrial film as well as the original recipe, I don’t think, but the results are pretty nice nonetheless. It can be magical! It’s not a recipe for every situation, but it is indeed beautiful in the right situations. It’s a very happy accident!

Forest Creek – Farmington, UT – Fujifilm GFX-50S – “Classic Negative Industrial”

I believe that this film simulation recipe is compatible with all GFX cameras, although I’m not completely sure about the GFX100 (it should be). It cannot be used on the X-T30 and X-T3 because those cameras don’t have Classic Negative, but it can be used on other X-Trans IV cameras (X100V, X-Pro3, X-T4 and X-S10) by selecting Color Chrome FX Blue Off, Clarity 0 (or maybe -2), and Grain Weak + Small; however, results will be slightly different. I tried it on my Fujifilm X100V and it did, in fact, look good, but it’s really intended for GFX cameras.

Classic Negative
Dynamic Range: DR400
Highlight: +1
Shadow: +2
Color: +1
Color Chrome Effect: Weak
Sharpening: +1
Noise Reduction: -4
Grain Effect: Weak
White Balance: 3200K, +8 Red & -8 Blue
ISO: Auto up to ISO 6400
Exposure Compensation: +1/3 to +2/3 (typically)

Sample photographs, all camera-made JPEGs, captured with a Fujifilm GFX-50S using this Classic Negative Industrial recipe:

Tunnel Silhouette – Farmington, UT – Fujifilm GFX-50S
Pedestrian Tunnel – Farmington, UT – Fujifilm GFX-50S
Manhole Cover – Farmington, UT – Fujifilm GFX-50S
No Parking Any Time – Farmington, UT – Fujifilm GFX-50S
Flasher – Farmington, UT – Fujifilm GFX-50S
Fallen Tree on Frozen Lake – Farmington, UT – Fujifilm GFX-50S
Smiling Jo – Farmington, UT – Fujifilm GFX-50S
January Sun in the Forest – Farmington, UT – Fujifilm GFX-50S
Backlit – Farmington, UT – Fujifilm GFX-50S
Creekside Trail – Farmington, UT – Fujifilm GFX-50S
Vines on Trees – Farmington, UT – Fujifilm GFX-50S
Spiky Leaves – Farmington, UT – Fujifilm GFX-50S
Sunlight Trail – Farmington, UT – Fujifilm GFX-50S
Brown Among Green – Farmington, UT – Fujifilm GFX-50S

This post contains affiliate links, and if you make a purchase using my links I’ll be compensated a small amount for it.

Fujifilm GFX-50S Amazon B&H
Fujinon GF 23mm f/4 Amazon B&H

50557680816_8cb5645e93_c

Help Fuji X Weekly

Nobody pays me to write the content found on fujixweekly.com. There’s a real cost to operating and maintaining this site, not to mention all the time that I pour into it. If you appreciated this article, please consider making a one-time gift contribution. Thank you!

$2.00

Medium Format vs Crop Sensor: How Much Better is Fujifilm GFX than Fujifilm X?

Fujifilm North America sent me a GFX-50S medium-format camera and Fujinon 23mm lens to go with it. The camera and lens aren’t mine; I get to use them for a few weeks, then return them to Fujifilm. The camera is $5,500 (it was $6,500 when it came out four years ago), and the lens is $2,600, so just over $8,000 altogether. This is the most expensive camera and lens that I’ve ever put my hands on!

There are two questions that I want to answer: how much better is medium-format GFX over the APS-C X cameras, and which film simulation recipes, if any, are compatible with GFX. By the way, this isn’t my review of the camera. I’ll write that after I’ve had it for longer. This article is the first step towards a review. I’m simply trying to answer a couple of questions about the GFX-50S camera.

Yesterday I did a little survey on my Instagram account: can you tell the difference between pictures captured on my Fujifilm X-T30 with a Rokinon 12mm lens (a $1,200 combo) and those captured on a GFX-50S with a Fujinon 23mm lens? By far, most photographs are viewed on social media. People post their pictures on Instagram and Facebook and other platforms, and that’s how we see them. Printed photographs are far less common. That’s just the way it is. I wanted to know: on social media, is it even possible to tell the difference between pictures captured using $1,200 gear and $8,000 gear?

Before I get into the responses to that survey, I want to briefly talk about the technical stuff—the why. The reason that I chose the X-T30 is because its JPEG settings are very similar to the GFX-50S’ JPEG settings. I used the same film simulation recipes, Kodak Ultramax for color and Kodak Tri-X 400 for black-and-white, on both cameras (this also allowed me to see how similar or dissimilar recipes are rendered on these cameras). I chose the Rokinon 12mm lens because it has the same 18mm full-frame-equivalent focal length as the 23mm lens on the GFX camera. I used f/8 on the Rokinon and f/16 on the Fujinon (to better match the depth-of-field) and adjusted the shutter speed to compensate; otherwise, the settings on both cameras were identical.

Here are the pictures that I posted to Instagram, in the same order:

Fujifilm X-T30
Fujifilm GFX-50S
Fujifilm X-T30
Fujifilm GFX-50S
Fujifilm X-T30
GFX-50S
Fujifilm X-T30
Fujifilm GFX-50S

Now to that survey! The majority of the comments were something to the effect of, “I can’t tell which camera took which pictures.” There were 10 people who took a guess, and five got it right and five wrong. I was actually surprised that five people figured it out—some of you have very keen eyes! There were three sets of two pictures to allow for direct comparisons, but the final two pictures weren’t a set, and those two pictures tripped up a few people who otherwise figured out the rest. Even a couple of those who guessed correctly said that they weren’t certain on those last two. The takeaway is that, on social media, if you study the pictures carefully and can side-by-side compare, there is a barely noticeable difference between images captured on GFX cameras and those captured on X cameras, but otherwise you can’t tell.

Of course, you’re not spending $8,000 for good-looking social media pictures, but for good-looking prints. So I printed the pictures! All of the prints were 8″ x 12″, but I made some crops that would be about 16″ x 24″, 24″ x 36″, and 40″ x 60″ if the rest of the picture was there. Here are a few of those crops:

Fujifilm X-T30
Fujifilm GFX-50S
Fujifilm X-T30
Fujifilm GFX-50S
Fujifilm X-T30
Fujifilm GFX-50S
The prints!

I studied the prints, then I had my wife, Amanda, look at them. We both came to the same conclusion: printed at 8″ x 12″ it’s really difficult to tell which camera captured which picture; at 16″ x 24″ it’s a little easier to tell but still very tough; at 24″ x 36″ it’s more obvious, but the X-T30 still looks pretty good; and at 40″ x 60″ the GFX is the clear winner, but the X-T30 image isn’t awful.

The Fujifilm GFX-50S costs six times as much as the Fujifilm X-T30. Does it produce six times better image quality? No. Does it produce twice as good image quality? No. Is it a pixel-peeper’s dream? Yes! If you like to zoom into your images and admire the fine details that can only be noticed when you look closely, the GFX-50S is a great option. If you need to crop deeply and still have good-looking pictures, the GFX-50S will deliver. If you print really, really big, the GFX-50S is indeed a fine photographic tool. Outside of that, there’s not a big advantage to the medium-format camera. In fact, there might be as many disadvantages as there are advantages, but that’s a discussion for another time. Did I mention that those files look really nice when you look really close?

Forest Creek – Farmington, UT – Fujifilm GFX-50S – Classic Negative

I have seven different film simulation recipes programmed into the GFX-50S right now, and here’s my probably-too-soon opinion: X-Trans III recipes and X-Trans IV recipes that are compatible with the X-T3 and X-T30 are usable on the GFX-50S… but they don’t look exactly the same. One difference is that the JPEGs from the GFX-50S are slightly less saturated and a hair less warm; it’s very minor but noticeable when side-by-side comparing. The GFX-50S has a larger dynamic range, which not only gives you more latitude for highlight and shadow recovery, but also produces a more flat picture; that’s not necessarily bad, just different. The GFX-50S has Classic Negative—yea!—but not the other JPEG options, such as Clarity and Color Chrome FX Blue, that the newer X-Trans IV cameras have.

I look forward to shooting more with the GFX-50S, and I know it will be difficult to send back. Using it reaffirms that X series cameras are fantastic and that the gap between APS-C and medium-format isn’t as big as what one might think. There are people who would benefit from the larger sensor and higher resolution that the GFX-50S offers, and those people likely know who they are. If I could, I would definitely own this camera, but it’s not a big deal that I don’t because my other Fujifilm cameras are pretty darn good, too.

Top 20 Most Popular Film Simulation Recipes of 2020

Here are the Top 20 most popular film simulation recipes of 2020! I used page views to rank these recipes. Those with Kodak, Kodachrome or Portra in the name are quite popular. More than half of these use Classic Chrome as the base. It’s interesting to compare these to the 12 most popular recipes of December 2020. Only one black-and-white recipe made this list, which isn’t too surprising because color is more popular than monochrome. No Bayer, X-Trans I or X-Trans II recipes found their way into the top 20, only X-Trans III and X-Trans IV.

Without further ado, here are the Top 20 most popular film simulation recipes of 2020:

#1: Fujifilm X-T30 Kodachrome 64

Traffic Lamp – Bountiful, UT – Fujifilm X-T30 – “Kodachrome 64”

#2: Fujifilm X100V Kodachrome 64

Spring Snow – Farmington, UT – Fujifilm X100V – “Kodachrome 64”

#3: Fujifilm X100F Kodak Portra 400

May Clouds Over Wasatch – Layton, UT – Fujifilm X100F – “Kodak Portra 400”

#4: Fujifilm X-Pro2 Kodachrome II

From Dust to Dust – Great Sand Dunes NP, CO – Fujifilm X-Pro2 – “Kodachrome II”

#5: Fujifilm X100F Vintage Kodachrome

Weber River Autumn – Uintah, UT – Fujifilm X100F – “Vintage Kodachrome”

#6: Fujifilm X100V Kodak Portra 400

Journal – North Salt Lake, UT – Fujifilm X100V – “Kodak Portra 400”

#7: Fujifilm X-T30 Eterna

Neon Reflection – Ogden, UT – Fujifilm X-T30 – “Eterna”

#8: Fujifilm X100F Classic Chrome

Closed Drive Thru Window – South Ogden, UT – Fujifilm X100F – “Classic Chrome”

#9: Fujifilm X-T30 Kodak Portra 160

Goosenecks – Goosenecks SP, UT – Fujifilm X-T30 – “Kodak Portra 160”

#10: Fujifilm X-T30 Kodak Portra 400

Pink Tree Bloom – Farmington, UT – Fujifilm X-T30 – “Kodak Portra 400”

#11: Fujifilm X100F Fujicolor Superia 800

Goodyear – Farmington, UT – Fujifilm X-T30 – “Fujicolor Superia 800”

#12: Fujifilm X100F CineStill 800T

Where Was Your Head That Day? – Farmington, UT – Fujifilm X100F – “CineStill 800T”

#13: “Classic Negative” for X-Trans III

November Morning – South Weber, UT – Fujifilm X-T20 – “‘Classic Negative’ for X-Trans III”

#14: Fujifilm X100V Cine Teal

Sunlit Tree Leaves – Farmington, UT – Fujifilm X100V – “Cine Teal”

#15: Fujifilm X100F Kodak Ektar 100

Open Fountain – Brigham City, UT – Fujifilm X100F – “Kodak Ektar 100”

#16: Fujifilm X-T30 Kodacolor

Vintage Sunset – Ogden, UT – Fujifilm X-T30 – “Kodacolor”

#17: Fujifilm X-T30 Kodak Gold 200

Outside 7-Eleven – Layton, UT – Fujifilm X-T30 – “Kodak Gold 200”

#18: Fujifilm X100V Classic Negative

Boy in the Window Light – Farmington, UT – Fujifilm X100V – “Classic Negative”

#19: Fujifilm X100V Kodak Tri-X 400

Wrong Way – Centerville, UT – Fujifilm X100V – “Kodak Tri-X 400”

#20: Fujifilm X100V Fujicolor Superia 100

Grandmother & Grandson – Farmington, UT – Fujifilm X100V – “Fujicolor Superia 100”

You can find these film simulation recipes and many more on the Fuji X Weekly app!

Which one of these 20 recipes is your favorite? Which recipe do you use that didn’t make this list? Let me know in the comments!

Fujifilm X100V Film Simulation Recipe: Classic Monochrome

Signs, Poles & Wires – Farmington, UT – Fujifilm X100V – “Classic Monochrome”

For some reason, black-and-white film simulation recipes aren’t as popular as color, but Fujifilm cameras are capable of some great monochrome images straight-out-of-camera. This new “Classic Monochrome” recipe was made by Thomas Schwab (B&W Instagram), who has created several of the film simulation recipes on this website and collaborated on several others. He’s a friend of this blog, and I’m honored that he allows me to share his recipes here!

Thomas said that he started with one of the Ilford recipes, and this evolved from that. It’s called “Classic Monochrome” because it has a great old-school B&W print feel. The only change that I added was Toning, which is optional, but it seems to look nice with these settings. This recipe has quickly become one of my favorite black-and-white options! It’s most similar to Dramatic Monochrome, so if you like that recipe you’ll like this one, too. Thank you, Thomas!

Suburban Garages – Farmington, UT – Fujifilm X100V – “Classic Monochrome”

This recipe is contrasty and clean. It reminds me of Agfapan 25 printed using a high-contrast filter (maybe a #4, or even split-filtered). It’s not intended to look like it, but that’s what it reminds me of. It does have a limited dynamic range, and it’s easy to clip highlights, so the exposure should be carefully considered, or perhaps try DR-Auto if you are concerned. It’s compatible (as of this writing) with the Fujifilm X100V, X-T4, X-Pro3 and X-S10 cameras.

Monochrome (+Y, +R, +G)
Dynamic Range: DR100
Highlight: +4
Shadow: +2
Noise Reduction: -4
Sharpening: +1
Clarity: +4
Toning: WC +1, MG 0

Grain Effect: Weak, Small
Color Chrome Effect: Strong
Color Chrome Effect Blue: Strong
White Balance: Auto, 0 Red & 0 Blue
ISO: Auto, up to ISO 12800
Exposure Compensation: -1/3 to +1/3 (typically)

Example photographs, all camera-made JPEGs using this Classic Monochrome film simulation recipe on my Fujifilm X100V:

Marks the Spot – Farmington, UT – Fujifilm X100V
Main Line Trail – Farmington, UT – Fujifilm X100V
Empty Box – Farmington, UT – Fujifilm X100V
Empty Bench – Farmington, UT – Fujifilm X100V
Joshua Biking – Farmington, UT – Fujifilm X100V
Girl & Bike – Farmington, UT – Fujifilm X100V
Horses & Ducks – Farmington, UT – Fujifilm X100V
Country Road Bus – Farmington, UT – Fujifilm X100V
No Motor Vehicles – Farmington, UT – Fujifilm X100V
Weed 1 – Farmington, UT – Fujifilm X100V
Weed 2 – Farmington, UT – Fujifilm X100V
Ice Abstract 1 – Farmington, UT – Fujifilm X100V
Ice Abstract 2 – Farmington, UT – Fujifilm X100V

This post contains affiliate links, and if you make a purchase using my links I’ll be compensated a small amount for it.

Fujifilm X100V Black    Amazon   B&H
Fujifilm X100V Silver   Amazon   B&H

Help Fuji X Weekly

Nobody pays me to write the content found on fujixweekly.com. There’s a real cost to operating and maintaining this site, not to mention all the time that I pour into it. If you appreciated this article, please consider making a one-time gift contribution. Thank you!

$2.00

Don’t Steal My Stuff

I’ve become aware that someone has stolen my stuff. Sadly, it’s not the first time, nor will it be the last. Unfortunately, there are crooked people out there, and creatives are particularly vulnerable to having their work ripped off because we put our art out there for the world to see.

Someone is profiting from the film simulation recipes found on the Fuji X Weekly blog. I, Ritchie Roesch, created most of them. Some were co-created between myself and collaborators (friends of this blog). A few were not created by me, but I always ask for and receive permission before publishing them on this website, and I always give credit to the creator. But someone has published the recipes from this website on their own platform; this person never asked for nor received permission from me, and I was never cited or given any credit. Some of the recipes were renamed to something similar, but most were copied straight up. This person is collecting money through solicited donations and paid “premium” content. But most of this person’s content is mine. While this person doesn’t state that they created the recipes, they don’t state that they didn’t, which is downright misleading.

I put in so much time into this blog as a service to the Fujifilm community. It’s disheartening to say the least that someone has taken this work for their own financial benefit. Create your own recipes! Or, here’s a thought: cite your sources. Even better, reach out to me in the first place. What this person did is extremely underhanded and unethical and probably illegal. It’s really shameful.

If the person who did this (and they know who they are) reads this article, my hope is that they stop collecting money (profiting from other’s work without permission) and clearly cite their sources (instead of plagiarism). This person should also contact me. It’s not right what you did. There’s a right way and wrong way to do things, and you chose the wrong way. I ask you to please set things right. Be inspired by this website, but do not steal from it!

About White Balance

This cross process look is made possible by a White Balance adjustment.

I get asked regularly about White Balance. My film simulation recipes require various White Balance adjustments, and sometimes, in different light situations, the results can be unusual, which can be good or bad, depending on what you are trying to achieve. So let’s discuss this, and figure out what you can do if the results aren’t what you want.

White Balance is the adjustment of color temperature (measured in Kelvin) to account for various light conditions, so that white objects appear white, and not yellow or blue or some other color. White Balance Shift is a tool to precisely fine-tune the White Balance. The intention of White Balance and White Balance Shift is to achieve a natural color balance that matches what the eye sees. But you can give your photographs whatever color balance you’d like—this is art; there are no rules.

Back when I shot film, I don’t remember hearing the term “white balance” spoken even once. There were two options: daylight film and tungsten film. The former was most common and was used in natural light situations, the the latter was less common and used in artificial light situations. I carried with me a warming filter and cooling filter to compensate for various light conditions, essentially to adjust the “white balance” when the light changed. You can actually still do this with digital photography, but the White Balance tools on your camera make it unnecessary to carry around warming and cooling filters.

Different film simulation recipes require different White Balance settings. Some use Auto, but many use Daylight or a specific Kelvin temperature or some other option. Most have a shift, as well. Often they are intended for natural light, and a few for artificial light, but when the light changes, the results can look strange sometimes. Occasionally that “strange” result might be something you really like, but often it’s probably not. When that happens, what can you do?

The White Balance in this picture is intended to produce good results at night.

I’ve said for a few years now that film simulation recipes can be seasoned to taste. This means that if you aren’t getting the look you want, don’t be afraid to adjust the parameters to achieve desired results. For White Balance, this might mean selecting something different than what the recipe calls for. Will this make it look more like the film that it’s based off of? Probably not, but if it gets you the look that you want, then that’s good, right? The next time you are in some light situation that’s giving you too warm or too cool results, see if simply selecting a different White Balance (maybe even simply using Auto White Balance) fixes the issue for you.

Another option is to use a different recipe. Some film simulation recipes are intended to work well in certain light conditions. Look for one that might be a better fit for the situation. If you read the articles and view the sample pictures, that might provide a clue of when a certain recipe will work well; however, it’ll probably take some trial and error to really figure out which recipes to use when.

Other than either adjusting the White Balance to something different than what the recipe calls for or selecting a different recipe altogether, your options are to use a warming or cooling filter like in the film days or to simply embrace the unusual results. There’s not a whole lot else that you can do. My advice is to consider beforehand if the recipe will be a good fit for the light; if it’s not but you still want to use it, either accept the results for what they are or adjust the White Balance to something that will give you the results that you want. Don’t be afraid to make an adjustment to the White Balance if that’s what the situation calls for.

Sunset Photography w/ Fujifilm X-T30 + Fujinon 100-400mm

Oquirrh Mountain Evening – Bountiful, UT – Fujifilm X-T30 & Fujinon 100-400mm

My most expensive lens, by far, is the Fujinon 100-400mm, which retails for $1,900. Despite the hefty price tag, I find myself not using that lens very often. Why? There are several reasons. First, the camera that I reach for the most is my Fujifilm X100V, which has a fixed lens, so I can’t use the 100-400mm with that camera. Another reason is that the focal length is very long and sometimes difficult to use; it’s not the right tool for many situations. The final reason is that it’s big and heavy, especially compared to my other lenses, and it works best when attached to a tripod, so it’s kind of a hassle to use. I paid a lot of money for this lens, so I need to use it more often.

One recent opportunity I had to use the Fujinon 100-400mm lens was photographing the sunset in Bountiful, Utah. Some distant clouds and haze created the potential for a great sunset. I set my tripod at the top of a hill that overlooked the valley below, attached the lens to the tripod, then attached my Fujifilm X-T30 to the lens. I had my Velvia film simulation recipe loaded into the camera, which is a great recipe for sunset photography because of its contrast and vibrant colors. In the film days, Velvia 50 was a top choice if you wanted stunning sunset pictures, and now with Fujifilm X cameras the Velvia film simulation is a top option.

Temple – Bountiful, UT – Fujifilm X-T30 & Fujinon 100-400mm

The sunset didn’t disappoint. Actually, it was more vibrant and lovely than I could have hoped for! It was a great show that lasted about 10 minutes. Even though I had the lens on a tripod, I still kept the shutter speed high to prevent blur from shake because I didn’t tighten everything down so that I could swing the lens around. To get a faster shutter speed I had the ISO set higher than one might expect. I was doing manual exposure. I zoomed in and out, trying to find different compositions. These seven pictures were captured from that one spot within the 10 minutes of the sunset show. The 100-400mm lens allowed me to capture a variety of pictures without moving places.

These photographs aren’t in sequential order. The picture at the top of this article was actually the last exposure, and the picture above of the temple was second-to-last. The very first exposure is the last picture at the bottom of this post. The order of the rest are scrambled up. In some pictures, I think the saturation is a little too much, and perhaps the recipe too bold, but in some other pictures it was the right choice. The X-T30 is a good camera, and the 100-400mm a good lens, and they worked very well together to make these pictures possible. I need to use these together more often.

Lava Sky over Stansbury Mountains – Bountiful, UT – Fujifilm X-T30 & Fujinon 100-400mm
South End of Antelope Island – Bountiful, UT – Fujifilm X-T30 & Fujinon 100-400mm
Antelope & Stansbury – Farmington, UT – Fujifilm X-T30 & Fujinon 100-400mm
Salt Lake & Stansbury Mountains At Sunset – Bountiful, UT – Fujifilm X-T30 & Fujinon 100-400mm
Stansbury Mountains – Bountiful, UT – Fujifilm X-T30 & Fujinon 100-400mm

Fujifilm X100V Film Simulation Recipe: Color Negative 400

Wind Rewind – Farmington, UT – Fujifilm X100V – “Color Negative 400”

I ran across a picture in an article about coffee, and that picture reminded me a lot of the Classic Negative film simulation. I don’t think the picture was captured with Classic Negative; perhaps a VSCO (or some other brand) preset was used that was intended to look something like Superia film. So, with one picture as my guide, I set out to recreate the look with my Fujifilm X100V. Ideally you want more than one sample picture to study, but that’s all I had. These settings look pretty darn close to that picture, but it’s difficult to know if it’s truly accurate because I only had one sample to work with, and I don’t know how it should look in various situations. Still, I’m happy with how it turned out.

Initially I was going to name this recipe “Fujicolor Negative” because it has a Fujicolor Superia-like look, but then I stumbled across some Kodak ColorPlus 400 photographs, and they looked quite similar to these pictures. Even though the resemblance to ColorPlus 400 is completely accidental, I thought that calling it “Color Negative 400” was more appropriate because it is in the general ballpark of a film that’s not Fujicolor. Or, more accurately, it is similar to both a Kodak stock and a Fujifilm stock, and not exactly like either. I do think, no matter how close it may or may not be to an actual film, it has a nice film-like aesthetic to it that many will appreciate.

Ability – Farmington, UT – Fujifilm X100V – “Color Negative 400”

This recipe is dark and contrasty, and can be used to create a certain moody look. I think it works best in low-contrast scenes, and does well both indoors and outdoors. This recipe is only compatible (as of this writing) with the Fujifilm X100V, X-Pro3, X-T4 and X-S10 cameras.

Classic Negative
Dynamic Range: DR400
Highlight: 0
Shadow: +4
Color: +4
Noise Reduction: -4
Sharpening: 0
Clarity: -5
Grain Effect: Weak, Large
Color Chrome Effect: Weak
Color Chrome Effect Blue: Weak
White Balance: Auto, -2 Red & -4 Blue
ISO: Auto, up to ISO 6400
Exposure Compensation: +1/3 to +1 (typically)

Example photographs, all camera-made JPEGs using this Color Negative 400 film simulation recipe on my Fujifilm X100V:

Succulent Faux – Farmington, UT – Fujifilm X100V
Fabric Leaf – Farmington, UT – Fujifilm X100V
Holga 120N & Ilford HP5 Plus – Farmington, UT – Fujifilm X100V
Table Bolsey – Farmington, UT – Fujifilm X100V
Three Indoor Plants – Farmington, UT – Fujifilm X100V
Face Masks Are Required – Farmington, UT – Fujifilm X100V
Speed Stars – Farmington, UT – Fujifilm X100V
Fish on a Wall – Farmington, UT – Fujifilm X100V
Waiting for Fish – Farmington, UT – Fujifilm X100V
Contemplation – Farmington, UT – Fujifilm X100V
Stroller Ride – Farmington, UT – Fujifilm X100V
Leaning into the Frame – Farmington, UT – Fujifilm X100V
Bicycle Here – Farmington, UT – Fujifilm X100V
Birds in a Dormant Tree – Farmington, UT – Fujifilm X100V

See also: Film Simulation Recipes

This post contains affiliate links, and if you make a purchase using my links I’ll be compensated a small amount for it.

Fujifilm X100V Black    Amazon   B&H
Fujifilm X100V Silver   Amazon   B&H

50557680816_8cb5645e93_c

Help Fuji X Weekly

Nobody pays me to write the content found on fujixweekly.com. There’s a real cost to operating and maintaining this site, not to mention all the time that I pour into it. If you appreciated this article, please consider making a one-time gift contribution. Thank you!

$2.00

Fuji X Weekly 2020 Quick Recap

2020 wasn’t great in general (understatement of the year?), but it was a great year for the Fuji X Weekly blog! Let me share with you some of the highlights and statistics from this last year.

In 2020:
– There were 3.7 million page views on this website—that’s more than four times as many as 2019!
– I published 178 articles, almost one every other day (I only promise one per week, hence the name…).
– The #1 most viewed article, My Fujifilm X-T30 Kodachrome Film Simulation Recipe, had 79,939 views.
– This blog was mentioned in videos by Andrew & Denae, Vuhlandes, Omar Gonzalez, and The Snap Chick, among others.
– The Fuji X Weekly App made an appearance on FujiRumors and PetaPixel, among others.
– Oh, and the Fuji X Weekly app for iOS came out on December 1st! Android coming soon.
– Back in October I redesigned the website, making it easier to find film simulation recipes.

How did I find the time? I do all this “on the side” in the spare moments of my day. So many people have helped my photography over the years, and this is my way to pay it forward. Sometimes I wish that I had more time to dedicate to this website and photography, because there’s so much more that I could do.

While 2020 was definitely a big year for this blog—which was only possible because of you, the greatest audience in photography—I know that 2021 will be even bigger. There’s so much in the works, and so much that I hope to accomplish, that it’s bound to be a big year! Some great things for the Fujifilm community await, and I can’t wait to share them with you!

The two pictures below are examples of what will be the first new film simulation recipe of 2021—it’s coming soon!

Fish on a Wall – Farmington, UT – Fujifilm X100V – My last exposure of 2020
Leaning into the Frame – Farmington, UT – Fujifilm X100V – My first exposure of 2021

New Video: Making Blue Hour Photographs During Daylight

I just published a new video on the Fuji X Weekly YouTube Channel! This particular video is a mix of this article about creating blue hour pictures in daylight and this article about Fujifilm using my picture on their website, plus some footage of downtown Ogden, Utah. It’s pretty short, so if you have a spare two minutes, give the video a watch!

If you don’t subscribe to the Fuji X Weekly YouTube Channel, be sure to do so, that way you don’t miss new content when it comes out. Also, as a reminder, Fuji X Weekly is on Instagram and Facebook, so be sure to follow me on social media. Thank you for coming to this blog, for sharing articles on your social media, for all the likes and comments, and for all your support! I appreciate all of you!