Swath of Red – Buckeye, AZ – Fujifilm X-T5 – “Kodak Portra 400 v2”
This is a simple update to the Kodak Portra 400 v2 Film Simulation Recipe, which was originally made for X-Trans IV cameras. I discovered that a slight tweak is needed for X-Trans V models, because the new sensor renders blues just a little deeper on some film simulations, including Classic Chrome. For this recipe, simply setting Color Chrome FX Blue from Weak to Off makes it compatible with (as of this writing) the Fujifilm X-T5, X-H2, and X-H2S.
Kodak Portra 400 is a popular professional-grade color negative film introduced in 1998. There’s been a number of revisions and improvements to the emulsion over the years, so the Portra that’s available today is slightly different than the original Portra from roughly 25 years ago. As the name suggests, it’s intended for portraitures, but is also a popular option for many other genres of photography. One film can have several different aesthetics depending on many factors, and this particular Film Simulation Recipe is modeled after the Kodak Portra 400 pictures from a specific photographer. It’s one of my absolute favorite recipes for daylight and especially golden hour photography, and it does pretty well in several other light conditions; however, it’s probably not the best option for indoor artificial light, unless you want especially warm pictures.
This Kodak Portra 400 v2 Film Simulation Recipe is intended for Fujifilm X-Trans V models. It’s compatible with newer GFX cameras too, but will likely render slightly different. If you have an X-Pro3, X100V, X-T4, X-S10, X-E4, or X-T30 II, try the Kodak Portra 400 v2 recipe for those models (click here). If you have an X-T3 or X-T30, try the version for those cameras (click here).
Film Simulation: Classic Chrome Grain Effect: Strong, Small Color Chrome Effect: Strong Color Chrome FX Blue: Off White Balance: 5200K, +1 Red & -6 Blue Dynamic Range: DR400 Highlight: 0 Shadow: -2 Color: +2 Sharpness: -2 High ISO NR: -4 Clarity: -2 ISO: Auto, up to ISO 6400 Exposure Compensation: +1/3 to +1 (typically)
Example photographs, all camera-made JPEGs using this “Kodak Portra 400 v2” Film Simulation Recipe on my Fujifilm X-T5:
Christmas Angel – Buckeye, AZ – Fujifilm X-T5
Nativity – Buckeye, AZ – Fujifilm X-T5
Happy Holidays – Buckeye, AZ – Fujifilm X-T5
Lemons – Buckeye, AZ – Fujifilm X-T5
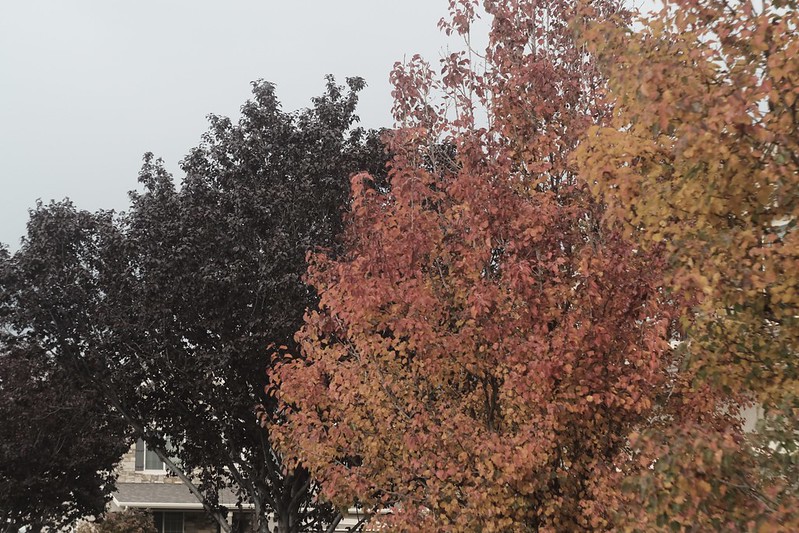
Changing Seasons – Buckeye, AZ – Fujifilm X-T5
Leaves on the Concrete – Buckeye, AZ – Fujifilm X-T5
GCR – Williams, AZ – Fujifilm X-T5
Lighted Cupola – Williams, AZ – Fujifilm X-T5
Sisters – Williams, AZ – Fujifilm X-T5
Brothers – Buckeye, AZ – Fujifilm X-T5
December Fog – Buckeye, AZ – Fujifilm X-T5
Multi-Arm Saguaro – Buckeye, AZ – Fujifilm X-T5
Saguaro Mist – Buckeye, AZ – Fujifilm X-T5
Wall Cage – Buckeye, AZ – Fujifilm X-T5
Super Star – Glendale. AZ – Fujifilm X-T5
I Believe – Avondale, AZ – Fujifilm X-T5
Standing in the Sun – Avondale, AZ – Fujifilm X-T5
Untidy Palm – Palo Verde, AZ – Fujifilm X-T5
Misty Desert Hills – Buckeye, AZ – Fujifilm X-T5
It Was All Yellow – Buckeye, AZ – Fujifilm X-T5
Small Pop of Color – Buckeye, AZ – Fujifilm X-T5
Clouds & Brown Trees – Buckeye, AZ – Fujifilm X-T5
Golden Neighborhood – Buckeye, AZ – Fujifilm X-T5
This post contains affiliate links, and if you make a purchase using my links I’ll be compensated a small amount for it.
Nobody pays me to write the content found on fujixweekly.com. There’s a real cost to operating and maintaining this site, not to mention all the time that I pour into it. If you appreciated this article, please consider making a one-time gift contribution. Thank you!
During this last SOOC broadcast, we attempted something never done before by anyone ever: create a new Film Simulation Recipe live on YouTube (which you can find at the 2:09:19 mark, if you missed the show). It was all done randomly. We spun wheels, used random number apps and programs, picked paper out of a hat, conducted a couple polls, and even had a kid pick a number—this recipe was a group effort created by you using chance. A special Thank You to everyone who participated! This was, of course, for fun. I would say that this is the least serious recipe ever to be published on this website, but that doesn’t mean you can’t use it for serious photography, because you absolutely can!
After completing the recipe, we took up name suggestions from the audience, and then ran a poll to decide which to go with, and “Mystery Chrome” won by a significant margin. The mystery is, perhaps, whether or not this is any good, or if anyone will actually use it—or maybe because it was all a mystery as it was being formed, parameter-by-parameter. We (as in the hosts, the guests, and those in the audience) also programmed this recipe into our cameras right away, and while still broadcasting live, we captured a picture, uploaded it, and shared them in the show (my picture is below). That’s the power of Fujifilm cameras and Film Simulation Recipes: within minutes of creating a recipe, people can program it into their cameras, capture an image, and share it across the globe—it can be that quick. Amazing!
Slides – Buckeye, AZ – Fujifilm X-H1 – “Mystery Chrome”
Interestingly, this recipe—completely by luck—has a Kodak-like reversal film look, thanks to Classic Chrome, the white balance, and Highlight/Shadow settings. I think it’s somewhat similar to Kodachrome 200—it’s not quite right for that, but certainly in the ballpark, and probably the closest recipe on this website for that film. This is a high-contrast recipe, and is best for use in low-contrast situations or to achieve bold results in mid or high contrast scenarios. It certainly has the potential to be well-liked, but I don’t suspect it will be anyone’s go-to recipe for everyday photography.
If it were up to me, I would make one modifications to Mystery Chrome: Noise Reduction to -4 instead of +4. I’m not a big fan of the in-camera Noise Reduction, and I like to take it all the way down. For internet viewing, and even 8″ x 12″ prints, you’ll have a hard time even noticing the difference between +4 and -4, but if you zoom in or print larger, it becomes more obvious. Maybe you prefer the increased Noise Reduction; personally, I do not. All of the photos in this article were captured with Noise Reduction set to +4.
This Mystery Chrome Film Simulation Recipe is compatible with all Fujifilm X-Trans III cameras—X-Pro2, X100F, X-E3, X-T2, X-T20, and X-H1—plus the X-T3 and X-T30 by simply setting Color Chrome Effect to Off. For newer X-Trans IV cameras, additionally set Color Chrome FX Blue to Off, Clarity to 0, and choose a Grain size (either Small or Large)—if you use it on X-Trans V cameras, blues will render slightly more deeply. For GFX, shadows will render slightly less dark, which you might actually prefer.
Classic Chrome Dynamic Range: DR400 Highlight: +3 Shadow: +4 Color: 0 Color Chrome Effect: N/A (X-Trans III) or Off (X-T3/X-T30) Sharpness: -4 Noise Reduction: +4 Grain: Strong White Balance: Daylight, +3 Red & -5 Blue ISO: Auto up to ISO 6400 Exposure Compensation: +1/3 to +2/3 (typically)
Example photographs, all camera-made JPEGs captured using this “Mystery Chrome” Film Simulation Recipe on my Fujifilm X-H1:
Slides Plus Canisters – Buckeye, AZ – Fujifilm X-H1
Corvette Abstract – Buckeye, AZ – Fujifilm X-H1
Taco Lamp – Buckeye, AZ – Fujifilm X-H1
Happy Girl – Buckeye, AZ – Fujifilm X-H1
Late Bloomer – Buckeye, AZ – Fujifilm X-H1
Rainbow Trumpets – Buckeye, AZ – Fujifilm X-H1
Wren in Rome – Buckeye, AZ – Fujifilm X-H1
Traffic Flag – Buckeye, AZ – Fujifilm X-H1
Pergola Lights – Buckeye, AZ – Fujifilm X-H1
Autumn Rainbow – Buckeye, AZ – Fujifilm X-H1
Amber Autumn – Buckeye, AZ – Fujifilm X-H1
Brilliant Leaf – Buckeye, AZ – Fujifilm X-H1
Yellow Tree – Buckeye, AZ – Fujifilm X-H1
Bougainvillea & Palm Fronds – Buckeye, AZ – Fujifilm X-H1
Nobody pays me to write the content found on fujixweekly.com. There’s a real cost to operating and maintaining this site, not to mention all the time that I pour into it. If you appreciated this article, please consider making a one-time gift contribution. Thank you!
Pilot – Cordes Lakes, AZ – Fujifilm X-T5 – “Kodachrome 64”
This isn’t a new Film Simulation Recipe; it’s simply a slight modification of my Kodachrome 64 recipe for X-Trans IV cameras to make it compatible with X-Trans V models. The adjustments are pretty simple: set Color Chrome FX Blue to Off and Shadow to +0.5. Why the Color Chrome FX Blue adjustment? I discovered that with Classic Chrome (and some other film simulations), X-Trans V cameras render blue deeper. Why the change to Shadow? I stated in the X-Trans IV version, “I would set Shadow to +0.5 if I were using these settings on [a] camera [with that option].” With those two modifications, the Kodachrome 64 recipe is ready for your Fujifilm X-Trans V camera!
Kodachrome was a brand-name of color reversal film made by Kodak between 1935 and 2009. There were three eras of Kodachrome: 1935-1960, 1961-1973, and 1974-2009. Each era produced a slightly different look, and the third era is the one you’re probably most familiar with. This recipe is intended to mimic the aesthetic of the third era of Kodachrome, specifically the ISO 64 emulsion.
This Kodachrome 64 Film Simulation Recipe is intended for Fujifilm X-Trans V models, which (as of this writing) include the X-H2, X-H2S, and X-T5 cameras. It’s compatible with newer GFX models too, but will likely render slightly different on those cameras. Those with an X-Pro3, X100V, X-T4, X-S10, X-E4, or X-T30 II, try the Kodachrome 64 recipe for those models (click here). Those with an X-T3 or X-T30, try the Kodachrome 64 recipe for those cameras (click here). For those with an X-Trans II model, there’s a Kodachrome 64 recipe for you, too (click here).
Film Simulation: Classic Chrome Grain Effect: Weak, Small Color Chrome Effect: Strong Color Chrome FX Blue: Off White Balance: Daylight, +2 Red & -5 Blue Dynamic Range: DR200 Highlight: 0 Shadow: +0.5 Color: +2 Sharpness: +1 High ISO NR: -4 Clarity: +3 ISO: Auto, up to ISO 6400 Exposure Compensation: 0 to +2/3 (typically)
Example photographs, all camera-made JPEGs using this “Kodachrome 64” Film Simulation Recipe on my Fujifilm X-T5:
Palm Tree Closeup – Palo Verde, AZ – Fujifilm X-T5
Abandoned Mobile Home – Arlington, AZ – Fujifilm X-T5
Store & Bar – Hassayampi, AZ – Fujifilm X-T5
Narrow Bridge – Arlington, AZ – Fujifilm X-T5
Concrete Railroad Ties & Steel Bridge – Arlington, AZ – Fujifilm X-T5
Gillespie Dam – Arlington, AZ – Fujifilm X-T5
Gila River Reeds – Arlington, AZ – Fujifilm X-T5
Flag, Bell, Cross – Arlington, AZ – Fujifilm X-T5
Princess Garden – Buckeye, AZ – Fujifilm X-T5
Secret Garden – Buckeye, AZ – Fujifilm X-T5
Blossomed Garden Rose – Buckeye, AZ – Fujifilm X-T5
Farm Truck – Buckeye, AZ – Fujifilm X-T5
Wall Shadow & Empty Pot – Buckeye, AZ – Fujifilm X-T5
Dusk Lamp – Buckeye, AZ – Fujifilm X-T5
Girl on Swing – Buckeye, AZ – Fujifilm X-T5
Desert Sunset – Buckeye, AZ – Fujifilm X-T5
This post contains affiliate links, and if you make a purchase using my links I’ll be compensated a small amount for it.
Nobody pays me to write the content found on fujixweekly.com. There’s a real cost to operating and maintaining this site, not to mention all the time that I pour into it. If you appreciated this article, please consider making a one-time gift contribution. Thank you!
Specifically, I set out to create a Film Simulation Recipe that could make a good option for “golden hour” or “midday” daylight photography—potentially a solid choice for C1 or C2 in your camera. I wanted it to have a classic Kodak aesthetic—perhaps a bit nostalgic, like from the 1970’s or 1980’s, maybe somewhat similar to Kodacolor—but not modeled after any specific film. Something classic and warm and clearly Kodak-like. I really like what I came up with, and I think many of you will, too!
Saguaro Green – Buckeye, AZ – Fujifilm X-T30 – “Classic Kodak”
This “Classic Kodak” Film Simulation Recipe is compatible with the X-T3 and X-T30 cameras, and, because it doesn’t use Color Chrome Effect, it’s also compatible with X-Trans III models. To use this recipe on newer X-Trans IV (and X-Trans V) cameras, simply set Color Chrome FX Blue to Off, Clarity to 0, and choose a Grain size (either Small or Large).
Classic Chrome Dynamic Range: DR400 Highlight: -2 Shadow: +1 Color: +4 Noise Reduction: -4 Sharpness: -1 Grain Effect: Strong Color Chrome Effect: Off White Balance: Shade, -1 Red & +2 Blue ISO: Auto up to ISO 6400 Exposure Compensation: +1/3 to +1
Below are all camera-made JPEGs captured using this “Classic Kodak” Film Simulation Recipe on my Fujifilm X-T30:
Clocktower – Buckeye, AZ – Fujifilm X-T30
Center on Main – Buckeye, AZ – Fujifilm X-T30
5 & 6 – Goodyear, AZ – Fujifilm X-T30
Water Fountain – Buckeye, AZ – Fujifilm X-T30
Circle Around the Roofline – Buckeye, AZ – Fujifilm X-T30
Old Doll Head For Sale – Buckeye, AZ – Fujifilm X-T30
Unlit Bulbs and Rainbow – Buckeye, AZ – Fujifilm X-T30
Rainbow Hidden in the Trees – Buckeye, AZ – Fujifilm X-T30
Small Yellow Leaves – Buckeye, AZ – Fujifilm X-T30
Dressed in Pink – Buckeye, AZ – Fujifilm X-T30
Green Garden Leaves – Buckeye, AZ – Fujifilm X-T30
Palm Branches in the Sky – Buckeye, AZ – Fujifilm X-T30
Sonoran Desert Mountains – Buckeye, AZ – Fujifilm X-T30
Nobody pays me to write the content found on fujixweekly.com. There’s a real cost to operating and maintaining this site, not to mention all the time that I pour into it. If you appreciated this article, please consider making a one-time gift contribution. Thank you!
Road Work Ahead – Glendale, AZ – Fujifilm X70 – “Classic Kodak Chrome”
Earlier this year I started a new Film Simulation Recipe series with the intention of customizing each film simulation to be optimized for the aesthetic that Fujifilm intended. In other words, make a nice-looking recipe that is similar to yet better than the stock look of a film simulation. The first recipe in this series is Standard Provia, the second is Improved Velvia, and the third is Everyday Astia. Now it’s time for Classic Chrome!
The problem with creating a Classic Chrome recipe for this series is there is already one that optimizes the aesthetic that Fujifilm intended. It already exists! So the challenge, of course, is to create something similar yet different, and hopefully every bit as good as the “old” recipe. Also, I thought to do it for X-Trans II cameras, which have thus far been left out of this series. I call this recipe “Classic Kodak Chrome” because the Classic Chrome film simulation is supposed to resemble a Kodak aesthetic, and this recipe definitely does. Fujifilm would never call the film simulation Kodak Chrome (even if they had the rights to use the brand name), but that doesn’t prevent me from including the Kodak name in my recipe.
Please, Dad—No More Pictures! – Buckeye, AZ – Fujifilm X70 – “Classic Kodak Chrome”
Most X-Trans II cameras have the Classic Chrome film simulation, but not all; this “Classic Kodak Chrome” Film Simulation Recipe is only compatible with those X-Trans II cameras with Classic Chrome, such as the X100T, X-E2, X-E2S, X-T1, X-T10, X30, X70, and XQ2 . Unfortunately, this recipe is not compatible with the X100S, X20, and XQ1, even though they are X-Trans II. Those with Bayer models with Classic Chrome can also use this recipe, although it will render slightly different on those cameras.
Classic Chrome Dynamic Range: DR200 Highlight: -1 (Medium-Soft) Shadow: 0 (Standard) Color: +1 (Medium-High) Sharpness: 0 (Standard) Noise Reduction: -2 (Low) White Balance: Auto, +2 Red & -2 Blue ISO: Auto up to ISO 3200 Exposure Compensation: 0 to +2/3 (typically)
Example photographs, all camera-made JPEGs captured on my Fujifilm X70 using this “Classic Kodak Chrome” Film Simulation Recipe:
R2-D2 Junkyard – Buckeye, AZ – Fujifilm X70
Old School Diner – Glendale, AZ – Fujifilm X70
Three Scary Pumpkins – Buckeye, AZ – Fujifilm X70
Big Intersection – Glendale, AZ – Fujifilm X70
In Step – Glendale, AZ – Fujifilm X70
Old Garage – Glendale, AZ – Fujifilm X70
Yellow Building Behind White Fence – Glendale, AZ – Fujifilm X70
Small Neighborhood Flowers – Glendale, AZ – Fujifilm X70
Autumn Window – Glendale, AZ – Fujifilm X70
Doll & Toy Museum – Glendale, AZ – Fujifilm X70
Brick, Tree, Sun – Glendale, AZ – Fujifilm X70
Trees & Glass – Glandale, AZ – Fujifilm X70
Tree Tops & Cyan Sky – Buckeye, AZ – Fujifilm X70
Singular Garden Blossom – Buckeye, AZ – Fujifilm X70
Nobody pays me to write the content found on fujixweekly.com. There’s a real cost to operating and maintaining this site, not to mention all the time that I pour into it. If you appreciated this article, please consider making a one-time gift contribution. Thank you!
Bee on a Blossom – Buckeye, AZ – Fujifilm X70 – “Kodak Color Negative”
I’ve wanted a Fujifilm X70 ever since I learned of its existence. For those who don’t know, the X70 was essentially a smaller, more wide-angle, and less expensive X100T. Introduced in January 2016 and discontinued in December of that same year, you might think that the camera was a flop, but it wasn’t. Unfortunately, to Fujifilm’s surprise, shortly after the camera launched, Sony suddenly discontinued the 16-megapixel APS-C sensor that the X70 used, and Fujifilm had no choice but to fully move on to X-Trans III as quickly as possible. The X70 was a casualty of that situation. No successor was ever made, supposedly because heat dispersion was an issue with higher resolution sensors that couldn’t be remedied. Even though the camera is six years old now, people love their X70’s—you don’t see very many for sale, and when you do it’s usually for a similar price to, or even higher than, the original MSRP. I was fortunate to find one in excellent condition for “only” $600.
I’ve had this camera for just a few days. After unboxing the X70, I quickly programmed into it the latest recipe that I had been working on with my X-T1 (which is in need of a sensor cleaning), and busily shot with it. Already I love this little camera—not only is it very practical to carry around everywhere, it is so much fun to use! Fujifilm really needs to work hard an its successor, the X80—this should be a top priority, in my opinion.
For this “Kodak Color Negative” Film Simulation Recipe, I wanted to use the Incandescent White Balance. Why? Because you cannot program a White Balance Shift into the C1-C7 Custom Presets (only on X-Pro3 and newer models); however, the camera will remember one shift per white balance type. If each of your presets uses a different white balance type, then you don’t have to remember to adjust the shift when switching presets. Incandescent is a white balance option that I’d not yet used on X-Trans II, so it seemed like a logical place to start.
The aesthetic that I was hoping to achieve with this recipe was Kodak Portra 400. I don’t believe that I succeeded in faithfully mimicking that (sometimes there’s a similarity); however, it does seem to produce a Kodak-like color negative film look, perhaps more like Ultramax, but not exactly that, either. Whatever it does or doesn’t resemble, I personally really like the aesthetic produced by this recipe, and I hope that you do, too.
Johanna in Evening Light – Buckeye, AZ – Fujifilm X70 – “Kodak Color Negative”
This “Kodak Color Negative” recipe is compatible with all X-Trans II cameras that have Classic Chrome, including the X100T, X-E2, X-E2S, X-T10, X-T1, X30, X70, and XQ2. Unfortunately, the X100S, X20, and XQ1 don’t have Classic Chrome, despite being X-Trans II. Those with Bayer models that have Classic Chrome can also use this recipe, although it will render a little different on your camera.
Classic Chrome Dynamic Range: DR200 Highlight: -2 (Soft) Shadow: -1 (Medium-Soft) Color: +2 (High) Sharpness: -1 (Medium-Soft) Noise Reduction: -2 (Low) White Balance: Incandescent, +6 Red & -7 Blue ISO: Auto up to ISO 3200 Exposure Compensation: 0 to +2/3 (typically)
Example photographs, all camera-made JPEGs captured on my Fujifilm X70 using this “Kodak Color Negative” Film Simulation Recipe:
Sunlight Through The Grapevine – Surprise, AZ – Fujifilm X70
Nobody pays me to write the content found on fujixweekly.com. There’s a real cost to operating and maintaining this site, not to mention all the time that I pour into it. If you appreciated this article, please consider making a one-time gift contribution. Thank you!
Large Stone & Tall Grass – Farmington, UT – Fujifilm X-H1 – “Vintage Kodacolor”
This Film Simulation Recipe is called “Vintage Kodacolor” because I was inspired by some old Kodak Kodacolor puzzles that I stumbled across (did you know that Kodak made jigsaw puzzles?). I’m not completely certain which Kodacolor film was used for these puzzles—possibly Kodacolor II—or how much the printing process affected the aesthetic, or even how much the colors have faded and shifted over time. Whatever the case, this recipe does a pretty good job emulating it, and produces a warm vintage-like aesthetic that’s easy to appreciate. There’s some similarities between this and my Kodacolor II 126 recipe.
This recipe has been available on the Fuji X Weekly App as a Patron Early-Access Recipe since December; however, a different Early-Access Recipe has replaced it, so now this one is available to everyone! This isn’t a Film Simulation Recipe that is for every person or every situation, but some of you in the right situations will absolutely love it. I think it is especially good for achieving a vintage look on sunny days and during golden hour.
This “Vintage Kodacolor” recipe is fully compatible with all X-Trans III cameras, plus the Fujifilm X-T3 and X-T30. Those with newer X-Trans IV (and X-Trans V) cameras can use it, too, but you’ll have to decide on Clarity (I suggest 0, or maybe -2), Color Chrome FX Blue (I suggest Off), and Grain size (I would try Large).
Classic Chrome Dynamic Range: DR200 Highlight: +2 Shadow: 0 Color: -4 Noise Reduction: -4 Sharpness: -1 Grain Effect: Strong Color Chrome Effect: Off/NA White Balance: 9100K, -4 Red & +4 Blue ISO: Auto up to ISO 12800 Exposure Compensation: -1/3 to +1/3
Example photographs, all camera-made JPEGs captured using this “Vintage Kodacolor” Film Simulation Recipe on my Fujifilm X-H1 & X-T30:
Tree Behind – Buckeye, AZ – Fujifilm X-T30
Vintage Phragmites – Farmington, UT – Fujifilm X-H1
Evening Reeds and Sky – Farmington, UT – Fujifilm X-H1
Three Brown Leaves – Farmington, UT – Fujifilm X-H1
Don’t Approach the Great Blue Heron – Farmington, UT – Fujifilm X-H1
Safe Zone – Farmington, UT – Fujifilm X-H1
Sunset Through The Grass – Farmington, UT – Fujifilm X-H1
Evening Light on the Wood – Farmington, UT – Fujifilm X-H1
Flowers No More – Farmington, UT – Fujifilm X-H1
Metal Door – Farmington, UT – Fujifilm X-H1
Cool Dog – Buckeye, AZ – Fujifilm X-T30
Cardboard Architect – Farmington, UT – Fujifilm X-H1
Holiday Horse Rider – Farmington, UT – Fujifilm X-H1
Nobody pays me to write the content found on fujixweekly.com. There’s a real cost to operating and maintaining this site, not to mention all the time that I pour into it. If you appreciated this article, please consider making a one-time gift contribution. Thank you!
Pops of Pink – Buckeye, AZ – Fujifilm X-H1 – “Melancholy Blue”
For this Film Simulation Recipe I wanted to combine the beautiful blues of the new Pacific Blues recipe with the dark moodiness of the Vintage Agfacolor recipe. The result is a slightly melancholic aesthetic that can also produce dramatic results in certain circumstances. It’s great for daylight photography—delivering interesting (yet quite dissimilar) results in both overcast and bright sunlight conditions, including Low Key photography—and it also seems like a good option for some artificial light situations. Despite its versatility, it’s not a recipe that everyone will love; however, I know that a few of you will really appreciate it.
Unless your camera is an X-Pro3 or newer, you cannot save a white balance shift with your C1-C7 custom presets; however, your camera will remember one shift per white balance type, so if each C1-C7 recipe uses a different white balance type, you won’t have to remember to change the shift when you change recipes. There aren’t very many recipes that use the Incandescent White Balance, but now you have another recipe option if you are using this method.
This “Melancholy Blue” Film Simulation Recipe is intended for Fujifilm X-Trans III cameras, plus the X-T3 and X-T30. I used it on my Fujifilm X-H1 and X-T30, and it did well on both. For newer X-Trans IV cameras, set Color Chrome FX Blue to Off, Clarity to 0, and Grain size to… either Small or Large, you’ll have to decide which you prefer.
Classic Chrome Dynamic Range: DR200 Highlight: +3 Shadow: -1 Color: -2 Noise Reduction: -4 Sharpness: -1 Grain Effect: Weak Color Chrome Effect: Off/NA White Balance: Incandescent, +4 Red & -9 Blue ISO: Auto up to ISO 6400 Exposure Compensation: -1/3 to -1(typically)
Example photographs, all camera-made JPEGs captured using this “Melancholy Blue” Film Simulation Recipe on my Fujifilm X-T30 & Fujifilm X-H1 cameras:
Prickly Fruit – Buckeye, AZ – Fujifilm X-H1
Yellow on Top – Buckeye, AZ – Fujifilm X-H1
Dark Saguaro – Buckeye, AZ – Fujifilm X-H1
Buddies – Buckeye, AZ – Fujifilm X-H1
Lights Along A Wall – Buckeye, AZ – Fujifilm X-T30
Backyard Blooms – Buckeye, AZ – Fujifilm X-H1
Backlit Trumpets – Buckeye, AZ – Fujifilm X-H1
Twin Blooms – Buckeye, AZ – Fujifilm X-T30
Climbing Trumpets – Buckeye, AZ – Fujifilm X-T30
Bougainvillea Branch – Buckeye, AZ – Fujifilm X-H1
Block Wall Shadow – Buckeye, AZ – Fujifilm X-H1
Does Not Stop – Buckeye, AZ – Fujifilm X-H1
Roof Lines – Buckeye, AZ – Fujifilm X-T30
Find this Film Simulation Recipe and over 200 more on the Fuji X Weekly App!
Help Fuji X Weekly
Nobody pays me to write the content found on fujixweekly.com. There’s a real cost to operating and maintaining this site, not to mention all the time that I pour into it. If you appreciated this article, please consider making a one-time gift contribution. Thank you!
I wanted to make another recipe that uses the Fluorescent 2 (or “warm white fluorescent”) white balance. Why? Because this is a very underutilized and under appreciated option. I have only four other recipes that use it—Provia 400, Fujicolor Super HG, Super HG Astia, and Fujichrome Sensia 100—and those are all very good recipes. I didn’t have any specific film in mind when I made this, I was simply attempting something that looked good.
After shooting with it awhile, and looking at the pictures, the results looked familiar, but I couldn’t put a finger on it. I started digging through my old pictures, and wasn’t finding anything. Then I stumbled on a few Kodak Ektachrome E100GX frames, and the results were similar.
Ektachrome E100GX was a color transparency film made by Kodak from 2001-2009, and is what replaced E100SW. It was known for vibrant saturation, a warm color cast, and fine grain. It wasn’t quite as warm, vibrant, or sharp as E100SW, but overall very similar, yet with finer grain. Some people thought it was better than E100SW, some people thought it was worse. I liked E100SW a bit better, but E100GX was still a good film, particularly if you wanted something warm, colorful, and contrasty, but not overly so.
Intelligent Children – Bountiful, UT – Fujifilm X-T30 – “Ektachrome E100GX”
This recipe is compatible with Fujifilm X-Trans III, X-T3 and X-T30 cameras. For those with newer X-Trans IV cameras, to use this recipe simply set Color Chrome FX Blue to Off, Clarity to 0, and Grain size to Small.
Classic Chrome Dynamic Range: DR200 Highlight: -2 Shadow: +2 Color: +4 Noise Reduction: -4 Sharpness: -2 Grain Effect: Weak Color Chrome Effect: Off/NA White Balance: Fluorescent 2, -1 Red & -6 Blue ISO: Auto up to ISO 6400 Exposure Compensation: +1/3 to +1
Example photographs, all camera-made JPEGs captured using this “Ektachrome E100GX” film simulation recipe on my Fujifilm X-T30 & Fujifilm X-H1 cameras:
Yellow Glow of Iowa – Bountiful, UT – Fujifilm X-T30
Sunlight Reflected on Window – Bountiful, UT – Fujifilm X-T30
Dark Red Tree & Partly Cloudy Sky – Ogden, UT – Fujifilm X-T30
Dead Leaves in a Dry Drinking Fountain – Bountiful, UT – Fujifilm X-T30
Small Waterfall – Ogden, UT – Fujifilm X-T30
Forest Graffiti – Ogden, UT – Fujifilm X-T30
Growing Out of the Side – Ogden, UT – Fujifilm X-T30
Two Boys Going Down a Trail – Ogden, UT – Fujifilm X-T30
Reflection in the River – Ogden, UT – Fujifilm X-T30
Left – Bountiful, UT – Fujifilm X-T30
Warm Pink Blooms – Buckeye, AZ – Fujifilm X-H1
Bougainvillea Pink – Buckeye, AZ – Fujifilm X-H1
Little Orange Flowers – Buckeye, AZ – Fujifilm X-H1
Find this Film Simulation Recipe and over 200 more on the Fuji X Weekly App!
Help Fuji X Weekly
Nobody pays me to write the content found on fujixweekly.com. There’s a real cost to operating and maintaining this site, not to mention all the time that I pour into it. If you appreciated this article, please consider making a one-time gift contribution. Thank you!
Reggie Ballesteros (website, YouTube, Instagram, Instagram), also known as Reggie B Photo, is an official Fujifilm X-Photographer based in San Fransisco, California. He shoots both film and digital, and on his Fujifilm cameras he likes to use both RAW and JPEG. For his JPEGs, Reggie developed a Film Simulation Recipe that’s a close match to the Kodak Portra 400 film that he shoots and has developed and scanned (on a Noritsu) at Richard Photo Lab. He was very kind to allow me to share his Portra recipe with you on this website and the Fuji X Weekly App. Thanks, Reggie!
Portra 400 was introduced by Kodak in 1998. It used to come in two varieties: “NC” (Neutral Color, which had less saturation) and “VC” (Vivid Color, which had more saturation). I shot a little of both Kodak Portra 400NC and Kodak Portra 400VC back in the day, and I preferred the more colorful version. The film was redesigned in 2006 to improve grain and scanning. It was again redesigned in 2010, with the NC and VC emulsions dropped, replaced by a new mid-saturation version (simply called Portra 400), with more improvements to scanning.
I’m Your Huckleberry – Ridgedale, MO – Fujifilm X100V – “Reggie’s Portra”
As the name implies, Kodak Portra 400 is intended for portrait photography, but can be used for many other genres of photography. It’s similar to Portra 160, but with more contrast, saturation and grain. Believe it or not, ISO 400 was considered “high ISO” by many photographers back in the film days, and Portra 400 was one of the absolute best “high ISO” color films ever made. It’s still available today, and is very popular among film photographers.
When developing his Portra recipe, Reggie used the Kodak Portra 400 Film Simulation Recipe from this website as his starting point, and he tweaked it to more closely match his Portra scans and to better suit his photography. One film can have many different aesthetics, depending on how it’s shot, developed, scanned, and a whole host of other factors, so it’s great that Reggie made this alternative version, which might be closer to the exact look that you are after. Also, because this recipe uses Auto White Balance and doesn’t use Clarity, you might find that this one is more versatile than some other recipes. Oh, and take a look at the Kodak Portra 400 v2 and Kodak Portra 400 Warm recipes, which could potentially produce your desired aesthetic.
Pines – Lake Catherine SP, AR – Fujifilm X100V – “Reggie’s Portra”
One special note: Reggie has a 5% CineBloom diffusion filter attached to his lens whenever he shoots with this particular recipe. I have been using my Fujifilm X100V as a monochrome-only camera, but because I, too, have a 5% CineBloom filter attached to it, I made an exception so that I could test this recipe on that camera with the diffusion filter. For the shots captured on my X-E4, I did not use a diffusion filter; however, I do like how the 5% CineBloom subtly affects the image, and I recommend pairing it with this recipe if you can.
This Film Simulation Recipe is compatible with the Fujifilm X-Pro3, X100V, X-T4, X-S10, X-E4, & X-T30 II cameras. To use it on the X-T3 and X-T30, simply ignore Grain size and Color Chrome FX Blue, since your camera doesn’t have those options—the results will be slightly different, but nearly identical. More than likely this recipe is compatible with GFX and X-Trans V, but I haven’t tested it to know for sure.
Abandoned Long John Silver’s – Elk City, OK – Fujifilm X100V – “Reggie’s Portra”
Classic Chrome Dynamic Range: DR-Auto Highlight: -1 Shadow: -1 Color: +2 Noise Reduction: -4 Sharpening: -2 Clarity: 0 Grain Effect: Weak, Small Color Chrome Effect: Strong Color Chrome Effect Blue: Weak White Balance: Auto, +2 Red & -4 Blue ISO: Auto, up to ISO 6400 Exposure Compensation: +1/3 to +1 (typically)
Example photographs, all camera-made JPEGs using “Reggie’s Portra” Film Simulation Recipe on my Fujifilm X-E4 and Fujifilm X100V cameras:
Below is a video that Reggie made which illustrates his Portra recipe quite well (he notes that the Shadow setting is incorrect in the video—it should say -1, not -2). Be sure to like and subscribe and all that stuff. Enjoy!
This post contains affiliate links, and if you make a purchase using my links I’ll be compensated a small amount for it.
Nobody pays me to write the content found on fujixweekly.com. There’s a real cost to operating and maintaining this site, not to mention all the time that I pour into it. If you appreciated this article, please consider making a one-time gift contribution. Thank you!
Fujifilm cameras have a feature in Advanced Settings called “High Key” that I recently discovered is based on the Provia film simulation, and can be mimicked. While this “High Key” setting can produce nice-looking images, it’s not really my style, so I set out to create a Film Simulation Recipe to serve as an alternative to it, with an aesthetic that I appreciate a little more. Specifically, I wanted a generic overexposed Kodak color negative film aesthetic, perhaps Portra-like (or at least Portra-inspired), which is why I call this recipe Bright Kodak.
Bright Kodak might look familiar. It’s actually similar to a couple of other recipes, namely Bright Summer (a.k.a. “Preetra 400”) and Kodak Portra 400 Warm. If you like those recipes, you’ll certainly like this one, too. The key to using this Bright Kodak recipe is to increase the exposure—almost overexpose—to make the pictures nice and bright.
Palm – Goodyear, AZ – Fujifilm X-E4 – “Bright Kodak”
This Film Simulation Recipe is fully compatible with newer X-Trans IV cameras: Fujifilm X-Pro3, X100V, X-T4, X-S10, X-E4, & X-T30 II. If you have an X-T3, X-T30, or X-Trans III camera, you can get similar results by ignoring Grain size and using a diffusion filter (such as 10% CineBloom) in lieu of Clarity. This recipe is also likely compatible with newer GFX cameras, although the results won’t be completely identical.
Classic Chrome Dynamic Range: DR400 Highlight: -2 Shadow: -2 Color: +4 Noise Reduction: -4 Sharpening: -2 Clarity: -3 Grain Effect: Strong, Large Color Chrome Effect: Off Color Chrome Effect Blue: Off White Balance: Daylight, +3 Red & -7 Blue ISO: Auto, up to ISO 6400 Exposure Compensation: +1 to +1 2/3 (typically)
Example photographs, all camera-made JPEGs using this “Bright Kodak” Film Simulation Recipe on my Fujifilm X-E4:
Cactus Evening – Goodyear, AZ – Fujifilm X-E4
3 Tall Cacti – Goodyear, AZ – Fujifilm X-E4
Cacti Reaching to the Moon – Goodyear, AZ – Fujifilm X-E4
Palm & Flowers – Goodyear, AZ – Fujifilm X-E4
Pink – Goodyear, AZ – Fujifilm X-E4
Bougainvillea – Goodyear, AZ – Fujifilm X-E4
Palm Moon – Goodyear, AZ – Fujifilm X-E4
Neighborhood Palms – Goodyear, AZ – Fujifilm X-E4
If You Know, You Know… – Gilbert, AZ – Fujifilm X-E4
Red Stripe – Buckeye, AZ – Fujifilm X-E4
Compared to “High Key”:
“High Key”
“Bright Kodak”
Compared to “Bright Summer” & “Kodak Portra 400 Warm”:
Nobody pays me to write the content found on fujixweekly.com. There’s a real cost to operating and maintaining this site, not to mention all the time that I pour into it. If you appreciated this article, please consider making a one-time gift contribution. Thank you!
Inside City Creek – Salt Lake City, UT – Fujifilm X-T30 – “Kodacolor VR”
This Film Simulation Recipe was an experiment. I started out with my Fujicolor 100 Industrial recipe, but instead of using a cool White Balance with a warm White Balance Shift, I did the opposite: I used a warm White Balance with a cool shift. After many adjustments to various settings, this ended up not resembling the Fujicolor 100 Industrial recipe much at all, but it does have a great vintage print-film aesthetic that I really like.
I wasn’t sure at first which film this recipe most closely resembled (since it wasn’t intended to mimic any specific film), although it seemed to have some similarities to Kodacolor VR. I already have a Kodacolor recipe (plus a variant of it), which does a great job at mimicking Kodacolor VR; this recipe and that one look somewhat similar, but definitely different. Then I ran across some pictures that looked very similar to the ones you see in this article, and it turned out that they were shot on Kodacolor VR film that had expired. So I think this recipe, while it does resemble Kodacolor VR, as well as ColorPlus 200 (which is a direct descendant of that film), it most closely looks like Kodacolor VR that’s been stored a little past its expiration date. Of course, one film can have many different looks, depending on how it was shot, developed, scanned and/or printed, and (in this case) stored, so this recipe serves as a nice alternative to my original Kodacolor recipe.
Leaning Tower – Salt Lake City, UT – Fujifilm X-T30 – “Kodacolor VR”
This “Kodacolor VR” recipe was originally a Patron Early-Access Recipe, but is now available to everyone! If you are a Fuji X Weekly App Patron, there is a new Early-Access Recipe that replaced this one, so be sure to look for that. This recipe is compatible with Fujifilm X-Trans III and X-T3 and X-T30 cameras. For those with newer X-Trans IV cameras, set Color Chrome FX Blue to Off, Clarity to 0 (or perhaps -2), and I’d suggest Grain size Large, but use Small if you prefer.
Classic Chrome Dynamic Range: DR400 Highlight: -1 Shadow: +1 Color: +2 Sharpness: -1 Noise Reduction: -4 Grain: Weak Color Chrome Effect: Off White Balance: 10000K, -7 Red & +8 Blue ISO: Auto up to ISO 6400 Exposure Compensation: +1/3 to +1 (typically)
Example photographs, all camera-made JPEGs captured using this “Kodacolor VR” film simulation recipe on my Fujifilm X-T30:
Summer Reeds – Farmington, UT – Fujifilm X-T30
Corner Through Leaves – Salt Lake City, UT – Fujifilm X-T30
Stones & Glass Ceiling – Salt Lake City, UT – Fujifilm X-T30
Glass – Salt Lake City, UT – Fujifilm X-T30
Building a Building – Salt Lake City, UT – Fujifilm X-T30
Small Spaces Between – Salt Lake City, UT – Fujifilm X-T30
Twilight Telephone Poles – Salt Lake City, UT – Fujifilm X-T30
Stoneground – Salt Lake City, UT – Fujifilm X-T30
Goes for Gold – Salt Lake City, UT – Fujifilm X-T30
Night Parking – Salt Lake City, UT – Fujifilm X-T30
Doki Doki – Salt Lake City, UT – Fujifilm X-T30
Escalators – Salt Lake City, UT – Fujifilm X-T30
Downtown Buildings – Salt Lake City, UT – Fujifilm X-T30
Coming Train – Salt Lake City, UT – Fujifilm X-T30
Trax – Salt Lake City, UT – Fujifilm X-T30
Waiting on the Platform – Salt Lake City, UT – Fujifilm X-T30
Glass & Sky – Salt Lake City, UT – Fujifilm X-T30
Tall Downtown Buildings – Salt Lake City, UT – Fujifilm X-T30
Nobody pays me to write the content found on fujixweekly.com. There’s a real cost to operating and maintaining this site, not to mention all the time that I pour into it. If you appreciated this article, please consider making a one-time gift contribution. Thank you!
This new version of the recipe isn’t intended to more accurately replicate the film, but instead offer a nice-looking alternative that still retains a vintage Kodak essence. It has a “memory color” that is reminiscent of classic Kodak slide film. I especially like how this recipe renders blues.
Tetons in March – Grand Teton NP, WY – Fujifilm X100V – “Kodak Brilliance”
Because the Kodak Brilliance recipe uses Clarity and Color Chrome FX Blue, it’s only compatible with the Fujifilm X-Pro3, X100V, X-T4, X-S10, X-E4, and X-T30 II cameras. I believe that you could also use it on newer GFX cameras, although I have not personally tested it. For the X-T3 and X-T30, feel free to try it, ignoring Clarity, Color Chrome FX Blue, and Grain size—it won’t look exactly the same, but will be pretty similar.
Classic Chrome Dynamic Range: DR200 Highlight: +4 Shadow: -2 Color: +4 Noise Reduction: -4 Sharpness: -1 Clarity: +2 Grain Effect: Weak, Small Color Chrome Effect: Strong Color Chrome Effect Blue: Weak White Balance: Daylight, +2 Red & -1 Blue ISO: Auto, up to ISO 6400 Exposure Compensation: -1 to 0 (typically)
Example photographs, all camera-made JPEGs using this “Kodak Brilliance” Film Simulation Recipe on my Fujifilm X100V and Fujifilm X-E4:
On the Cusp of Spring – Hammond, OR – Fujifilm X-E4
Wet Fern – Columbia River Gorge, OR – Fujifilm X100V
Hanging Orange – Hammond, OR – Fujifilm X-E4
Blowing East – Hammond, OR – Fujifilm X-E4
Beach Staircase – Cannon Beach, OR – Fujifilm X-E4
Misty Ocean – Cannon Beach, OR – Fujifilm X-E4
Haystack Rock – Cannon Beach, OR – Fujifilm X-E4
Helicopter Behind Haystack Rock – Cannon Beach, OR – Fujifilm X-E4
Shipwreck Shell – Fort Stevens SP, OR – Fujifilm X100V
Peter Iredale at Sunset – Fort Stevens SP, UT – Fujifilm X100V
If you are searching for a good blue-hour and nighttime Film Simulation Recipe, this is one you should try! I used it recently in Jackson Hole, Wyoming, and Astoria, Oregon, and was impressed with the results. I invite you, if you will be photographing after dark anytime soon, to give this recipe a try—you’ll be glad that you did! I suspect that this will become a favorite recipe for some of you.
Night Statue – Jackson Hole, WY – Fujifilm X100V – “Serr’s 500T”
This recipe is compatible with the Fujifilm X-Pro3, X100V, X-T4, X-S10, X-E4, and X-T30 II cameras. For those with an X-T3 or X-T30, you can use this recipe but you’ll have to ignore Grain size and Color Chrome FX Blue—the results will be slightly different, but pretty close. Those with X-Trans III cameras will additionally have to ignore Color Chrome Effect. Because Clarity is set to 0 in this recipe, I used a 5% CineBloom filter on my X100V for these pictures—alternatively, you could set Clarity to -2 and get similar results.
Classic Chrome Dynamic Range: DR-Auto Highlight: -2 Shadow: -1 Color: -1 Noise Reduction: -2 Sharpness: -1 Clarity: 0 Grain Effect: Strong, Large Color Chrome Effect: Strong Color Chrome Effect Blue: Strong White Balance: 3200K, -1 Red & +4 Blue ISO: Auto, up to ISO 6400 Exposure Compensation: -1/3 to +1/3 (typically)
Example photographs, all camera-made JPEGs using “Serr’s 500T” Film Simulation Recipe on my Fujifilm X100V:
Dairy Maid – Warrenton, OR – Fujifilm X100V
Cold Nights – Jackson Hole, WY – Fujifilm X100V
Magic Fork – Astoria, OR – Fujifilm X100V
Salmon – Astoria, OR – Fujifilm X100V
Walking Tadziu – Jackson Hole, WY – Fujifilm X100V
Anders began by looking at some old prints he has, which were captured on Kodak Gold 200 film. He noticed that these prints looked a little different than my Kodak Gold 200 recipe, but one film can have many different looks depending on how it was shot, developed, printed and/or scanned, or even which generation of the emulsion you’re viewing. This recipe mimics the aesthetic of his prints, but he noticed that it also matches many examples of Gold 200 that he found online.
Kids in a Tree – Farmington, UT – Fujifilm X100V – “Kodak Gold v2”
This recipe is compatible with the Fujifilm X-Pro3, X100V, X-T4, X-S10, X-E4, and X-T30 II cameras. To make this recipe work on the X-T3 and X-T30, Anders suggests using Grain Strong, White Balance 5900K (with the same shift), and ignoring Clarity—I suggest that you consider using a weak diffusion filter, such as 1/8 Black Pro Mist or 5% CineBloom, in leu of Clarity. In addition, for X-Trans III, ignore Color Chrome Effect. The results will be slightly different, but nearly the same. Anders suggests trying this recipe with a 3200K white balance for night photography.
Classic Chrome Dynamic Range: DR200 Highlight: 0 Shadow: -1 Color: -1 Noise Reduction: -4 Sharpness: -1 Clarity: -2 Grain Effect: Strong, Large Color Chrome Effect: Weak Color Chrome Effect Blue: Off White Balance: 5800K, +2 Red & +4 Blue ISO: Auto, up to ISO 6400 Exposure Compensation: 0 to +2/3 (typically)
Example photographs, all camera-made JPEGs using this new Kodak Gold v2 film simulation recipe on my Fujifilm X100V:
Moon Behind Pine – Farmington, UT – Fujifilm X100V
Moon Behind Cattails – Farmington, UT – Fujifilm X100V
Safe Zone – Farmington, UT – Fujifilm X100V
Makeshift Gate – Farmington, UT – Fujifilm X100V
Wood Post – Farmington, UT – Fujifilm X100V
Trail to Visitors Center – Farmington, UT – Fujifilm X100V
Green Leaves in January – Farmington UT – Fujifilm X100V
Hanging Red Berries in Winter – Farmington, UT – Fujifilm X100V
Berries and Barren Branches – Farmington, UT – Fujifilm X100V
Brown Reeds – Farmington, UT – Fujifilm X100V
Jo in a Tree – Farmington, UT – Fujifilm X100V
Jo Under The Tennis Net – Farmington, UT – Fujifilm X100V
Evergreen Tops – Farmington, UT – Fujifilm X-E4 – “Kodak High Definition Plus 200”
This Kodak High Definition Plus 200 film simulation recipe was a fun one to make. My wife, Amanda, was looking through an old box of pictures when she came across a group of prints that she thought looked interesting, so she showed them to me. The images were captured in the Sierra Nevada mountains, largely in the Sequoia National Forest, in 2006. I had no idea what film I used, but after locating the negatives, I discovered it was Kodak High Definition Plus 200. The pictures were printed on Fujicolor Crystal Archive paper. Not surprisingly, Fujifilm paper produces a different aesthetic than Kodak paper, so if this film had been printed on Kodak paper the pictures would look a little different. Back then, the rule of thumb for best results was that Kodak negatives should be printed on Kodak paper, Fujifilm negatives should be printed on Fujifilm paper, etc., but obviously I broke that “rule” with these travel pictures.
Kodak High Definition Plus 200 was a color negative film that was also sold under the name Kodak Royal Supra 200. At the time, Kodak claimed that it was the sharpest and finest-grained ISO 200 color negative film on the market. Originally there were ISO 100, 200, 400 and 800 varieties, but since this film line was introduced right at the beginning of the decline of film, it didn’t take Kodak long to discontinue all but the ISO 200 and 400 versions, and even those didn’t last all that long. I shot a few rolls of the film, and after digging through that photo box, I found two sets of negatives, both exposed around that same timeframe. I honestly don’t remember all that much from the experience, but it was fun to rediscover these long-forgotten pictures and recreate the aesthetic on my Fujifilm X-E4 camera.
A picture of Kodak High Definition Plus negatives, captured with this recipe.
A picture of Kodak High Definition Plus 200 prints, captured with this recipe.
A poor quality scan of one of the prints. Sorry. I really need to buy a better scanner.
For ISO 200 color negative film, Kodak High Definition Plus 200 was indeed pretty sharp and fine-grained. It was moderately vibrant (just a little above “true to life”) and contrasty but not overly contrasty. From what I can tell, it didn’t have as large of an exposure latitude as some of Kodak’s other color negative films. It was warm, but seemed to lean more towards green than red when printed on Fujicolor paper. Obviously, how the film is shot, developed, printed and/or scanned will affect how it looks (I apologize for my poor quality scan above, which doesn’t do the picture justice whatsoever, but I wanted to share it anyway). This recipe mimics how I shot the film in 2006, printed on Fujicolor paper. It is compatible with the Fujifilm X-Pro3, X100V, X-T4, X-S10, X-E4, and X-T30 II cameras.
Classic Chrome Dynamic Range: DR400 Highlight: 0 Shadow: +1 Color: +2 Noise Reduction: -4 Sharpening: 0 Clarity: -3 Grain Effect: Weak, Small Color Chrome Effect: Weak Color Chrome Effect Blue: Weak White Balance: 4800K, -2 Red & -7 Blue ISO: Auto, up to ISO 6400 Exposure Compensation: +1/3 to +2/3 (typically)
Example photographs, all camera-made JPEGs using this Kodak High Definition Plus 200 film simulation recipe on my Fujifilm X-E4 & Fujifilm X100V:
Walking Bridge – Farmington, UT – Fujifilm X-E4
Hollow Building – Bountiful, UT – Fujifilm X100V
Leaves that Left – Farmington, UT – Fujifilm X100V
Flag & Evergreen – Layton, UT – Fujifilm X-E4
Green Pine Needles – Farmington, UT – Fujifilm X100V
Red Roof – Farmington, UT – Fujifilm X-E4
Lonely Table – Orem, UT – Fujifilm X100V
Night Shopping Carts – Draper, UT – Fujifilm X100V
Pillow on Couch – Farmington, UT – Fujifilm X100V
Fake Succulent – Farmington, UT – Fujifilm X-E4
Evening Clouds Over Wasatch Mountains – Farmington, UT – Fujifilm X-E4
Disappearing Light on Francis Peak – Farmington, UT – Fujifilm X-E4
Nobody pays me to write the content found on fujixweekly.com. There’s a real cost to operating and maintaining this site, not to mention all the time that I pour into it. If you appreciated this article, please consider making a one-time gift contribution. Thank you!
Autumn on Kodachrome – Layton, UT – Fujifilm X-E4 – “Kodachrome 25”
The Kodachrome name has been used for many different films over the years. The first Kodachrome product was a two-glass-plate color negative that was introduced in 1915. Like all other color photography methods of its time, the results weren’t particularly good and the product not especially successful.
In 1935, Kodak released its next Kodachrome product: a positive color transparency film. This Kodachrome was the first film that produced reasonably accurate colors, and, because of that, was the first commercially successful color film. It became the standard film for color photography for a couple decades, and was even Ansel Adams’ preferred choice for color work. The December 1946 issue of Arizona Highways, which was the first all-color magazine in the world, featured Barry Goldwater’s Kodachrome images. While the most popular Kodachrome during this time was ISO 10, Kodak also produced an ISO 8 version, as well as a Tungsten option in the 1940s.
Kodak made significant improvements to Kodachrome, and in 1961 released Kodachrome II. This film boasted more accurate colors, sharper images, finer grain, and a faster ISO of 25. While it was still somewhat similar to the previous Kodachrome, it was better in pretty much every way. A year later Kodachrome-X was introduced, which had an ISO of 64, and produced more saturation and increased contrast, but was grainier.
Golden Red Berries – Farmington, UT – Fujifilm X-E4 – “Kodachrome 25”
In 1974, because Kodak created a less-toxic development process, Kodachrome II was replaced by Kodachrome 25 and Kodachrome-X was replaced by Kodachrome 64. This generation of Kodachrome is what most people think of when they picture (pun intended) the film, gracing the pages of magazines like National Geographic. Due to Kodachrome’s sharpness, grain, color, contrast, and archival characteristics, it was a great all-around option that worked well in most circumstance. Steve McCurry, who is perhaps the best-known photographer to extensively use this era of Kodachrome, said of the film, “It has almost a poetic look with beautiful colors that were vibrant and true to what you were shooting.”
This film simulation recipe is intended to mimic Kodachrome 25 color transparency film. I was fortunate to shoot a few rolls of Kodachrome 25. It was a beautiful film, and probably the sharpest color film ever made, but its low ISO made it difficult to use. Kodachrome 64, which was still a low-ISO film, was about 1 2/3 stops faster. The major differences between the two Kodachrome emulsions is that the ISO 25 version was sharper and less grainy, while the ISO 64 version was more contrasty, vibrant and a hair warmer. Both were very similar, though, and it would be hard to spot the differences without a close inspection. Some people preferred the slightly more subtle tones and finer detail of Kodachrome 25, and some preferred the faintly punchier pictures rendered on Kodachrome 64. I liked Kodachrome 64 a little more, and so that’s what I most often used.
Below are a couple examples of this Kodachrome 25 recipe compared to my Kodachrome 64 recipe:
Kodachrome 25 recipe
Kodachrome 64 recipe
Kodachrome 25 recipe
Kodachrome 64 recipe
In the example below, I made massive crops so that you could more easily see the subtle differences in sharpness and grain between the two Kodachrome recipes. The differences in warmth are also more obvious. If the Kodachrome 25 recipe could have a .25 adjustment warmer, and if the Kodachrome 64 recipe could have a .25 adjustment cooler, it would likely be more accurate, but alas we’re limited by what Fujifilm gives us. In the case of this recipe, a Color Chrome FX Blue Medium would be a nice option, but it doesn’t exist.
Kodachrome 25 recipe
Kodachrome 25 crop
Kodachrome 64 crop
When Kodak discontinued Kodachrome in 2009, it shocked the photographic community; however, the deeper blow was that Kodak discontinued the chemicals required to develop it. Even if you had an old roll of the film (which I did), you couldn’t develop it, except as a black-and-white film from a specialty lab. By the end of 2010, the Kodachrome era was officially over for good. Fortunately, if you have a Fujifilm camera, the spirit of Kodachrome still lives.
This Kodachrome 25 recipe is only compatible with the Fujifilm X-T4, X-S10, X-E4, and X-T30 II cameras. You can modify this for the X-Pro3 and X100V by setting Highlight to 0 and Shadow to -1 instead of what it calls for—I don’t like it quite as much, but it’s pretty similar.
Classic Chrome Dynamic Range: DR400 Highlight: +0.5 Shadow: -0.5 Color: +1 Noise Reduction: -4 Sharpening: +3 Clarity: +3 Grain Effect: Off Color Chrome Effect: Strong Color Chrome Effect Blue: Strong White Balance: Daylight, +2 Red & -4 Blue ISO: Auto, up to ISO 1600 Exposure Compensation: 0 to +2/3 (typically)
Example photographs, all camera-made JPEGs using this new Kodachrome 25 film simulation recipe on my Fujifilm X-E4:
Pedestrian Bridge – Farmington, UT – Fujifilm X-E4
Empty Stairs – Farmington, UT – Fujifilm X-E4
Red Box – Farmington, UT – Fujifilm X-E4
Locked Fire Box – Farmington, UT – Fujifilm X-E4
Three Bike Boxes – Farmington, UT – Fujifilm X-E4
Trains Can’t Stop – Farmington, UT – Fujifilm X-E4
Ceiling Conduit – Farmington, UT – Fujifilm X-E4
Delivering Boxes – Roy, UT – Fujifilm X-E4
Josh in Shadow – Farmington, UT – Fujifilm X-E4
Orange Leaves – Layton, UT – Fujifilm X-E4
Path Through A Fall Forest – Farmington, UT – Fujifilm X-E4
Golden Light on Mountain – Farmington, UT – Fujifilm X-E4
Last Light on Francis Peak – Farmington, UT – Fujifilm X-E4
Nobody pays me to write the content found on fujixweekly.com. There’s a real cost to operating and maintaining this site, not to mention all the time that I pour into it. If you appreciated this article, please consider making a one-time gift contribution. Thank you!
Two days ago I published my new Retro Gold film simulation recipe, which is great for “golden hour” photography. That recipe has a lot of contrast in it—I stated in the article that it was similar to slide film or maybe push-processed negative film. A high-contrast recipe works great in situations that are low-contrast. Sometimes when the sun is low, the scenes you encounter aren’t low-contrast, but high contrast. In those cases, the Retro Gold recipe may not be the best choice. Thomas Schwab suggested that I should create a low-contrast version that’s better suited for high-contrast situations—that’s how this recipe, which I call Retro Gold Low Contrast, came to be.
This recipe has more of a color negative film look (Kodak Gold, maybe?). The color cast is perhaps similar to using an enhancing filter (and maybe a polarizer, too). Like the other recipe, this one isn’t intended to mimic any specific film, but it definitely has an analog aesthetic to it.
Yellow Leaf of Autumn – Farmington, UT – Fujifilm X-E4 – “Retro Gold Low Contrast”
Because this “Retro Gold Low Contrast” film simulation recipe uses Clarity and Color Chrome FX Blue, it’s compatible with the Fujifilm X-Pro3, X100V, X-T4, X-S10, X-E4, and X-T30 II cameras. It might also be compatible with the newer GFX cameras, too, although I’m not certain of that. Unfortunately, it’s not compatible with the X-T3 and X-T30.
Classic Chrome Dynamic Range: DR400 Highlight: 0 Shadow: -2 Color: +4 Noise Reduction: -4 Sharpening: 0 Clarity: -3 Grain Effect: Weak, Small Color Chrome Effect: Strong Color Chrome Effect Blue: Strong White Balance: Fluorescent 3 (“Cool White Fluorescent”), +4 Red & -6 Blue ISO: Auto, up to ISO 6400 Exposure Compensation: 0 to -2/3 (typically)
Example photographs, all camera-made JPEGs using this “Retro Gold Low Contrast” film simulation recipe on my Fujifilm X-E4:
Cloudy Ridge – Farmington, UT – Fujifilm X-E4
Cloudy Mountain – Farmington, UT – Fujifilm X-E4
Dressed Warm – Farmington, UT – Fujifilm X-E4
Vines up the Bark – Farmington, UT – Fujifilm X-E4
Long Yellow Leaves – Farmington, UT – Fujifilm X-E4
Nobody pays me to write the content found on fujixweekly.com. There’s a real cost to operating and maintaining this site, not to mention all the time that I pour into it. If you appreciated this article, please consider making a one-time gift contribution. Thank you!
Golden Red Berries – Farmington, UT – Fujifilm X-E4 – “Retro Gold”
This film simulation recipe began as an attempt to mimc the aesthetic of the Retro Effect on Ricoh GR cameras. There are several reasons why this recipe isn’t a good facsimile to that, but, even so, I really like what I came up with. It has a retro look to it that is somewhat reminiscent of slide film that’s been left in a hot car a little too long (or, perhaps, simply wasn’t stored correctly), and somewhat reminiscent of push-processed negative film, maybe something like Kodak Gold. It’s not intended to mimic any specific film, so any similarities to an analog aesthetic is a happy accident.
Because of its retro-golden look, I’ve named this recipe “Retro Gold.” It’s outstanding in evening light, and pretty good at other times, too. In some ways it reminds me of my Golden Negative recipe, and in some ways it reminds me of my Expired Slide recipe, but it’s not really like either. While you can use it anytime, this is a film simulation recipe that I recommend you try during your next “golden hour” photographic outing.
One Way To The Mountains – Farmington, UT – Fujifilm X-E4 – “Retro Gold”
Because this “Retro Gold” film simulation recipe uses Clarity and Color Chrome FX Blue, it’s compatible with the Fujifilm X-Pro3, X100V, X-T4, X-S10, X-E4, and X-T30 II cameras. It might also be compatible with the newer GFX cameras, too, although I’m not certain of that. Unfortunately, it’s not compatible with the X-T3 and X-T30. If you don’t want to use Clarity because it slows down the camera, an alternative might be to use a diffusion filter, like the 1/8 Black Pro Mist or 5% CineBloom. Another option for this recipe that you are welcome to try is a stronger grain effect. I went with Weak and Small because I wasn’t attempting a particular film look, but it would likely look nice with as much as Strong and Large.
Classic Chrome Dynamic Range: DR400 Highlight: +4 Shadow: +2 Color: +4 Noise Reduction: -4 Sharpening: 0 Clarity: -2 Grain Effect: Weak, Small Color Chrome Effect: Strong Color Chrome Effect Blue: Strong White Balance: Fluorescent 3 (“Cool White Fluorescent”), +4 Red & -6 Blue ISO: Auto, up to ISO 6400 Exposure Compensation: 0 to -2/3 (typically)
Example photographs, all camera-made JPEGs using this “Retro Gold” film simulation recipe on my Fujifilm X-E4 & Fujifilm X100V:
Hazy Evening Berries – Farmington, UT – Fujifilm X-E4
Sunset Red – Farmington, UT – Fujifilm X-E4
Purple Thistle – Farmington, UT – Fujifilm X-E4
Golden November Leaves – Farmington, UT – Fujifilm X-E4
Golden Evening Leaves – Farmington, UT – Fujifilm X-E4
Autumn Yellow Leaf – Farmington, UT – Fujifilm X-E4
Thorns & Leaves – Farmington, UT – Fujifilm X-E4
Boy In The Shadow – Farmington, UT – Fujifilm X-E4
Bokeh Abstract – Farmington, UT – Fujifilm X-E4
Partly Cloudy Sky Reflected – Salt Lake City, UT – Fujifilm X100V
Evening Housetop – Farmington, UT – Fujifilm X-E4
Neighborhood Autumn Leaves – Farmington, UT – Fujifilm X100V
Hidden Neighborhood Evening – Farmington, UT – Fujifilm X100V
Nobody pays me to write the content found on fujixweekly.com. There’s a real cost to operating and maintaining this site, not to mention all the time that I pour into it. If you appreciated this article, please consider making a one-time gift contribution. Thank you!
Pumpkin – Farmington, UT – Fujifilm X-T1 – “Kodacolor 200”
For this recipe, I was attempting to recreate a Kodak Portra 400 NC aesthetic. A couple of decades ago, Portra (both the ISO 160 and ISO 400 emulsions) came in two versions: NC (“Neutral Color”) and VC (“Vivid Color”). Kodak later revised the film to be something in-between the two, which they simply called Portra 160 and Portra 400. This recipe is, I believe, in the general ballpark of Portra 400 NC, but not exactly right; however, I like the results anyway. So if this recipe is close to Kodak Portra 400 NC, why did I call it Kodacolor 200? Because I think it is actually a little closer to Kodacolor 200, which is a variety of Kodacolor VR, and related to ColorPlus 200. I wouldn’t call it an exact match to Kodacolor 200, but that’s the film this is most likely closest to. If you want a Portra 400 NC or Kodacolor 200 aesthetic, this recipe is relatively similar to both.
There’s a fair amount of contrast produced by this recipe, which looks really good in conditions without harsh light. In bright daylight, the contrast might be a little too much, perhaps more closely resembling push-processed film, or (to a lessor extent) even bleach-bypassed Portra. On bright days, you might consider dropping both Shadow and Highlight to +1 if you find it to be too contrasty. I believe this film simulation recipe produces its best results when the sun is a little obscured, but not heavy overcast; however, it’s possible to get good results in many different circumstances. If your X-Trans II camera has Classic Chrome, I invite you to give this recipe a try—it’s a great high-contrast, low saturation option.
Power Pole Cup – Farmington, UT – Fujifilm X-T1 – “Kodacolor 200”
Classic Chrome Dynamic Range: DR200 Highlight: +2 (Hard) Shadow: +2 (Hard) Color: -2 (Low) Sharpness: -1 (Medium-Soft) Noise Reduction: -2 (Low) White Balance: 3200K, +8 Red & -8 Blue ISO: Auto up to ISO 3200 Exposure Compensation: 0 to +2/3 (typically)
Example photographs, all camera-made JPEGs captured on my Fujifilm X-T1 using this Kodacolor 200 film simulation recipe:
Phragmites – Farmington, UT – Fujifilm X-T1
Touch of Red – Salt Lake City, UT – Fujifilm X-T1
Pumpkin Stem – Farmington, UT – Fujifilm X-T1
Autumn Shrub – Farmington, UT – Fujifilm X-T1
Ground Leaves – Farmington, UT – Fujifilm X-T1
Neighborhood Autumn Tree – Farmington, UT – Fujifilm X-T1
Creek Path in Autumn – Farmington, UT – Fujifilm X-T1
Nobody pays me to write the content found on fujixweekly.com. There’s a real cost to operating and maintaining this site, not to mention all the time that I pour into it. If you appreciated this article, please consider making a one-time gift contribution. Thank you!