Fujifilm X-E4 Film Simulation Recipe: Kodachrome 25

Autumn on Kodachrome – Layton, UT – Fujifilm X-E4 – “Kodachrome 25”

The Kodachrome name has been used for many different films over the years. The first Kodachrome product was a two-glass-plate color negative that was introduced in 1915. Like all other color photography methods of its time, the results weren’t particularly good and the product not especially successful.

In 1935, Kodak released its next Kodachrome product: a positive color transparency film. This Kodachrome was the first film that produced reasonably accurate colors, and, because of that, was the first commercially successful color film. It became the standard film for color photography for a couple decades, and was even Ansel Adams’ preferred choice for color work. The December 1946 issue of Arizona Highways, which was the first all-color magazine in the world, featured Barry Goldwater’s Kodachrome images. While the most popular Kodachrome during this time was ISO 10, Kodak also produced an ISO 8 version, as well as a Tungsten option in the 1940s.

Kodak made significant improvements to Kodachrome, and in 1961 released Kodachrome II. This film boasted more accurate colors, sharper images, finer grain, and a faster ISO of 25. While it was still somewhat similar to the previous Kodachrome, it was better in pretty much every way. A year later Kodachrome-X was introduced, which had an ISO of 64, and produced more saturation and increased contrast, but was grainier. 

Golden Red Berries – Farmington, UT – Fujifilm X-E4 – “Kodachrome 25”

In 1974, because Kodak created a less-toxic development process, Kodachrome II was replaced by Kodachrome 25 and Kodachrome-X was replaced by Kodachrome 64. This generation of Kodachrome is what most people think of when they picture (pun intended) the film, gracing the pages of magazines like National Geographic. Due to Kodachrome’s sharpness, grain, color, contrast, and archival characteristics, it was a great all-around option that worked well in most circumstance. Steve McCurry, who is perhaps the best-known photographer to extensively use this era of Kodachrome, said of the film, “It has almost a poetic look with beautiful colors that were vibrant and true to what you were shooting.”

This film simulation recipe is intended to mimic Kodachrome 25 color transparency film. I was fortunate to shoot a few rolls of Kodachrome 25. It was a beautiful film, and probably the sharpest color film ever made, but its low ISO made it difficult to use. Kodachrome 64, which was still a low-ISO film, was about 1 2/3 stops faster. The major differences between the two Kodachrome emulsions is that the ISO 25 version was sharper and less grainy, while the ISO 64 version was more contrasty, vibrant and a hair warmer. Both were very similar, though, and it would be hard to spot the differences without a close inspection. Some people preferred the slightly more subtle tones and finer detail of Kodachrome 25, and some preferred the faintly punchier pictures rendered on Kodachrome 64. I liked Kodachrome 64 a little more, and so that’s what I most often used.

Below are a couple examples of this Kodachrome 25 recipe compared to my Kodachrome 64 recipe:

Kodachrome 25 recipe
Kodachrome 64 recipe
Kodachrome 25 recipe
Kodachrome 64 recipe

In the example below, I made massive crops so that you could more easily see the subtle differences in sharpness and grain between the two Kodachrome recipes. The differences in warmth are also more obvious. If the Kodachrome 25 recipe could have a .25 adjustment warmer, and if the Kodachrome 64 recipe could have a .25 adjustment cooler, it would likely be more accurate, but alas we’re limited by what Fujifilm gives us. In the case of this recipe, a Color Chrome FX Blue Medium would be a nice option, but it doesn’t exist.

Kodachrome 25 recipe
Kodachrome 25 crop
Kodachrome 64 crop

When Kodak discontinued Kodachrome in 2009, it shocked the photographic community; however, the deeper blow was that Kodak discontinued the chemicals required to develop it. Even if you had an old roll of the film (which I did), you couldn’t develop it, except as a black-and-white film from a specialty lab. By the end of 2010, the Kodachrome era was officially over for good. Fortunately, if you have a Fujifilm camera, the spirit of Kodachrome still lives.

This Kodachrome 25 recipe is only compatible with the Fujifilm X-T4, X-S10, X-E4, and X-T30 II cameras. You can modify this for the X-Pro3 and X100V by setting Highlight to 0 and Shadow to -1 instead of what it calls for—I don’t like it quite as much, but it’s pretty similar.
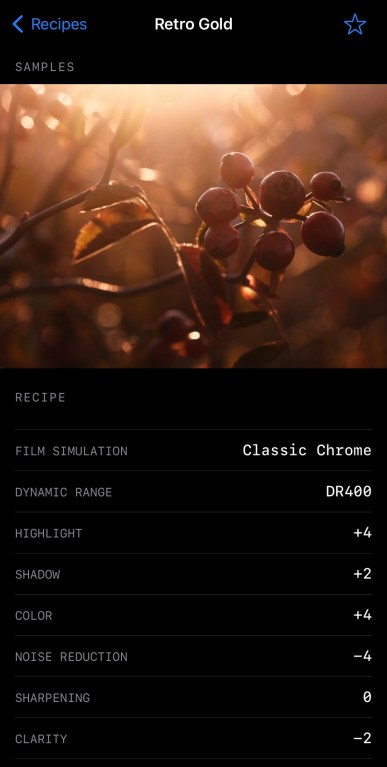
Classic Chrome
Dynamic Range: DR400
Highlight: +0.5
Shadow: -0.5
Color: +1
Noise Reduction: -4
Sharpening: +3
Clarity: +3
Grain Effect: Off
Color Chrome Effect: Strong
Color Chrome Effect Blue: Strong
White Balance: Daylight, +2 Red & -4 Blue
ISO: Auto, up to ISO 1600
Exposure Compensation: 0 to +2/3 (typically)

Example photographs, all camera-made JPEGs using this new Kodachrome 25 film simulation recipe on my Fujifilm X-E4:

Pedestrian Bridge – Farmington, UT – Fujifilm X-E4
Empty Stairs – Farmington, UT – Fujifilm X-E4
Red Box – Farmington, UT – Fujifilm X-E4
Locked Fire Box – Farmington, UT – Fujifilm X-E4
Three Bike Boxes – Farmington, UT – Fujifilm X-E4
Trains Can’t Stop – Farmington, UT – Fujifilm X-E4
Ceiling Conduit – Farmington, UT – Fujifilm X-E4
Delivering Boxes – Roy, UT – Fujifilm X-E4
Josh in Shadow – Farmington, UT – Fujifilm X-E4
Orange Leaves – Layton, UT – Fujifilm X-E4
Path Through A Fall Forest – Farmington, UT – Fujifilm X-E4
Golden Light on Mountain – Farmington, UT – Fujifilm X-E4
Last Light on Francis Peak – Farmington, UT – Fujifilm X-E4

Find this film simulation recipe and many more on the Fuji X Weekly — Film Recipes App!

Help Fuji X Weekly

Nobody pays me to write the content found on fujixweekly.com. There’s a real cost to operating and maintaining this site, not to mention all the time that I pour into it. If you appreciated this article, please consider making a one-time gift contribution. Thank you!

$2.00

FXW Zine — Issue 01 — December 2021

Introducing the FXW Zine, a publication of Fuji X Weekly!

This new eZine is an extension of this website and a part of the Creative Collective. If you are a Creative Collective subscriber, then you can download the inaugural issue of FXW Zine right now (below).

What’s in the December issue? How big is it? There are four articles: Behind the Picture: The Story of Jacob’s Ladder, The Beauty of Grey, Perfectly Pine, and Photograph Before It’s Too Late. There are 17 photographs, including the cover image (above). This issue is 12 pages long cover-to-cover. I hope that you find it entertaining and inspiring. I plan on this being a monthly publication, but I don’t want to promise that in case I have to skip a month here and there, but it should be roughly a once-a-month thing.

If you haven’t joined the Creative Collective (learn more about it here), consider subscribing today to get access to bonus articles and the brand-new FXW Zine.

Note: This was a Creative Collective article, but it is now available to everyone.

View and download Issue 01 of FXW Zine here:

New Patron Early-Access Film Simulation Recipe: Fujicolor Analog

Cotton On – Farmington, UT – Fujifilm X100V – “Fujicolor Analog”

The Fuji X Weekly App is free, yet becoming a Fuji X Weekly Patron unlocks the best App experience! One benefit of being a Patron is you get early access to some new film simulation recipes. These early-access recipes will eventually become available free to everyone in time, including this new one. In fact, many early-access recipes have already been publicly published on this blog and the App, so now everyone can use them. Patrons help support Fuji X Weekly and, really, without them there would be no App. So I want to give a special “thank you” to all of the Patrons!

This new Patron early-access recipe is called Fujicolor Analog. I was asked to recreate the look of a certain photographer, and I noticed that a lot of their photographs had a Classic Negative aesthetic, so I thought it would be easy to mimic. It turns out that this person shoots a lot of film, including (but not limited to) Fujicolor C200 and various Superia emulsions, as well as digital (but not Fujifilm, as far as I can tell), using RNI and perhaps some other filters or presets. Nothing said what each picture had been captured with, so it became difficult to recreate. After a little frustration, I decided to select only pictures with a certain aesthetic to attempt to emulate. I believe these might have been captured on a Superia emulsion, but they might not have been—they might not even be film! I think I was able to create a pretty close facsimile to this person’s aesthetic… at least one of the many various (but still somewhat similar) looks that this photographer has.

One film can have many different looks, depending on how it was shot, developed, and printed or scanned. I do believe this “Fujicolor Analog” recipe mimics the aesthetic of a Fujifilm color negative film, but which exact film, and how handled, is uncertain. What is certain is that this is a very nice film simulation recipe that some of you will love! It’s compatible with the Fujifilm X-Pro3, X100V, X-T4, X-S10, X-E4, X-T30 II cameras.

If you are a Fuji X Weekly Patron, it’s available to you right now on the App!

Example photographs, all camera-made JPEGs captured using this “Fujicolor Analog” film simulation recipe on my Fujifilm X100V:

Noble Fir – Kaysville, UT – Fujifilm X100V
Pine Trunk – Kaysville, UT – Fujifilm X100V
Burly Ladder – Kaysville, UT – Fujifilm X100V
Red Lights – Kaysville, UT – Fujifilm X100V
Utah Reeds – Farmington, UT – Fujifilm X100V
Pine in the Sky – Farmington, UT – Fujifilm X100V
Withering Blooms – Orem, UT – Fujifilm X100V
Peaks Above The Gap – Orem, UT – Fujifilm X100V
Arts – Draper, UT – Fujifilm X100V
Stop Spreading Germs – Draper, UT – Fujifilm X100V
Pharmacy Lift – Centerville, UT – Fujifilm X100V

Fujifilm X-Trans IV Film Simulation Recipe: Vintage Negative

Vintage Berries – Farmington, UT – Fujifilm X100V – “Vintage Negative”

This new film simulation recipe isn’t actually new. It’s been a Patron early-access recipe on the Fuji X Weekly App for awhile, so App Patrons have had the opportunity to shoot with it for many months. It’s been replaced with a different early-access recipe, so now it’s available to everyone! If you are an App Patron, be sure to look for the new early-access recipe.

I call this recipe “Vintage Negative” because it is based on some old photographs that someone shared with me. The pictures were old family prints that this person had found in a box. The film used was unknown, and it’s hard to know just how much of the aesthetic was from the film itself, and how much was from the print, which likely had a color shift from age. If you’re looking for an aged analog aesthetic, this recipe is for you!

Mountain Painted in Sunset Orange – Farmington, UT – Fujifilm X-E4 – “Vintage Negative”

The “Vintage Negative” film simulation recipe is compatible with all X-Trans IV cameras except the X-T3 and X-T30. If you have a Fujifilm X-Pro3, X100V, X-T4, X-S10, X-E4, or X-T30 II camera, you can use this recipe. The newer GFX cameras can likely use it, too, although I’m not certain, and it will likely render the pictures slightly different.

Classic Negative
Dynamic Range: DR400
Highlight: +1
Shadow: +2
Color: -3
Noise Reduction: -4
Sharpeness: -4
Clarity: -5
Grain Effect: Strong, Large
Color Chrome Effect: Strong
Color Chrome Effect Blue: Strong
White Balance: 10000K, -6 Red & -5 Blue
ISO: Auto, up to ISO 6400
Exposure Compensation: +1/3 to +2/3 (typically)

Example photographs, all camera-made JPEGs using this “Vintage Negative” film simulation recipe on my Fujifilm X100V and Fujifilm X-E4 cameras:

Christmas Star – Kaysville, UT – Fujifilm X100V
Two Ladders – Kaysville, UT – Fujifilm X100V
Pine Needles – Farmington, UT – Fujifilm X100V
Water Tower – Salt Lake City, UT – Fujifilm X100V
Troller Square – Salt Lake City, UT – Fujifilm X100V
Yellow House Evening – Farmington, UT – Fujifilm X100V
Suburban Reed Evening – Farmington, UT – Fujifilm X100V
Clouds Around The Mountain Peak – Farmington, UT – Fujifilm X-E4
Sunset Thistles – Farmington, UT – Fujifilm X-E4
Phragmites Shoot – Farmington, UT –

Find this film simulation recipe and many more on the Fuji X Weekly — Film Recipes App!

Help Fuji X Weekly

Nobody pays me to write the content found on fujixweekly.com. There’s a real cost to operating and maintaining this site, not to mention all the time that I pour into it. If you appreciated this article, please consider making a one-time gift contribution. Thank you!

$2.00

How To Navigate Fuji X Weekly

When I created the Fuji X Weekly website, I wanted it to be clean and simple. I took a minimalistic approach to its design. For awhile it was clean and simple, but as the website grew and things evolved over time, it became less and less so.

The Blog used to be the Homepage, but now they’re separate—while the Blog is still pretty minimalistic, the Homepage is fairly busy. The two screenshots below show the cluttered Homepage compared to the clean Blog. The original design philosophy still serves a purpose, but in many ways Fuji X Weekly has outgrown it. I will likely at some point revamp the design, which would be a lot of work, but for now it remains as it gets the job done.

Because the Homepage is so busy, it’s easy to overlook things on there. For example, you might have missed that the 10 most recent blog posts can be accessed from it. Or that if you keep scrolling down, there’s an option to “Follow by Email” or even search the website. Because the Blog is so clean, it’s easy to miss much of the available material. The point of this article is to shed some light on how to navigate this website so that you don’t miss anything. There’s much more content than many might realize.

Specifically, I want to talk about the Menus that some people might not even know exist. Before going into that, though, I want to mention that clicking on “Fuji X Weekly” over the camera (see the top picture in this article) will take you to the Homepage. No matter where you are, it’s easy to get back home. To the left and right of “Fuji X Weekly” at the top are what’s called Hamburger Menus. The top-left Hamburger Menu has three horizontal lines, and the top-right Hamburger Menu has four horizontal lines. The left menu will bring up a list of pages. The Homepage and the Blog are just two of 17 standalone pages on Fuji X Weekly. At the bottom is a search bar, which is helpful if you are searching for something specific. The right menu will bring up a list of recent blog posts, an archive of blog posts (you can browse through specific months, going all the way back to the beginning), and a search bar is on top. This is the easiest place to find specific articles, either by searching or browsing. The best way to think about it is: Pages are accessed via the left menu, Posts are accessed through the right menu.

Let’s talk briefly about those 17 standalone pages, accessed through the top-left menu.

The Homepage you already know. Next is About—there’s a short biography (and a link to an article that dives a little deeper into it), but most importantly there’s a “Contact Me” form, if you want to shoot me a message. Then there is the Blog, which, again, you already know. After that is the Creative Collective Corner, which is where you’ll find bonus articles for Creative Collective subscribers. Next is Development, which is simply a list of How-To and Photographic Advice type articles that I’ve published. The Film Simulation Recipes page is next. This is actually a redundant page that originally served a very different purpose. You see, for awhile all of the film simulation recipes were listed there, but then, as I made more-and-more, it just made more sense to separate them into different groups, and not all on one page. I didn’t want to delete the page because there were so many links to it. Now it serves as a launching platform (identical to what’s on the Homepage) to the different recipe groups. If you are not sure which sensor generation your camera has, there’s a list at the bottom of the page. After that is Film Simulation Reviews, which is a list of articles that demonstrate various recipes in different situations. Then there’s the Fuji X Weekly App page, which is everything you need to know about the App. The next six pages are where you’ll find all of the recipes: Bayer, GFX, X-Trans I, X-Trans II, X-Trans III, and X-Trans IV. After that is the Gear page, which is where you’ll find my camera and lens reviews. Next is SOOC Live, which is where you’ll find all of the SOOC episodes. Last but not least is the Video page, which is where you’ll find my YouTube videos.

All of that is accessed through that top-left menu!

The content in the top-right menu is more dynamic, and is always evolving as more articles are published. I want to mention one more time the search bar, which is such a great way to find things—especially if you are unsure where exactly it is located. If you can remember what the article was titled or about, the search feature can help you quickly find it.

Fuji X Weekly has been around for over four years, and I’ve published a lot of articles during that time. Most people come for the film simulation recipes, yet there’s lots of other great stuff to explore; however, it’s not always obvious what there is and where exactly it’s at on the website. The intention of this post is to help you find it. The top-left menu will take you to the various pages, the top-right menu will take you to various posts, and the “Fuji X Weekly” in-between will take you home.

FXW App: Filter by White Balance — How To Use This New Feature

The Fuji X Weekly App was updated just yesterday, and I want to discuss one of the new features that I think will be heavily used: Filter by White Balance! This feature is unlocked by becoming a Fuji X Weekly App Patron.

Filter by White Balance will be a game-changer for many of you. The most obvious use is for finding recipes that match the lighting conditions. Is it sunny? Find a recipe that uses the Daylight White Balance. Is it indoors in mixed lighting? Maybe Auto White Balance would be good. But there’s another way to use Filter by White Balance, which I’ll discuss below, that will make your Fujifilm experience even better!

If your Fujifilm camera is older than the X-Pro3, you cannot save White Balance Shift within the C1-C7 Custom Presets, and each time you change Presets, you have to remember to adjust the WB Shift. It can be a little annoying. However, for each White Balance type, the camera will remember one WB Shift, so if each of your C1-C7 presets uses a different White Balance type, when you switch Presets, you won’t have to adjust the WB Shift. Amazing!

Let’s take a more practical look at this. If you have a Fujifilm X-T3 (for example), we’ll Filter by Camera and select the camera. For the X-T3, you’ll have over 70 recipes to choose from!

Let’s select one recipe to be our C1 in the Custom Settings menu. We’re now going to Filter by White Balance, and tap Auto—there are nearly 40 recipes to choose from! If you find more than one that requires the same WB Shift—Classic Chrome and Velvia both use +1R & -1B, and Velvia v2 and Dramatic Monochrome both use 0R & 0B, just as a couple examples—you can actually use multiple recipes from this White Balance type, and potentially program more than just C1. For this example we’re going to pick just one, perhaps Eterna v3 (interestingly, Agfa Optima 200 shares this same shift, and could be used, too), to be our C1 preset.

For C2 we’re going to select Daylight. There are 12 options to choose from. Kodak Portra 160, Kodak Portra 400, and Kodak Gold 200 all share the same WB Shift, so, in theory, you could program all three of these into your Custom Settings presets. For this, let’s go with Kodak Tri-X 400 to be our C2.

Next, for C3, let’s select Kelvin. You have 15 to choose from. Let’s choose maybe Jeff Davenport Night.

For C4 we’ll go with the Fluorescent 1 White Balance. There are just two options, and we’ll select Kodak Vision3 250D.

It’s the same story for Fluorescent 2: there are only two options. We’ll choose Ektachrome E100G to be our C5 preset.

For C6 we’ll select Incandescent. There’s just one recipe: Eterna Bleach Bypass, so we’ll program that one in.

Lastly, we have C7, and for that we’ll select Shade. There are three options, and we’ll go with Porto 200.

Now we have our C1-C7 Custom Settings presets programmed! C1 is Eterna v3. C2 is Kodak Tri-X 400. C3 is Jeff Davenport Night. C4 is Kodak Vision3 250D. C5 is Ektachrome E100G. C6 is Eterna Bleach Bypass. And C7 is Porto 200. That’s a pretty good set! Since each preset uses a different White Balance type, you won’t have to adjust the WB Shift when you switch presets. For those White Balance types that don’t have very many options, such as Fluorescent 1, Fluorescent 2, etc., if you didn’t like any of the choices, you could alternatively use two recipes that share both the same White Balance and WB Shift (such as the ones mentioned earlier).

You can come up with multiple combinations of these C1-C7 options, and keep track of them using the new colored Stars. Maybe use Green Stars for these seven recipes, and come up with another seven that can be used together and mark them with Blue Stars, and another seven that are marked with Purple Stars. Just an idea.

I hope this all makes sense. Filter by White Balance can be useful in more than one way. If your camera is older than the X-Pro3, this will make your Fujifilm experience more enjoyable, as you won’t have to remember to check the WB Shift each time you change presets. If you don’t have the Fuji X Weekly App, download it now. If you do have the App and it didn’t automatically update, be sure to visit the appropriate App Store and manually update it. If you are not a Fuji X Weekly App Patron, for the best App experience, consider becoming a Patron today!

Available Now: The Fuji X Weekly App Update!

The big Fuji X Weekly App update is available right now!

If your phone or tablet didn’t automatically update the App, be sure to manually update it right away. Depending on your device and how you have it configured, it’s possible that you might have to delete the App and reinstall, but most people shouldn’t have to do that in order to update it. Hopefully for most of you it happened automatically already, and you’re good to go. The App update is in both the Google Play Store for Android and the Apple App Store for iOS.

What’s in this “big” update? Plenty! Some of the things are for everyone, and some of the things are only for Fuji X Weekly App Patrons. Let’s talk about the improvements that are for everyone first, and then we will get to the good stuff that’s for Patrons.

View Sample Pictures Larger

Normal size pictures.
Tap to view pictures larger.

This is a pretty straightforward improvement: tap on a picture to view larger, and tap again to return to normal size. One request that I’ve received many times is the ability to enlarge the sample pictures in each recipe. Now you can! Of course, you can view them even larger (and see more of them) on the website—there’s a link at the bottom of each recipe.

Sort by A-Z, Z-A, Newest-to-Oldest, & Oldest-to-Newest

Before this update, you could only sort the recipes either alphabetically A-Z or chronologically Newest-to-Oldest. Now I’ve added Z-A or Oldest-to-Newest as options. If you know the name of the recipe and it begins on or after the letter N, sorting Z-A might make it quicker to locate. Or if you know that a recipe you are looking for was published awhile ago, sorting Oldest-to-Newest might make more sense. This should make it a little easier and quicker to locate what you are searching for.

Now, to the good stuff!

All of the improvements mentioned below are available for Fuji X Weekly App Patrons. The best App experienced is reserved for Patrons, so if you are not one, consider subscribing today! Simply tap the Gear icon in the App, and then select Become a Patron.

Filter by White Balance or Dynamic Range

There are two new Filter options: White Balance and Dynamic Range. Some users will benefit from Filter by Dynamic Range, but Filter by White Balance is huge! If your Fujifilm camera is older than the X-Pro3, you cannot save White Balance Shift within C1-C7 Custom Presets, and each time you change Presets, you have to remember to adjust the WB Shift. It can be a little annoying. However, for each White Balance type, the camera will remember one WB Shift, so if each of your C1-C7 presets uses a different White Balance type, when you switch Presets, you won’t have to adjust the WB Shift. For many, this is a game-changer!

Favorite with Colored Stars

One really great upgrade is Favoriting with colored Stars. Before, when you tapped the Star to Favorite a recipe, it came in one color (yellow). But now you can choose between five different colors: yellow, red, green, blue, and purple. The benefit of this is that you can use colored Stars to organize recipes. Maybe yellow represents the recipes currently loaded into your camera, red represents the recipes you want to try next, and green represents the ones you tried in the past and really liked. Or maybe yellow is your favorite portrait recipes, green your favorite landscape recipes, and blue your favorite street recipes. Use the colored Stars to categorize the recipes however is meaningful to you. This is a great organizational tool, and, for some, this makes the App a significantly better experience.

Blank Recipe Cards

If you’ve ever created your own film simulation recipe, or if you’ve found some elsewhere that you like (perhaps on the Fuji X Weekly Community Recipes page, such as AstiAmore in the example above), you can now add them to your App! A new feature is blank recipe cards that you fill out. You can even add your own pictures from your camera roll! At some point down the road the idea is that you’ll be able to export, import, and share these custom recipes; however, that ability isn’t in this update—with any luck it will come before summer. Several of you have asked for blank recipe cards, and now you have them! This is a great new feature that many of you will really appreciate.

There’s one other thing that I want to mention: if you tap the Gear icon in the top-left of the App and look way down at the bottom, you will see Shop The Latest Fujifilm Gear. These are affiliate links to B&H and Amazon. If you are shopping for some new gear and you happen to think about it, I’ll be compensated a small amount if you make a purchase using my links. It’s a simple way to support Fuji X Weekly that doesn’t cost you anything.

Below are even more images of the new and improved Fuji X Weekly App!

I want to give a special thanks to Sahand Nayebaziz for all his hard work on this App update! Without him, not only would the App not be nearly as good as it is, but there wouldn’t be a Fuji X Weekly App at all. Thank you so much, Sahand!

Why I Love The Fujinon 35mm F/2

Chair & Pillow – Fujifilm X-T30 & Fujinon 35mm f/2 – “Ilford Delta Push Process

The Fujinon 35mm f/2 was once my most-used lens. It was what you would typically see attached to my Fujifilm X-T30, or sometimes my Fujifilm X-T1. There’s a lot to love about this lens, but I don’t use it nearly as often as I once did, and it has absolutely nothing to do with image quality.

You can read my full review of the Fujinon 35mm f/2 lens here. I don’t want to rehash what I’ve already stated, but simply tell you why I love this lens (and also why I don’t use it much anymore).

The 35mm f/2 is a lovely little lens that’s super sharp, has nice bokeh, has a pretty good maximum aperture of f/2, is fast, small and lightweight. It captures wonderful pictures! There’s not much at all that can be said negatively about it. It’s a solid prime with a very useful focal length. It’s a great example of the Fujinon quality that Fujifilm has become known for, and I would recommend it to anyone.

If it’s all sunshine and lollipops, why don’t I use this lens much anymore? It has to do with the focal-length. Earlier this year I got the new Fujinon 27mm f/2.8, which has a full-frame-equivalent focal-length of 40.5mm—nearly “standard” (as the eyes see), and only barely wide-angle. The 35mm lens is 52.5mm full-frame-equivalent, which is also in the range of “standard,” but is a little telephoto. (For those wondering, roughly 30mm on a Fujifilm camera, or 45mm on full-frame, is neither telephoto nor wide-angle). So these two lenses—27mm f/2.8 and 35mm f/2—are similar and in many ways redundant. The 27mm lens isn’t necessarily “better” but it is my preference because I like the focal-length just a little more. They’re both excellent options, but I only need one.

I do still use the 35mm f/2 sometimes. If I want just a little more reach, or if I need a little larger maximum aperture (such as for low-light photography), the 35mm lens is the one to grab. However, the number one reason why I choose it over the 27mm is because my wife often has the 27mm lens on her camera, so the 35mm—being a close second pick—is what I use on my camera instead. Of course, I have many other lenses to choose from, so sometimes I use the opportunity to try something completely different. In any event, I would be a little sad parting ways with the Fujinon 35mm f/2, but it wouldn’t really change much for me.

If you are looking for a standard prime lens that’s not too big or expensive and just captures wonderful pictures, the Fujinon 35mm f/2 is one to strongly consider. I like the 27mm f/2.8 just a little better, but the new one (with the aperture ring) is tough to find at the moment, so if you are impatient, this is an excellent alternative. The 35mm f/2 is such a good lens that it just seems “wrong” to give it a silver medal instead of gold, but when there are multiple options that are exceptional, things like that happen. Beside, you might prefer it over the 27mm, because you like the focal-length or larger aperture better. Maybe the Fujinon 35mm f/2 would suit your photography just a bit better.

Even though I don’t use it much anymore, I still love the Fujinon 35mm f/2, and would be plenty happy if it were the only lens I owned.

This post contains affiliate links, and if you make a purchase using my links I’ll be compensated a small amount for it.
Fujinon 35mm f/2 (Black) B&H Amazon
Fujinon 35mm f/2 (Silver) B&H Amazon

Man in Red – Fujifilm X-T1 & Fujinon 35mm f/2 – “Kodacolor
Pigeons Over A Roof – Fujifilm X-T30 & Fujinon 35mm f/2 – “Kodachrome 64
Mitchell Mesa – Fujifilm X-T1 & Fujinon 35mm f/2 – “Kodak Portra 160
Palm Tree Bees – Fujifilm X-T30 & Fujinon 35mm f/2 – “Kodachrome 64
Bright Spikes – Fujifilm X-T30 & Fujinon 35mm f/2 – “Kodachrome 64
Saguaro In The City – Fujifilm X-T30 & Fujinon 35mm f/2 – “Agfa APX 400
Dramatic Desert Sky – Fujifilm X-T30 & Fujinon 35mm f/2 – “Agfa APX 400
Dike Road – Fujifilm X-T1 & Fujinon 35mm f/2 – “Monochrome
Reflection on a Dirt Road – Fujifilm X-T30 & Fujinon 35mm – “Dramatic Monochrome
Terrible Ford – Boulder City, NV – Fujifilm X-T30 & Fujinon 35mm f/2 – “Agfa APX 400

Fujifilm X-Trans IV Film Simulation Recipe: Retro Gold Low Contrast

Purple Mountain – Farmington, UT – Fujifilm X-E4 – “Retro Gold Low Contrast”

Two days ago I published my new Retro Gold film simulation recipe, which is great for “golden hour” photography. That recipe has a lot of contrast in it—I stated in the article that it was similar to slide film or maybe push-processed negative film. A high-contrast recipe works great in situations that are low-contrast. Sometimes when the sun is low, the scenes you encounter aren’t low-contrast, but high contrast. In those cases, the Retro Gold recipe may not be the best choice. Thomas Schwab suggested that I should create a low-contrast version that’s better suited for high-contrast situations—that’s how this recipe, which I call Retro Gold Low Contrast, came to be.

This recipe has more of a color negative film look (Kodak Gold, maybe?). The color cast is perhaps similar to using an enhancing filter (and maybe a polarizer, too). Like the other recipe, this one isn’t intended to mimic any specific film, but it definitely has an analog aesthetic to it.

Yellow Leaf of Autumn – Farmington, UT – Fujifilm X-E4 – “Retro Gold Low Contrast”

Because this “Retro Gold Low Contrast” film simulation recipe uses Clarity and Color Chrome FX Blue, it’s compatible with the Fujifilm X-Pro3, X100V, X-T4, X-S10, X-E4, and X-T30 II cameras. It might also be compatible with the newer GFX cameras, too, although I’m not certain of that. Unfortunately, it’s not compatible with the X-T3 and X-T30.

Classic Chrome
Dynamic Range: DR400
Highlight: 0
Shadow: -2
Color: +4
Noise Reduction: -4
Sharpening: 0
Clarity: -3
Grain Effect: Weak, Small
Color Chrome Effect: Strong
Color Chrome Effect Blue: Strong
White Balance: Fluorescent 3 (“Cool White Fluorescent”), +4 Red & -6 Blue
ISO: Auto, up to ISO 6400
Exposure Compensation: 0 to -2/3 (typically)

Example photographs, all camera-made JPEGs using this “Retro Gold Low Contrast” film simulation recipe on my Fujifilm X-E4:

Cloudy Ridge – Farmington, UT – Fujifilm X-E4
Cloudy Mountain – Farmington, UT – Fujifilm X-E4
Dressed Warm – Farmington, UT – Fujifilm X-E4
Vines up the Bark – Farmington, UT – Fujifilm X-E4
Long Yellow Leaves – Farmington, UT – Fujifilm X-E4
Country Red – Farmington, UT – Fujifilm X-E4
November Red – Farmington, UT – Fujifilm X-E4
Orange Haze – Farmington, UT – Fujifilm X-E4
Orange Mountain – Farmington, UT – Fujifilm X-E4

Find this film simulation recipe and many more on the Fuji X Weekly — Film Recipes App!

Help Fuji X Weekly

Nobody pays me to write the content found on fujixweekly.com. There’s a real cost to operating and maintaining this site, not to mention all the time that I pour into it. If you appreciated this article, please consider making a one-time gift contribution. Thank you!

$2.00

Blurry Bokeh Balls As Abstract Art

Bokeh Abstract – Farmington, UT – Fujifilm X-E4 – “Retro Gold” recipe

Bokeh is an often discussed aspect of picture quality. A lot of people use the term, but I don’t know how commonly it is understood. Bokeh is a misspelled Japanese word that means fuzziness. In photography, it is used to describe the out-of-focus portion of a photograph. Good bokeh simply means that the quality of the blurry part of an image is pleasant. Obviously what is “good” is subjective, as different people have different tastes. When there are bright points (such as lights) that are out-of-focus in a picture, the camera will render them as blurry orbs, which are sometimes called “bokeh orbs” or “bokeh balls” or “bokeh circles” (depending on who you ask). Sometimes when people discuss “bokeh” they’re specifically talking about these orbs and not the rest of the blurry part of the picture, even though technically all of it is bokeh, and not just the bokeh balls.

In this article we’re going to purposefully create blurry bokeh balls as abstract art. We’re going to do some things in the name of creativity that might seem photographically unusual or even outlandish.

Hold on tight, because things are about to get fuzzy!

Note: This was a Creative Collective article, but now it is available to everyone.

This is a common use of “bokeh balls.”

The picture above is an example of how you most commonly see bokeh balls used in an image. The method is simple: subject closely focused to the lens, large aperture, and some background lights. In this case, the subject is holiday decor, the lens is the Fujinon 90mm f/2 at f/2, and the background is a lit Christmas tree. The bokeh balls aren’t the subject—they’re the background—although without them the picture would be a lot less interesting.

A similar technique can be used to make bokeh balls a more prominent part of a picture. Photograph wet glass, such as a car window, focusing on the drops, with some lights in the background. The two pictures below are examples of this. The first is a wet car windshield. The drops in the center are in focus, which is also where the bokeh balls are. Because of contrast, the water drops are secondary to the bokeh, and the fuzzy light circles are the subject. I used a Fujifilm X100V for this picture, programmed with the Kodachrome 64 film simulation recipe. The second picture is actually the glass from a picture frame that I removed and took to downtown Salt Lake City. I sprayed it with water, and focused on the drops. The city lights in the background became bokeh balls, which (again), because of contrast, is the subject. I used the Fujifilm X-T30 and 90mm f/2 lens, and the Jeff Davenport Night recipe.

Out-of-focus lights are the subject of this picture.
Even though you also notice the water, the lights are the subject of this picture.

Let’s take this a step further. What if none of the picture is in focus? What if everything is fuzzy? Certainly nobody actually purposefully captures a completely unfocused picture, right?

One technique is like the picture below. You can still tell what everything is. Even though the picture is entirely fuzzy, you know that it’s a tree with some string lights in it. It was captured with an X100F at f/2.8, manually focused short of the subject so that it would all be out-of-focus.

I don’t have to tell you that this is a tree.

Let me pause for a moment to talk about gear. In this case the camera doesn’t really matter, but the lens does—sort of. You can use any lens, but I find that telephoto tends to work better than wide-angle. The larger the maximum aperture the better—I used f/2.8 or larger. The close-focus capability of the lens is another factor to consider; you don’t need a macro lens, but it’s good if it can closely focus. You will manually focus the lens—typically, you’ll focus it to the close end, although occasionally you might focus to infinity if you are photographing something close.

What I wanted to do with this project is capture images like Bokeh Abstract at the very top of this article. The pictures would need to be completely out-of-focus (like the one above), but where you cannot tell what it is (like the top picture). Something more fanciful and even perhaps dreamlike—maybe more like that moment between sleep and wake when we’re wiping the slumber from our eyes and attempting to become aware of our surroundings but aren’t quite there yet. I wanted to create abstract art.

Let’s look at some images!

Holiday lights in a tree.
Lights above a dining room table.
Control panel in a car.
Lights on the front of a Costco building.
Lights on a strip-mall.

What’s great about this type of photography is that very ordinary and not especially photogenic scenes can become extraordinary. Yes, the tree covered in holiday lights could make a nice picture if in-focus, but out-of-focus it’s much more interesting. The other scenes I promise were not particularly intriguing, but make for compelling abstract pictures nonetheless. These are subjects that you might typically encounter in the course of your day, and, as long as you have a camera with you, the opportunity to create art is there for the taking. These were all captured after dark (after all, you need points of light, and, while not impossible, it is much less practical to do this in daylight), and with days getting shorter (in the northern hemisphere), the opportunities increase to create blurry bokeh balls as abstract art.

You don’t even need to leave your home! Crumple up and then unfold a small sheet of tinfoil. Shine a flashlight at it and—boom!—instant bokeh orbs to capture. That’s how I made the two photographs below. If you are bored one night, try this technique, and see what you capture.

Made with tinfoil and flashlight.
Shining the light from different angles creates different looks.

What about the picture at the very top? What is that?

The story behind Bokeh Abstract is interesting. I was sitting on my living room couch, getting ready to transfer the pictures from my camera to my phone. The camera was sitting on my lap, and when I powered it on, that’s what I saw on the rear screen. My four-year-old daughter has a mermaid blanket that’s covered in sequins, which was right in front of me reflecting the ceiling light. I quickly captured it before anything changed. After I snapped the picture, she got up and left the room, taking the blanket with her. It really was by happenstance that the lens was facing just right (and out of focus just right), and I had the awareness to snap the picture the moment that I saw it. That was an easy-to-miss picture opportunity that I was fortunate to capture. Keep your eyes peeled for not just lights, but reflected lights, too!

The Oxford dictionary defines abstract art as “art that does not attempt to represent external reality, but seeks to achieve its effect using shapes, forms, colors, and textures.” I don’t think any of these pictures will ever find themselves in an art exhibit, but they’re absolutely abstract art nonetheless. Maybe they’d make an interesting series if I captured enough of them.

Now it’s your turn! As the days get shorter, opportunities increase to create abstract photographs. Use a large aperture and don’t focus correctly, so that the points of light in the frame are bokeh orbs. See what interesting colors and patterns (or even randomness) that you can discover.

How To Use The Fuji X Weekly App (Videos)

I’ve been asked a few times recently to demonstrate through video how to use the Fuji X Weekly App. How do you get the most out of it? Some people are visual learners, and seeing it done makes much more sense than reading about it. If that’s you, this post is intended to help you.

I don’t currently have any videos that demonstrates this, as my two (below) only give a brief glimpse. They’re promotional videos and not how-to, although you can likely glean the gist of how it all works from them. I’m not really a “video guy” (just lightly dabble, I guess), so it’s not easy for me to whip something up real quick. However, I hope this article is helpful to you, as I share what is on YouTube regarding this. There are several great resources out there.

The SOOC series is a good starting point. For those who may not know, SOOC is a monthly live video series, with each episode focused on a different film simulation recipe. It is a collaboration between Tame Your Fujifilm (Fujifilm X-Photographer Nathalie Boucry) and Fuji X Weekly (Ritchie Roesch). SOOC is a fun and educational experience where we not only talk about Fujifilm camera settings, but also answer your questions and give tips and tricks. Basically, we’re trying to help you master your Fujifilm camera, with a focus on simplifying your photographic workflow.

As a part of this, Nathalie and I discuss and even demonstrate aspects of the Fuji X Weekly App. So if you are trying to understand how to use the App and how to get the most out of it, you without a doubt want to watch these episodes! They’re quite long, so under each video I’ve put a time that you should skip ahead to if you don’t want to watch the whole thing.

Skip to 48:43 & 1:06:30
Skip to 32:32
Skip to 23:58
Skip to 42:46 & 49:43
Skip to 21:00 & 29:20

Those SOOC episodes are great resources, and if you have the time I recommend watching them in their entirety. But if not, just skip ahead to those times under each video. Be sure to tune in on December 9th to catch Episode 06, as we will certainly discuss the App even more!

While I don’t have videos that show how to use the Fuji X Weekly App, other people have made some great videos that demonstrate how to do it! Yea! You’ll find these below—I’m sure they’ll be helpful to you.

Hopefully those above videos are great resources to you and will help you understand how to use the App. For those who prefer written words, check out these articles:

How To Add Film Simulation Recipes To Your Fujifilm Camera
Fuji X Weekly App: Filtering by Camera or Sensor?
Why You Should Become A Fuji X Weekly App Patron
Current 10 FXW App Patron Early-Access Recipes
Sneak Peek At The Fuji X Weekly App Update

Fujifilm Deals

There are a few new Fujifilm deals that were announced today. A couple are worth noting, namely $400 off of the X-T3 and $1,500 off the GFX50R! If you’ve been considering getting into the GFX system, this might be your best opportunity. For those looking out for a deal (perhaps for holiday shopping), those Fujifilm items that are currently on sale can be found below.

Cameras:
Fujifilm X-T3 – Save $400 – B&H Amazon
Fujifilm X-T4 – Save $200 – B&H Amazon
Fujifilm X-T30 – Save $100 – B&H Amazon

Lenses:
Fujinon 23mm f/1.4 – Save $200 – B&H Amazon
Fujinon 50mm f/1 – Save $200 – B&H Amazon

GFX:
GFX50R – Save $1,500 – B&H Amazon

This post contains affiliate links, and if you make a purchase using my links I’ll be compensated a small amount for it.

Fujifilm X-Trans IV Film Simulation Recipe: Retro Gold

Golden Red Berries – Farmington, UT – Fujifilm X-E4 – “Retro Gold”

This film simulation recipe began as an attempt to mimc the aesthetic of the Retro Effect on Ricoh GR cameras. There are several reasons why this recipe isn’t a good facsimile to that, but, even so, I really like what I came up with. It has a retro look to it that is somewhat reminiscent of slide film that’s been left in a hot car a little too long (or, perhaps, simply wasn’t stored correctly), and somewhat reminiscent of push-processed negative film, maybe something like Kodak Gold. It’s not intended to mimic any specific film, so any similarities to an analog aesthetic is a happy accident.

Because of its retro-golden look, I’ve named this recipe “Retro Gold.” It’s outstanding in evening light, and pretty good at other times, too. In some ways it reminds me of my Golden Negative recipe, and in some ways it reminds me of my Expired Slide recipe, but it’s not really like either. While you can use it anytime, this is a film simulation recipe that I recommend you try during your next “golden hour” photographic outing.

One Way To The Mountains – Farmington, UT – Fujifilm X-E4 – “Retro Gold”

Because this “Retro Gold” film simulation recipe uses Clarity and Color Chrome FX Blue, it’s compatible with the Fujifilm X-Pro3, X100V, X-T4, X-S10, X-E4, and X-T30 II cameras. It might also be compatible with the newer GFX cameras, too, although I’m not certain of that. Unfortunately, it’s not compatible with the X-T3 and X-T30. If you don’t want to use Clarity because it slows down the camera, an alternative might be to use a diffusion filter, like the 1/8 Black Pro Mist or 5% CineBloom. Another option for this recipe that you are welcome to try is a stronger grain effect. I went with Weak and Small because I wasn’t attempting a particular film look, but it would likely look nice with as much as Strong and Large.

Classic Chrome
Dynamic Range: DR400
Highlight: +4
Shadow: +2
Color: +4
Noise Reduction: -4
Sharpening: 0
Clarity: -2
Grain Effect: Weak, Small
Color Chrome Effect: Strong
Color Chrome Effect Blue: Strong
White Balance: Fluorescent 3 (“Cool White Fluorescent”), +4 Red & -6 Blue
ISO: Auto, up to ISO 6400
Exposure Compensation: 0 to -2/3 (typically)

Example photographs, all camera-made JPEGs using this “Retro Gold” film simulation recipe on my Fujifilm X-E4 & Fujifilm X100V:

Hazy Evening Berries – Farmington, UT – Fujifilm X-E4
Sunset Red – Farmington, UT – Fujifilm X-E4
Purple Thistle – Farmington, UT – Fujifilm X-E4
Golden November Leaves – Farmington, UT – Fujifilm X-E4
Golden Evening Leaves – Farmington, UT – Fujifilm X-E4
Autumn Yellow Leaf – Farmington, UT – Fujifilm X-E4
Thorns & Leaves – Farmington, UT – Fujifilm X-E4
Boy In The Shadow – Farmington, UT – Fujifilm X-E4
Bokeh Abstract – Farmington, UT – Fujifilm X-E4
Partly Cloudy Sky Reflected – Salt Lake City, UT – Fujifilm X100V
Evening Housetop – Farmington, UT – Fujifilm X-E4
Neighborhood Autumn Leaves – Farmington, UT – Fujifilm X100V
Hidden Neighborhood Evening – Farmington, UT – Fujifilm X100V
Marshland – Layton, UT – Fujifilm X100V
Sunset Mountains– Farmington, UT – Fujifilm X-E4

Find this film simulation recipe and many more on the Fuji X Weekly — Film Recipes App!

Help Fuji X Weekly

Nobody pays me to write the content found on fujixweekly.com. There’s a real cost to operating and maintaining this site, not to mention all the time that I pour into it. If you appreciated this article, please consider making a one-time gift contribution. Thank you!

$2.00

Are You A Better Photographer Than A Middle Schooler? — Photography Challenge

Jonathan capturing pictures for his middle school art project.

Do you remember the television gameshow hosted by comedian Jeff Foxworthy called Are You Smarter Than a 5th Grader? If not, the premise was pretty simple: answer questions from elementary school textbooks, with the most difficult questions taken from the fifth grade. Actual fifth grade students were on hand to offer help if the contestants should need it (and they always did). It turns out that most adults don’t remember the things they learned in elementary school—only two people ever won the million dollar grand prize. Those who lost had to admit on camera that they were not smarter than a fifth grader.

My 12-year-old son, Jon, is taking an art class in school, and one unit of this class is on photography. A project that he had to complete for this was to capture 10 photographs, each using a different and specific element of art. I let Jon use my Fujifilm X-E4 with a Fujinon 27mm f/2.8 lens attached. I did this same project right along side him, and I used a Fujifilm X-T30 with a Fujinon 35mm f/2 lens attached. Were my pictures going to be better than a middle schooler’s? How about you—are your pictures better than a middle schooler’s?

Let’s do this challenge together! There’s no prize, but it will be fun.

Note: this was a Creative Collective article, but now it’s available to everyone.

The “Are You A Better Photographer Than A Middle Schooler?” photography challenge is this:
– Capture 10 pictures
– Each picture needs to incorporate a different element of art
– The 10 “elements of art” for this project are:
1. Balance
2. Color
3. Contrast
4. Framing
5. Line
6. Movement
7. Pattern
8. Shape
9. Space
10. Texture

For this challenge, Jonathan and I went to a small downtown in Bountiful, Utah. The location for this project doesn’t matter, but I chose this spot for us because I thought we’d encounter a good variety of subjects that might make things a bit easier. We spent maybe an hour doing this, all during the “golden hour” because that’s when good light is most commonly plentiful, and good light is often a prerequisite to good photographs. If you are looking for advice to improve your photography, let me offer this: concentrate capturing pictures during the hour immediately following sunrise and the hour immediately before sunset. I programmed the Fujicolor Superia 1600 recipe into the X-E4 because that’s what Jon chose (via the Fuji X Weekly App). I used my Porto 200 and Cross Process recipes on my X-T30.

Now, to the pictures!

Element of Art: Balance

Jon’s photo:

My photo:

This was a more challenging “element of art” to capture photographically than I expected. Maybe my creative mind wasn’t running on all cylinders for this particular image, or perhaps there just wasn’t a lot of opportunities for a “balance” picture. For my image, I was trying to find where the bench balanced between the vertical, horizontal, and diagonal lines. I don’t think I was particularly successful. This image would have worked better in black-and-white, and definitely if there had been a person sitting on the bench. Jon said of his picture, “I was balancing the door with the trashcans.”

Element of Art: Color

Jon’s photo:

My photo:

Color was a much more obvious and easier element of art to incorporate. Jon found a vibrant jacket in a store to photograph, while I used the Cross Process recipe to make the colors in my image stand out.

Element of Art: Contrast

Jon’s photo:

My photo:

Contrast can be tackled a number of different ways—I took it more literally. The building (which was partly in the sun and partly not) was reflected in the car window, which made it appear more contrasty, and the Cross Process recipe helped accentuate that. Jon said of his picture, “I saw the white sign with black writing on a black pole.”

Element of Art: Framing

Jon’s photo:

My photo:

Jon framed his subject (the monument) with flowers. I framed my subject (the words “Studio 10” twice) with a window frame. Framing is easy, framing effectively isn’t always easy. My picture for Color was probably a better example of framing, but I was thinking of color and not framing when I captured it.

Element of Art: Line

Jon’s photo:

My photo:

I used the stair’s railing as leading lines to the door. Jon said of his picture, “I used the lines on the sidewalk to take you to the vertical lines of the poles.” Having lines run from the corners of the picture to the subject is an effective way to guide the viewer through an image.

Element of Art: Movement

Jon’s photo:

My photo:

Jon did some panning with a slow shutter speed to incorporate this element of art into his photograph. I used a slow shutter speed, too, but kept the camera still and let the moving objects blur as they passed through the frame.

Element of Art: Pattern

Jon’s photo:

My photo:

What drew my attention to this photo opportunity was the Albert Einstein quote in the window situated above the trashcans, and I thought of the potential commentary of it. How does the picture fulfill the Pattern element? Obviously the bricks are a repeated pattern, but what I saw was the trashcans and the electrical box with a similar shape. Perhaps this picture is a stretch for this element. The natural patterns in Jon’s picture are a little more obvious.

Element of Art: Shape

Jon’s photo:

My photo:

Jon and I both photographed circles, although much differently. I think there’s a lot of opportunity with this element for creativity, but we didn’t do much to explore it. Mine was captured near the very beginning of our outing (before the creative juices were flowing), and Jon’s at the very end (when he was looking for anything to fulfill the Shape element).

Element of Art: Space

Jon’s picture:

My pictures:

For this element of art, Jon photographed a large empty room that looked even bigger because of a mirror running across the back wall. The small streak of light leads to a barely visible stool, and perhaps a ballet shoe sits on the floor. I photographed a largely empty room for this element, too, although not nearly as spacious-looking. Jon makes an appearance in both pictures. I think this element would be easier in a rural environment.

Element of Art: Texture

Jon’s photo:

My photo:

Jon was really unsure of how to capture Texture, so I suggested to him that we do some double-exposure photography for this. It worked out pretty well, although this is certainly not the only way to tackle this element of the challenge.

Conclusion

This challenge was actually more difficult than I thought it was going to be. It’s not necessarily hard to photograph these 10 elements of art by happenstance throughout time, but to purposefully seek these things out and create an interesting photograph of them is a whole different story. It’s definitely something that I want to try again!

Doing challenges like this are good because they keep you in photographic shape. Musicians constantly practice. Athletes constantly train. Photographers need to continuously practice their art, but it’s easy to get in a rut. Challenges like this help you to get out of your rut and stay in photographic shape, even if none of your images from this challenge are particularly compelling.

How do you think that I did? Am I a better photographer than a middle schooler? Or do I need to say that I’m not? Let me know in the comments who did better with each Element of Art! I think Jon beat me in at least a few of them.

This challenge is for you, too! Below is a Word document that you can download—print it and take it with you! I had the 10 elements of art typed out on a note on my phone, and that worked well enough. Whatever helps you to remember the elements and keep track of what you’ve captured is what you should do. The Word document may or may not be helpful, but it is available to you if you want it, and I’m hoping that at least a few of you find it useful.

I hope that you try this challenge. If you do, let me know! Even better, try it with a friend. If you post the pictures somewhere on the web, leave a link to it in the comments, because I’d love to see them.

Why I Love The Fujinon 27mm F/2.8

As I was getting ready to write this article, I was looking around my gear cabinet for this lens and I couldn’t locate it. When I did find it, the lens was attached to my wife’s X-T4! It turns out that the Fujinon XF 27mm f/2.8 R WR is her favorite lens. It seems that whenever I want to use it, the lens is attached to her camera. This is the only lens that we fight over.

That first paragraph could be the entirety of this article. It says everything that you need to know (although my full review of the 27mm f/2.8 lens can be read here). If there could only be one lens in our household, it would be this one! But why? What makes this lens special?

The technical specs for this lens don’t stand out. A maximum aperture of f/2.8 isn’t eye-popping. The stats seem kind of ho-hum—in fact, that is why I hesitated to buy this lens in the first place. But stats don’t tell the whole story. What’s most important are the pictures, and the Fujinon XF 27mm f/2.8 R WR captures wonderful photographs!

Why does this lens capture such good images? It’s the sharpness, the micro-contrast, and the bokeh, which are all excellent. Perhaps, above all that, it’s the very useful focal-length, as 27mm is full-frame-equivalent to 40.5mm, which is pretty close to “normal” and very similar to what the eyes see. You can use this focal-length for most genres of photography. Useful and excellent—that’s the best summery of why I (we, actually) love this lens so much.

Fujifilm X-E4 & Fujinon 27mm f/2.8 with Positive Film

This is speaking nothing of the compact-size and lightweightness (I don’t think that’s a word) of this pancake lens, which makes it a joy to carry. Your gear is better when it doesn’t get in the way of itself, and this one—the smallest lens in the Fujinon lineup—certainly stays out of the way.

Ask anyone who owns this lens (or even the original 27mm f/2.8, which is optically identical), and they’ll tell you that it’s one of their favorites. On paper it shouldn’t be, but it is, because “on paper” is much different than real world use. The Fujinon XF 27mm f/2.8 R WR is an easy lens to recommend to anyone. However, if there’s one issue, it’s that this lens is really difficult to find right now, so if you are shopping for it, I wish you the best of luck.

This post contains affiliate links, and if you make a purchase using my links I’ll be compensated a small amount for it.

Buy the Fujinon 27mm f/2.8 lens here:
B&H Amazon

Fujifilm X-E4 & Fujinon 27mm f/2.8 with “Scanned Superia
Fujifilm X-E4 & Fujinon 27mm f/2.8 with “Fujicolor C200
Fujifilm X-E4 & Fujinon 27mm f/2.8 with AgfaChrome RS 100
Fujifilm X-E4 & Fujinon 27mm f/2.8 with “Super HG Astia
Fujifilm X-E4 & Fujinon 27mm f/2.8 with “Fujicolor Super HG v2

SOOC – SE01E05 – Agfa Optima 200

Episode 05 of SOOC was yesterday—I had a great time, and I hope you did, too. I want to give a big “Thank You” to everyone who tuned in and participated—you are the ones who make these episodes great! If you missed it when it was live, you can still watch it (above). We had some technical difficulties (related to a power outage) at the beginning, so (as of this moment) the show doesn’t start until about the 8-minute-mark. We’ll get this cleaned up shortly, but for now, just skip ahead a few minutes. Despite the problems at the start, a hundreds of you tuned in—I hope you learned something, that you were inspired, and/or that it was entertaining enough to make it worthwhile. Asking for nearly two hours of your time is a lot, and we really appreciate everyone who journeyed along with us!

For those who may not know, SOOC is a monthly live video series, with each episode focused on a different film simulation recipe. It is a collaboration between Tame Your Fujifilm (Fujifilm X-Photographer Nathalie Boucry) and Fuji X Weekly (Ritchie Roesch). SOOC is a fun and educational experience where we not only talk about Fujifilm camera settings, but also answer your questions and give tips and tricks. Basically, we’re trying to help you master your Fujifilm camera, with a focus on simplifying your photographic workflow.

In this month’s episode we discussed my Agfa Optima 200 film simulation recipe, and viewed the wonderful pictures that you captured with this recipe. We also introduced the next recipe: Cross ProcessUpload your pictures here to be featured in the next video! Episode 06 will be on December 9th, so mark your calendars, and I look forward to seeing you then!

If you haven’t watched the previous episodes, then get yourself comfortable, grab a beverage of choice, and click the links below!

Episode 01: Introduction

Episode 02: Kodachrome II

Episode 03: Fujicolor C200

Episode 04: Kodacolor

Episode 05: Agfa Optima 200

Also, be sure to check out the Viewer’s Images slideshows!

Viewer’s Images: Kodachrome II

Viewer’s Images: Fujicolor C200

Viewer’s Images: Kodacolor

SOOC Season 01 Episode 05 Is Today!

Episode 05 of SOOC is live today! The time has been changed to 11 AM Pacific, 2 PM Eastern (7 PM UTC).

SOOC is a monthly live video series, with each episode focused on a different film simulation recipe. It is a collaboration between Tame Your Fujifilm (Fujifilm X-Photographer Nathalie Boucry) and Fuji X Weekly (Ritchie Roesch). SOOC is a fun and educational experience where we not only talk about Fujifilm camera settings, but also answer your questions and give tips and tricks. Basically, we’re trying to help you master your Fujifilm camera, with a focus on simplifying your photographic workflow. This is an interactive show, so we not only need you to tune in, but your participation is essential to making the episode great.

In this month’s episode we will discuss the Agfa Optima 200 recipe, and we’ll take a look at your pictures captured with this recipe. We’ll also introduce the next recipe. We have a lot of great things planned, and I know you’ll appreciate this episode. See you soon!

M is for Macro, T is for Train

Fujifilm X-T30 with Asahi SMC Macro Takumar 50mm f/4 lens using the Ilford HP5 Plus recipe.

If you have kids (or grandkids), chances are that at least one of them loves trains. I mean, most kids do, right? All of my kids liked trains when they were little, and so far only my oldest daughter has outgrown them. If you have a little ferroequinologist in your midst, chances are at some point you’ll end up at a model train show. Can this be an opportunity for the creative photographer? Do picture opportunities exist at the exhibit?

This might initially seem like a silly endeavor for a Creative Collective article. Toys, really? Are we actually going to do photography at a model train show? What could possibly be learned from this exercise? I think there are several great lessons to be experienced, and we’ll discuss each. Now let’s take our Fujifilm X camera—with a macro lens attached—to a local train show. Let’s go!

Note: this was a Creative Collective article, but now it is available to everyone.

Fujifilm X-T30 with Asahi SMC Macro Takumar 50mm f/4 lens using the Eterna recipe.

Yes, I said “with a macro lens attached” in the sentence above. You will need a macro lens. Fujifilm makes two: the Fujinon 60mm f/2.4 and Fujinon 80mm f/2.8. Either one will work for this project, but, if you don’t already own one, they aren’t necessarily cheap; however, there are budget options available. You can backwards-mount a lens you already own using a cheap adapter. This isn’t my favorite option, but it works. Or you could use extension tubes, which can be effective and inexpensive. Or you can buy a vintage macro lens and adapter, which is what I’ve done, but this can be a little more expensive (although not nearly as much as a new Fujinon lens!). Pick your path. By the way, if you want a recommendation between the two Fujinon options, I’d go with the 80mm f/2.8.

The reason why you need a macro lens is because you’ll be photographing miniature worlds. There are many different scales of model trains, and the larger ones might not require a macro lens, but the smaller ones definitely will. If you have no interest in using a macro lens but still want to try this project, simply spend more time capturing the larger scale dioramas, and less time on the miniature models.

Light will be your biggest challenge, for three reasons. First, in my experience, the buildings don’t ever seem to be well-lit. You’ll be using high-ISOs. Ideally, you’d use a tripod, but, since these events are often crowded, a tripod isn’t practical, and might be considered rude to use. Second, the light is artificial, and often mixed. It’s easy to get a weird color cast, especially if you are using a recipe that calls for Daylight or any sort of warm white balance. Recipes that use Auto white balance tend to do better, although it really depends on the exact lighting situation. Third, when using a macro lens, the depth-of-field is often razor thin, so ideally you’d prefer small apertures, but that requires a lot of light or a long shutter speed, neither of which you’re likely going to have available to you, so you’re just going to have to deal with the super thin depth-of-field.

Fujifilm X-T30 with Asahi SMC Macro Takumar 50mm f/4 lens using the Eterna recipe.

You’re going to be pushing the envelope of your gear with regard to shutter speed, ISO, and aperture. Let’s look at each!

You’ll be using slow shutter speeds, but make sure that it is not too slow, because most likely you’ll be hand-holding the camera. If your shutter speed is too slow, you’ll get a lot of blurry pictures. For those with an X-T4 or X-S10, which have IBIS, you’re in a little better position; otherwise, you’ll want to set the shutter to the slowest speed that you can get away with. Typically, you don’t want to go any slower than the most similar number to the focal-length of the lens. I’m using a 50mm lens, so that means 1/60—but don’t forget about the crop-factor, which makes the lens full-frame equivalent to 75mm, and means that 1/80 is the slowest that I want to go with the 50mm lens. A shutter speed of 1/125 is even better, if the light allows. No matter what, be sure to use good technique when holding your camera, and keep a steady hand.

Another note regarding slow shutter speeds: there will be blur from movement if the train is rolling down the line. The picture at the top of this article is a good example of this. You are going to have a difficult time freezing motion, and even a slow movement will be a little blurry. You can accept that there’s a slight blur (like the picture above), or use the blur creatively (maybe panning?), or avoid photographing moving objects, and focus on the things that are still.

Fujifilm X-T30 with Asahi SMC Macro Takumar 50mm f/4 lens using the Eterna recipe.

Going into this project you have to know that you will be using high ISOs. How high? As high as you are comfortable with. If you find some decent light, you might be able to get away with ISO 1600, but if the light isn’t great you might have to go as high as ISO 12800—I find that most typically I’m using between 3200 and 6400. It is what it is.

The lens that I used has a maximum aperture of f/4, and I used that aperture for all of the pictures here. The closer you are focused to the end of the lens, the more narrow the depth-of-field will be. You can see that it’s razor-thin in these pictures. You have to be precise with your focus—even one millimeter off and your picture might be ruined. Whenever possible, you’ll want to use the narrow depth-of-field creatively. Typically in macro photography, you want to use smaller apertures, but that will require a tripod in this scenario.

Even though you are at a train show, there’s a lot more than trains to photograph. Typically these dioramas have towns, roads, houses, bridges, trees, people, animals, and most other things you’d find in real life, except miniaturized and carefully staged. Look for interesting scenes, or even uninteresting scenes that can be captured in a compelling way.

Fujifilm X-T30 with Asahi SMC Macro Takumar 50mm f/4 lens using the Eterna recipe.

Another thing to consider is your angle. While “drone shots” (photographing from high above) might be good sometimes, most often you’ll want to get down low, and put the camera lens near eye-level of a scale person. That’s not always practical or possible, but using a low perspective will often produce the best results. This might be the best practical advice for this project in this whole article.

Occasionally, if a model railroad is realistically detailed, you might be able to capture an image that could fool people into thinking it’s a real scene and not a model, but don’t count on that. Most likely your model train pictures will look like models and not the real thing. That’s ok. What’s more important is storytelling. A compelling image of a model is just as interesting as a compelling image of the real thing. Ansel Adams said, “There’s nothing worse than a sharp image of a fuzzy concept.” The point being: avoid having fuzzy concepts, no matter the subject. A solid concept for your model train photography will produce a compelling photograph. This, obviously, is just as big of a challenge, if not more so, than the technical issues you will face.

You are likely with your child or grandchild (or maybe nieces and nephews or friends), so don’t forget to have fun. While this is certainly a challenging circumstance photographically, it should be an enjoyable situation. Slow down. Make it a memorable time with whoever you are with.

Fujifilm X-T30 with Asahi SMC Macro Takumar 50mm f/4 lens using the Kodachrome II recipe.

To summarize, model train shows are challenging photographic exercises. There’s the technical problems, namely slow shutter speeds, high ISOs, narrow depth-of-field, and strange lighting. You’ll be technically doing macro photography, although most likely you’ll be trying to make the pictures not appear to be macro. There’s also the creative problems of capturing a compelling picture. If you come away with one or two frames that you like, that’s a good day. This will be one of the more difficult photographic experiences you’re likely to encounter. You’ll have to push your gear and yourself to the limit to be successful.

If there’s a train show near you, take your kids or grandkids (or go by yourself or with a friend), grab your camera on the way out the door, and try to snap a good picture or two. I guarantee that this challenge will help your photography improve, because that’s what difficult situations do.

If you are looking to increase the challenge of this project, try stacking diffusion filters or double exposure photography! Now that would be interesting!

Fujifilm X-T30 with Asahi SMC Macro Takumar 50mm f/4 lens using the Kodak Tri-X Push-Process recipe.
Fujifilm X-T30 with Asahi SMC Macro Takumar 50mm f/4 lens using the Ilford HP5 Plus recipe.

SOOC Episode 05 Rescheduled Slightly

SOOC Episode 05 is tomorrow, but it has been rescheduled slightly. It was announced to be 10 AM Pacific, 1 PM Eastern, but it has been pushed back an hour, and will now be 11 AM Pacific and 2 PM Eastern. I hope this isn’t too much of an inconvenience for you.

The delay is actually two hours in South Africa (due to a scheduled power outage), but since South Africa, like Arizona, doesn’t observe Daylight Savings, the delay will be only one hour for those who moved their clocks back an hour (and two hours for those who didn’t). It’s actually a good thing that this delay happened, or else I would have been an hour late for the broadcast tomorrow, which would have started before I expected it to—yikes! So it’s a blessing in disguise.

I hope to see you tomorrow!