After yesterday’s Take the BlindBlind Film Simulation Recipe Test article, I’ve been asked a couple of times what were the 10 Film Simulation Recipes that I provided to Andrew Goodcamera. You see, he asked me to give him a list of the Top 10 most popular Film Simulation Recipes of 2022. Now, I have no way of knowing which are the most used; however, I can tell which are the Top 10 most viewed Recipes on the Fuji X Weekly website. Are page-views a good indication of use? Probably, but it’s also quite possible that some Recipes are overrepresented and others are underrepresented. Unfortunately I don’t have a more accurate metric, so this will have to suffice.
Below you will find the Top 10 most popular Film Simulation Recipes of 2022 based on page-views, in order from least to most popular. Seven of them are X-Trans IV Recipes (for the X-Pro3, X100V, X-T4, X-S10, X-E4, & X-T30 II cameras), and three are X-Trans III Recipes (plus compatible with the X-T3 & X-T30). X-Trans V Recipes are pretty new—the oldest published in the third week of November—so it make sense that none made this list, and I suspect that they’ll become increasingly more popular throughout 2023. The Recipes for X-Trans I, II, Bayer, and GFX just aren’t nearly popular enough to crack this list (not likely a Top 20 list, either). The majority of people who shoot using Film Simulation Recipes are doing so on X-Trans III and newer cameras, and the largest group are shooting with X-Trans IV models.
Interestingly, the Classic Chrome Recipe, which is the second one ever published on Fuji X Weekly, ranks pretty high. Black-and-white Recipes aren’t usually as popular as color, so I’m happy to see the Kodak Tri-X 400 Recipe climb the list. I’m not surprised by much else, so let’s get to that list!
Which of these Film Simulation Recipes do you use most? What is your favorite Recipe not found on this list? Let me know in the comments!
I also thought it would be interesting to see if 2023 is trending different so far, or if the Recipes rank the same. While the top half of the list looks nearly identical, there are some notable differences in the bottom half. Pacific Blues is one of my top-favorite recipes, so I’m happy to see it crack the Top 10.
Andrew Goodcamera (formally known as Andrew & Danae) just published a YouTube video in which he conducts a blind film simulation and Film Simulation Recipe test. In the video Andrew shows six sets of 15 pictures. The images are a mix of stock film simulations (no recipe) and various Film Simulation Recipes. As you watch, you are supposed to take note of which pictures stand out to you—perhaps even take a guess at which Recipe you think was used for your favorite—and maybe discover a new Recipe to try that you didn’t realize you’d like. It’s a fun little experiment!
Back in January Andrew reached out to me because he had a video idea, and he needed a list of popular Film Simulation Recipes for it. He didn’t tell me what his video idea was, only that he was going to mention Fuji X Weekly and needed a list of Recipes. I happily provided him with what he requested, and that was the end of the story until today when I noticed he posted a new video. I’m very appreciative for his kind words and honored for the shoutout—thank you, Andrew!
I’m not going to say anything more until you’ve watched the video. I have some commentary that I want to add, but don’t want to spoil it for you, so take a moment right now to watch the video. Don’t scroll past the video below until you’ve watched it! Oh, and make sure you have a notepad handy to keep track of your picks.
Did you watch it? If so, keep scrolling down and let’s compare notes. If not, this is your last chance before you encounter some spoilers, so don’t go any further until you’ve seen the above video!
I had provided Andrew with 10 Film Simulation Recipes, which were the top ten most popular (by page views) from 2022. I wasn’t sure if he had used all of them or not, and I didn’t find out until the reveal that he had used six. I didn’t try to guess which pictures were which Recipes, but just wrote down which three images I liked most (best, second best, and third best) in each set.
What I picked most was picture J. In almost every set (four out of six) I chose that one as my favorite, and if it wasn’t number one it was second or third favorite (six selections total). I had a strong suspicion that it was Pacific Blues, and it turns out that it was indeed that Recipe. Pacific Blues is one of my absolute favorite Recipes, and this blind test just affirms that.
My next most-picked picture was O, although it was not my top favorite in any of the sets, only second or third (picked four times total). I wasn’t really sure which one that was, and was surprised when it was Vintage Kodachrome. I haven’t shot much with that particular Recipe in awhile, so I guess I need to!
The third-most picked picture was G (picked three times total: once number one and twice number two). I had a hunch that it was Kodachrome 64, but I wasn’t certain; turns out my hunch was right.
Picture I, which turned out to be Kodak Portra 400, was picked once for number one and once for number two. Picture H, which turned out to be Kodak Ektar 100, and picture D, which was my Classic Chrome Recipe, were each selected once for third favorite. The only stock film simulation (non-Recipe) picture that I selected was E, which is default Classic Negative, chosen once for third favorite.
Now it’s your turn! What were your top picks? Were you surprised by your findings? Comment below to let me know!
One last note: if you missed today’s SOOC Live broadcast about Street Photography, you can watch it now (click here). We had a great show, which was the first with the new format, so you’ll want to make sure to give it a view. Also, I want to give a big “thank you” to everyone who tuned in and participated!
Street photography is a very popular genre, and I get asked fairly frequently what my favorite gear is for it. While I do dabble in street photography, it’s not my most common photographic subject; however, I’ve done enough street photography that I feel comfortable giving gear recommendations for it. In this article I’ll tell you what I use and why.
While there is no definitive explanation, street photography is best described as pictures of chance encounters in public places. It often takes place in urban environments (such as downtown city centers), but it is certainly not limited to that. Some will say that humans must be included in the pictures for it to be street photography, but others will argue that the effects of humanity within the environment is acceptable, and some believe that any urban image fits within the genre. It is commonly understood that street photography involves candid (unstaged) pictures, but some will state that it is the chance encounters that are most important, and it is okay to provide some direction to that randomness in order to create a stronger picture. In other words, there’s no universal answer to what exactly street photography is, but most of the time you recognize it when you see it.
If you’ve never done street photography but want to try, the first place to start is understanding the laws and customs of the place you are photographing. Each country is different, and it may even vary from specific location to specific location. You want to understand your rights as a photographer in a public location, and the rights of those potentially being photographed. Besides the legal question, there is the ethical one: should you? While something might be legally ok, it does not necessarily mean that it is moral. These are all things that you should consider before attempting any street photography. Research the local laws. Consider what you are comfortable photographing and why, and what you are not comfortable photographing and why not. I cannot emphasize this step enough, and I encourage you to spend some time on these questions before heading out with your camera.
After that, the next step is to go to a public place and capture some candid images. The most common location is an urban environment, such as the center of a large city, but it can be anywhere where people are. If you don’t have easy access to a large downtown, consider what is nearby where you live. Even if you live in a small town or a rural location, I bet there are opportunities nearby if you look hard enough.
Now, let’s discuss gear. To be clear, you can use any camera. I’ve done street photography with most of my gear. There are a few tools that I do prefer over others, but if you don’t have these don’t worry too much about it, because whatever gear you currently own is good enough. The list below is simply the cameras that I personally prefer for street photography.
Fujifilm X100V
This is my favorite camera for street photography. Actually, it’s my favorite camera, period. The Fujifilm X100V is my “desert island” model—if I could own only one camera for the rest of my life, it would be this. There are a few things that make it especially good for street photography.
First, it’s pretty small. It’s good for carrying as you walk around for awhile, and people don’t often get intimidated by it like they would with a larger body. Second, the leaf shutter is basically silent, and allows you to be more stealthy. Yes, electronic shutters are silent, too, but they do have a couple of drawbacks that might affect your photography (situationally dependent), so a silent mechanical shutter is an excellent feature. Third, the optical viewfinder allows you to see outside the frame to better anticipate the decisive moment. There are many other things that make the camera great, such as the build quality, weather sealing, traditional tactile controls, built-in ND filter, etc., etc.; this isn’t a review of the X100V, just some reasons why it is my favorite tool for street photography.
Perhaps the top thing that makes the Fujifilm X100V great for street photography are all the Film Simulation Recipes that you can program into the camera. Almost no matter the aesthetic you want to achieve, there is a Recipe that will allow you to get the look straight-out-of-camera, no editing needed. This can make street photography more fun, while saving you time and frustration later.
The Ricoh GR III is a super small and compact camera that you can literally carry with you everywhere, since it fits so easily into a pocket or purse. If you own a Ricoh GR III, there is no excuse for not having it with you. Since photo opportunities aren’t always planned, it’s important to have quick access to a camera at all times, and this model makes it easy. I try to carry my GR III with me whenever I go out, even if it is just to the grocery store.
There are a few reasons why I like the GR III for street photography in particular. Since it is so small and unassuming, most people won’t figure you to be a photographer; if they even notice that you have a camera, they’ll likely think you are a snap-shooter or tourist, and will often disregard you. The 27.5mm (equivalent) lens gives a wide view, which can be good for showing context. Like the X100V, the GR III has a nearly silent leaf shutter. If you don’t want to be noticed, this camera is probably the best bet. There are certainly drawbacks to the GR III (no model is perfect), but for the size and weight it is pretty darn excellent.
There are Recipes for the Ricoh GR III, although not nearly as many as there are for the Fujifilm X100V. If you want to skip picture editing (called one-step photography), the GR III is a solid option that should be strongly considered. In fact, the Fujifilm X100V and the Ricoh GR III compliment each other, and can coexist comfortably in your camera bag.
Urban Crescent – Salt Lake City, UT – Ricoh GR III – Royal Supra
Speak Up or It Will Be Flat – Salt Lake City, UT – Ricoh GR III – Kodak Chrome
Bike with Basket – Scottsdale, AZ – Ricoh GR III – Aged Print
Since you always have your phone, you always have a camera. If you accidentally left your “real” cameras at home, no worries! Your cellphone camera is a perfectly capable photographic tool. My current cellphone is an iPhone 11. I don’t think your cellphone make and model matter much—any cellphone camera will suffice—but I personally prefer Apple, since I can use the RitchieCam camera app, which is only available for iOS (click here).
The iPhone is great for street photography because nobody thinks twice about seeing someone with their phone out. Even if you do get “caught” capturing a picture, you can easily fake that you are taking a selfie or texting someone or some other typical phone action. Many cellphones have multiple focal length options, so they’re surprisingly versatile. My favorite accessory is the Moment Tele 58mm lens.
While I do use my phone for photography, I also use it for another important reason: Apps! Specifically, the Fuji X Weekly App (Android, Apple) and the Ricoh Recipes App (Android, Apple). In my opinion, those are essential tools to accompany your Fujifilm and Ricoh cameras.
Fame, Fortune – Moab, UT – iPhone 11 + RitchieCam App – Standard Film
Yield then Stop – Panguitch, Utah – iPhone 11 + RitchieCam App – Night Negative
Exxon in Winter – Moab, UT – iPhone 11 + RitchieCam App – Night Negative
Let me show you a few more street images that I captured recently.
The three above pictures, despite being pretty different overall, all have something in common (besides being street photography). If you want to know what it is, you’ll have to tune into SOOC Live on March 2. Nathalie Boucry and I will be discussing the theme of street photography, including things like gear and Film Simulation Recipes and such. Mark your calendars now! Be sure to subscribe to the SOOC Live YouTube channel so that you don’t miss out on all the great upcoming broadcasts.
Getting an analog color negative film look from your Fujifilm camera is super easy! Pick a Film Simulation Recipe, program it into your camera, and photograph with it. You can get straight-out-of-camera analog-like results that don’t require any editing. But with almost 300 Recipes published on this website and the Fuji X Weekly App, it can be difficult to know which ones to choose. If you are not sure, let me suggest to you the five below. Yes, there are many others that will also get you a color negative film look, so this list is by no means definitive, but it might be a good starting point.
Fujicolor Reala 100 is compatible with the Fujifilm X-Pro3, X100V, X-T4, X-S10, X-E4, and X-T30 II; for X-Trans V, set Color Chrome FX Blue to Weak. Fujicolor Natura 1600 is compatible with the X-T4, X-S10, X-E4, and X-T30 II; for X-Trans V, set Color Chrome FX Blue to Weak. Fujicolor Pro 400H and Kodak Portra 400 are compatible with the X-Pro3, X100V, X-T4, X-S10, X-E4, and X-T30 II; for X-Trans V, set Color Chrome FX Blue to Off. Kodak Gold 200 is compatible with X-Trans III plus the X-T3 and X-T30; for newer X-Trans IV models, set Color Chrome FX Blue to Off, set Clarity to 0, and choose a Grain size (I recommend Small).
Find these Film Simulation Recipes and so many more in the Fuji X Weekly App! Download for free today; consider becoming an App Patron to unlock the best experience and support the work of this website.
I love making retro faded-film-like looks on Fujifilm cameras using the multiple-exposure feature. I have created a number of Film Simulation Recipes which utilize double-exposures to achieve a faded aesthetic. Some of these Recipe are Faded Negative, Faded Color, Vintage Color Fade, Faded Monochrome, and Split-Toned B&W. This type of Recipe isn’t nearly as popular as the “regular” ones that don’t use multiple exposures, and I’m pretty sure it’s because these are a lot more difficult to use. They are way less convenient and practical; however, they can be a good challenge and a lot of fun, and you’ll achieve results that a fairly unique.
I didn’t come up with a new double-exposure Recipe, but I did come up with a slight variation to this concept that I thought I’d share with you. If you are looking for something creative to try, this might just be what you are looking for. In any event, you’re sure to make some interesting images.
Note: this was a Creative Collective article, but now it’s available to everyone.
The concept of this project is pretty simple, and can be done with most Fujifilm cameras. I used my Fujifilm X100V, but you certainly don’t need that model for this project. As long as your Fujifilm camera has a multiple-exposure mode—and most do—you can join in on the fun.
Step one is to choose a Film Simulation Recipe. I went with Kodachrome 64 simply because I like that recipe. While you can use any Recipe, I find that ones with mid or high contrast tend to work better than low-contrast Recipes. So pick your favorite Recipe, whichever one that is, and let’s see what happens.
The second step is to set your camera to capture double exposures. Look for Multiple Exposures in the Drive Menu or on the Drive selector on the top-plate (depending on your camera model). For newer cameras, make sure that you have Average selected in the Multiple Exposure Control submenu. Refer to your camera’s manual if you are not sure.
After that, you’ll want to tape two colored pieces of paper together (I used simple construction paper—see above). You can use any two colors. I chose blue and yellow because they are contrasting colors, and thought it might make it more dynamic. Be creative or thoughtful with whichever colors you choose. A problem you will encounter is that the line between blue and yellow is fine and not feathered. It goes sharply from one color to the other, which is not what you want. We’ll address this in a moment, but for now keep it in mind.
Next, capture the first exposure. The subject can be whatever you want it to be. The camera will ask you if you are satisfied with the exposure or if you want to try again. If you are happy with it, press OK and get ready for the second exposure.
For the next step, which is the second exposure, you will capture an image of the two-colored paper, including a bit of both colors in the frame—it can go straight across or diagonal. You want the picture to be blurry, so flip the camera to manual focus and ensure that it is out-of-focus. This will make the sharp line fuzzy, and will blur out the paper’s texture. I also used a slow shutter speed and moved the paper during the exposure, to further grade the transition between yellow and blue. The camera will allow you to make multiple attempts until you are satisfied, so don’t be afraid to redo the second exposure if you aren’t happy with the results.
I haven’t done a whole lot to explore this concept. I’m sure there are a ton of creative possibilities. Use your imagination, and you are likely to capture some intriguing images.
I purchased my Fujifilm X-T5 when it was released back in November. I’ve received several messages lately asking why I haven’t published a review of the new camera. I think it’s because they are considering buying one themselves, and they want to know if it’s actually “worth” upgrading to or if there is something they should be aware of. Basically, some people want to either be talked into buying it or talked out of buying it, as it’s a lot of money and a big decision—which can be paralyzing—and you want to be wise with it. Lots of research is essential, and finding opinions from those you trust can be invaluable. I’m honored and flattered that many of you consider this website to be trustworthy.
At the beginning of each year, I like to take some time to consider how things went the prior year, what the current trajectory is, and where I want things to go. For Fuji X Weekly, I really feel that a slight shift in trajectory is needed, and in some ways I began moving towards that last year, even if I wasn’t sure the why and where. After much consideration, I have a clearer vision of where I want this website to go in 2023, and how to achieve it. I haven’t communicated these changes to you (until now, I suppose), but you’ve probably already noticed some.
There’s actually a lot going on behind the scenes. Many different projects are in the works. I’m juggling quite a bit right now. When the time is right, there are many exciting things that I look forward to announcing and sharing with you. Some projects might never work out, which has happened before (that’s just they way it goes sometimes), but I do believe that most of these will come to fruition. Some will take much longer than others, so stay tuned for these announcements over the coming weeks and months.
One thing that I haven’t announced (but you might have already picked up on) is that I’m doing more to explain and suggest when to use various Film Simulation Recipes. There are so many to choose from, and it can be difficult to know which to try. Then, when you find one you like, maybe the weather or light changes, and you don’t like it nearly so much in that situation. Now what do you do?
The trouble with suggesting Recipes is that, while one person might love one for a certain light and situation, another person might hate it for the same light and situation. For example, in the very same day, one photographer told me that they used the Kodak Portra 400 Recipe for a professional portraiture photo shoot and they couldn’t be more happy with the results, while another photographer told me that they tried that same Recipe for portraits and the results were horrible. Each person has their own tastes and style, and what will work for one person won’t work for another. I could suggest to you the Recipes that I think are good for various situations, but you might completely disagree with my assessment. Still, it can be helpful have a starting point.
None of this is completely new. For example, in the SOOC Livebroadcasts, not only have we discussed at length a Film Simulation Recipe in each show, but for awhile now we’ve suggested several Recipe for use in specific situations or for various genres of photography. Without giving away what’s in store of Season 3, which kicks off tomorrow, I can tell you that we’re doubling-down on that concept. Be sure to tune in, and subscribe to the new SOOC Live YouTube channel.
What does any of this have to do with a review of the Fujifilm X-T5? Simple: I’m moving away from product reviews. For now—and I don’t know if this will last forever or if it’s just for a time—I won’t be publishing any camera or lens reviews. I want to focus a lot less on telling you what is good or bad about various gear, and focus more on how to use your get to achieve the aesthetics you want straight-out-of-camera. I’m not going to publish a review of the X-T5, but instead publish more articles on using Recipes with that camera (and other camera, too, definitely not just or even mostly the X-T5). I want to help you get the results you want out of your camera, and product reviews, which take a lot of time to put together, get in the way of that. Besides, there are so many reviews of the Fujifilm X-T5 already, what could I possibly add? The only things I would say is that X-Trans V renders the color blue slightly deeper on some film simulations, Auto White Balance can be quirky, Nostalgic Neg. is similar to Eterna, and if you are doing long broadcasts the camera might overheat. Those are the only things that I would add to what others have discussed, and I’ve already said them. If you have been waiting patiently for my review (that won’t come), I hope this is somehow helpful to your decision to buy or not buy; mostly I would say trust your gut, because deep down you know whether or not you actually “need” that new camera, or if it’s just Gear Acquisition Syndrome, New Camera Envy, or Fear of Missing Out.
While not publishing camera and lens reviews might be seen as negative, I hope that the revised vision for Fuji X Weekly is very positive, and that the benefits of the changes far outweigh what must be left behind. I invite you to come along for the ride, and let’s see where all of this goes.
This post contains affiliate links, and if you make a purchase using my links I’ll be compensated a small amount for it.
In the February issue, we take a look at 10 different Film Simulation Recipes for use on dreary, overcast days. If you aren’t sure which recipe to use when the sky is grey, this issue is intended to be helpful. Also, my wife, Amanda, contributed six pictures to this publication, including the cover image.
If you haven’t joined the Creative Collective, consider subscribing today to get access to bonus articles and the FXW Zine—not just this issue, but the first thirteen issues, too!
Captured with the new “Negative Film” Picture Control Effect on my Ricoh GR III.
Fujifilm, pay close attention: Ricoh just did with their GR III and GR IIIx what you won’t do with your X-series cameras.
Fujifilm has stated that they’re moving away from Kaizen and to expect less of it going forward, but some other camera makers—including Ricoh—are embracing it. In fact, Ricoh just added a new Picture Control Effect, which is their Film Simulations equivalent, to their GR III and IIIx cameras. This new Effect is called Negative Film, and it looks pretty good so far to me. It’s not really like anything on Fujifilm exactly—perhaps it could be described as somewhat similar to a cross between Classic Negative and PRO Neg. Std—but it does produce an aesthetic that’s easy to appreciate.
I want to point out that the GR III was released almost at the same exact time as the Fujifilm X-T30. Since the release of the X-T30, Fujifilm has introduced three new Film Simulations—Classic Negative, Eterna Bleach Bypass, and Nostalgic Neg.—plus some other JPEG options like Color Chrome FX Blue, Clarity, and Grain size. None of it has trickled down to the X-T30 (or X-T3). Even the X-Pro3 and X100V—premium models, supposedly—weren’t given the Kaizen love that they (really, Fujifilm’s customers) deserve. Yet little ol’ Ricoh not only created a new Effect for apparently no reason other than the fun of it, and they gave it to the almost four-year-old GR III just because they wanted to make their customers happy.
Captured with the new “Negative Film” Picture Control Effect on my Ricoh GR III.
I have a ton of advice that I’d give to Fujifilm if they were ever interested in hearing my opinions. I mean, I have a pretty good pulse on a big chunk of their customer base, and I’ve done more than most to bring them new customers, whether directly or indirectly, so you’d think they would be interested in hearing what I have to say. The very first suggestion that I would have for them is to do more Kaizen and not less. I get that it costs time and money, but fostering a happy long-term repeat customer base is priceless, and well worth whatever it takes to do that. A lot of photographers go from brand-to-brand-to-brand, or they begrudgingly put up with a brand for a long time because they don’t want to endure the cost and headache of switching, and there is a surprisingly large amount of disloyalty among customers. Yes, there are the outspoken fanboys—I am one for Fujifilm—but while their voices are loud, their numbers are surprisingly small. So if a brand can actually make more of their customers loyal, which they do by showing them that they matter and are appreciated, it can have a significant long-term impact. Of course, if your customers don’t think you care about them, they’ll be more quick to leave when another brand offers something new and exciting, or if they think that another brand cares more about their customers than the one they’re currently using.
Ricoh just made sure that their customers know that they care. Fujifilm, make sure that your customers know you care!
Below are some examples of photos captured using the new Negative Film Picture Control Effect on my Ricoh GR III.
Glimpse of a Fleeting Memory – Gilbert, AZ – Fujifilm X-T5 – “Vintage Cinema”
I recently binge-watched a number of classic movies from the 1950’s, and I was really inspired by their picture aesthetics. After some research, I discovered that Kodak ECN 5248 25T motion picture film was used in several of these flicks. The problem, of course, with trying to replicate the look of a motion picture film stock is that not only is the aesthetic dependent on the usual factors of how shot and developed, but also on the lighting and filters used, which can be different movie-to-movie and even scene-to-scene. Instead of attempting to mimic the look of any particular movie or cinema film stock, I wanted to create a certain feel or mood—a “memory color” reminiscent of color movies from the 1950’s.
This Vintage Cinema Film Simulation Recipe is a Fuji X Weekly App Patron Early-Access recipe, which means if you are an App Patron, you have access to it right now. The Fuji X Weekly App is free, yet becoming a Patron unlocks the best App experience! One benefit of being a Patron is you get early access to some new Film Simulation Recipes, such as this one. These Patron Early-Access Recipes will eventually become available free to everyone in time, including this new one. Patrons help support Fuji X Weekly and, really, without them there would be no App, so I want to give a special “thank you” to all of the Patrons!
Ball on a Wall – Buckeye, AZ – Fujifilm X-T5 – “Vintage Cinema”
The Vintage Cinema Film Simulation Recipe, which is the very first Patron Early-Access Recipe for X-Trans V, is only compatible with (as of this writing) the Fujifilm X-T5, X-H2, and X-H2S (and I’m sure the X-S20 when it’s released this spring). I assume that the GFX100S and GFX50S II can also use this recipe, but that it will render slightly different—I don’t have either of those cameras to test it to know for certain. This recipe is best for sunny daylight conditions, and seems especially well-suited for golden hour photography, but can sometimes produce interesting results in cloudy, shade, and indoor situations, too. I believe this recipe would pair especially well with vintage lenses and probably diffusion filters, but for these pictures I used Fujinon lenses, including the 27mm f/2.8, 35mm f/2, 90mm f/2, and 100-400mm, without any filters.
Example photographs, all camera-made JPEGs using this “Vintage Cinema” Film Simulation Recipe on my Fujifilm X-T5:
Birds of a Feather – Gilbert, AZ – Fujifilm X-T5
Flipped Reflection – Gilbert, AZ – Fujifilm X-T5
Three Ducks in a Lake – Gilbert, AZ – Fujifilm X-T5
Bougainvillea Blooms & Blue – Buckeye, AZ – Fujifilm X-T5
Bougainvillea Beams – Buckeye, AZ – Fujifilm X-T5 – Photo by Jonathan Roesch
Side Gate Cracked Open – Buckeye, AZ – Fujifilm X-T5
Bougainvillea Bush in Bloom – Buckeye, AZ – Fujifilm X-T5
Hanging Bougainvillea Blossom – Buckeye, AZ – Fujifilm X-T5
Desert Bunny – Gilbert, AZ – Fujifilm X-T5
Jo on a Dirt Path – Gilbert, AZ – Fujifilm X-T5
Jo on the Patio – Buckeye, AZ – Fujifilm X-T5
Late Autumn Yellow – Buckeye, AZ – Fujifilm X-T5
Leafless Tree – Buckeye, AZ – Fujifilm X-T5 – Photo by Jonathan Roesch
Do Not Enter When Flooded – Buckeye, AZ – Fujifilm X-T5 – Photo by Jonathan Roesch
Dry Leaves on a Patio Chair – Buckeye, AZ – Fujifilm X-T5
According to Fujirumors, who has a reputation for being quite accurate, the next Fujifilm model will be the X-S20, which will be announced at the X-Summit in April. What are my thoughts on this upcoming camera?
First of all, I want to state that I have zero inside information. Fujifilm doesn’t tell me anything. I haven’t spoken with anybody who has knowledge about upcoming cameras. What I state about the X-S20—or any unreleased model—is my opinion (nothing more) and should be consumed with a grain of salt.
The X-S10 was a successful model for Fujifilm, doing what it was intended to do: attract those unsatisfied with their Canikony camera who have an interest in Fujifilm but are intimidated by the traditional dials because they have only ever used PASM. I have no doubt that the X-S20 will be just as successful, if not more so.
I believe it will have the same 40-megapixel sensor as the X-H2 and X-T5. It won’t be weather-sealed. It will be 95% the same camera as the X-S10, just with the new sensor and processor. I would be surprised if there were any big surprises. If the X-H2 is too expensive for you, or if you have an X-H2 but want a smaller and cheaper second body, the X-S20 will be the one to consider.
What will separate the X-S20 from the X-S10? Megapixels. Autofocus. Improved IBIS algorithm. Nostalgic Neg. 6K video. I don’t expect the new version to be head-and-shoulders better, but an improvement nonetheless, but with some give-and-take, so an argument could be made that the X-S10 is actually “better” (subjectively, of course), just like the X-T4 might be considered better than the X-T5 by some.
I do wonder if Fujifilm has intentions of introducing a mid-level PASM model. The X-H2/X-H2S cameras are “flagship” cameras that are true “hybrid” models (excellent for both stills and video), but unfortunately those are PASM models, which means long-time Fujifilm photographers were left out in the cold—the X-T4 and X-H1 are the only “flagship hybrid” cameras for you to choose from (yes, an argument could be made for the X-T5, but it is clear Fujifilm intends it for those who primarily are still photographers, not videographers). The X-S10 and X-S20 are entry-level (as in the new entry-level, which used to be mid-level). What’s in-between the high-end X-H2 and the low-end X-S20? For the PASM shooter, nothing. I’m not certain if something is needed, but I wouldn’t be surprised if Fujifilm is exploring that possibility, or even in the process of creating it.
I don’t think, in the current market, that it makes sense to have three entry-level models. That means either the X-E line or X-T00 line is likely on the way out. The X-T00 has historically been more popular, but the X-E line is beloved, and the X-E4 has been especially successful. I’m not sure what might get the ax or when, but it’s possible that the X-T30 II or X-E4 was the last in their respective series. Or maybe the X-T40 (or X-T50… they might skip using four because it is an unlucky number in Japan) or X-E5 will be the last. I hope I’m wrong about this, and both lines continue for years to come, but I don’t think that will be the case.
I’m disappointed that the X-S20 is the next camera to be announced. Six out of the last nine Fujifilm cameras will have been PASM models—X-S10, GFX100S, GFX50S II, X-H2S, X-H2, and X-S20—while one of the three non-PASM models—X-T30 II—wasn’t much more than a firmware update (so essentially 3/4 of Fujifilm’s latest releases have been PASM). I think it’s clear that Fujifilm is more interested in becoming a part of Canikony (Canikonyfilm?), which they see as their future growth potential, than to embrace and better communicate what makes them unique (and why that uniqueness is desirable). Shame. But, at the same time, the X-S line was due for an update, so I’m not too surprised that this is their next model. Still, I think with the current demand for the X100V, which Fujifilm cannot keep up with due to parts shortages, that they would expedite the X100Z (or whatever it will be called). To me, that would have made more sense.
This post contains affiliate links, and if you make a purchase using my links I’ll be compensated a small amount for it.
I used to shoot a lot of film. When I finally discovered the joy of Fujifilm cameras, with their incredible JPEG output, I practically stopped using analog cameras—not entirely, mind you, but almost. It was 25 years ago this upcoming fall (I cannot believe I’m that old…) that I began shooting film, yet I never once figured out a good storage system for my film canisters.
At the pinnacle of my analog adventures, you’d find a half-dozen or so unused film canisters in the refrigerator, another handful in the fridge exposed and waiting development, and another handful stuffed into various pockets of my camera bag, waiting for their chance in the camera. I wasn’t nearly prolific enough to have hundreds of rolls of film in the refrigerator or freezer, but I was a regular at my local lab, buying more film once every week or two. Despite all of the film coming and going for years, not once did I ever have a good system for it. My wife once complained about all of the film in the fridge because it was in the way of the food.
The good folks at Evergreen Cases, who happen to be big fans of Fujifilm cameras and Film Simulation Recipes, sent me a Seahorse X Waterproof 35mm Film Canister Case (with the Fuji X Weekly logo printed on it!). Where was this 25 years ago? If I had had two of these cases, my film could have been a lot more organized. I would have had one case for the refrigerator, where film-in-waiting (either to be exposed or developed) would be stored, and a case in my bag, for the film waiting for its turn in the camera. Now that I shoot a lot less film, one case is enough for me. Film is extremely expensive nowadays, so I’m glad that I use Fujifilm cameras for the vast majority of my photography.
This article doesn’t have much to do with the usual topics of this website, so—to bring it back home real quick—let me tell you a little about the two photographs above, which (admittedly) are nothing special. I used my Fujifilm X-T5 with the Kodak Portra 400 v2 Film Simulation Recipe to capture them. With Fujifilm cameras and recipes, I’m able to quickly and easily snap pictures that are ready to share—whether on social media or this website or with friends and family—the moment that they’re captured. No waiting for the lab. No sitting in front of a computer fiddling with files. Eliminating that second step is revolutionary—at least that’s what Ansel Adams said.
Red & Green Bush – Buckeye, AZ – Fujifilm X-T5 – “Superia Xtra 400”
This is a simple update to the Superia Xtra 400 Film Simulation Recipe, which was originally made for X-Trans IV cameras. I discovered that a slight tweak is needed for X-Trans V models, because the new sensor renders blues just a little deeper on some film simulations, including Classic Negative. For this recipe, simply setting Color Chrome FX Blue from Strong to Weak makes it compatible with (as of this writing) the Fujifilm X-T5, X-H2, and X-H2S.
Thomas Schwab created the Superia Xtra 400 recipe by capturing a roll of actual Superia Xtra 400 film while also capturing identical exposures with his Fujifilm cameras, then, using X RAW Studio, he worked on the settings until he found a match. As you can imagine, he put a lot of time and effort into creating it! He shared with me some of his side-by-side pictures—comparing the film with his recipe—and it was tough to figure out which was which—they looked so close! Also, just recently another photographer shot a roll of Superia Xtra 400 film and used the Superia Xtra 400 recipe on his Fujifilm camera, and he shared with me the similar results he got between the two. Amazing! Of course, with film, so much depends on how it’s shot, developed, and scanned or printed, and the aesthetic of one emulsion can vary significantly.
Fujifilm introduced Superia Xtra 400, a consumer-grade color negative film, in 1998, replacing Super G Plus 400. This film has been updated a couple of times, first in 2003 and again in 2006. It’s been widely used, thanks to its low cost and versatility. I’ve shot several rolls of this film over the years. This recipe is for Fujifilm X-Trans V cameras. Those with newer GFX models can use it, too, although it will likely render slightly differently.
Film Simulation: Classic Negative Grain Effect: Strong, Small Color Chrome Effect: Off Color Chrome FX Blue: Weak White Balance: Auto, +3 Red & -5 Blue Dynamic Range: DR400 Highlight: 0 Shadow: -1 Color: +4 Sharpness: -1 High ISO NR: -4 Clarity: -2 ISO: Auto, up to ISO 6400 Exposure Compensation: 0 to +1 (typically)
Example photographs, all camera-made JPEGs using this “Superia Xtra 400” Film Simulation Recipe on my Fujifilm X-T5:
Forwards or Backwards – Buckeye, AZ – Fujifilm X-T5
Nobody pays me to write the content found on fujixweekly.com. There’s a real cost to operating and maintaining this site, not to mention all the time that I pour into it. If you appreciated this article, please consider making a one-time gift contribution. Thank you!
Soft Rose – Buckeye, AZ – Fujifilm X-T5 – “Timeless Negative”
On February 3, 2021, Fujifilm shared the very first Nostalgic Neg. Film Simulation Recipe. As part of their promotion for the GFX100S, which was the first camera to have the new Nostalgic Neg. film sim, Fujifilm Japan shared a YouTube video, and hidden within was a recipe put together by the creators of Nostalgic Neg. “Nostalgic Negative is tuned for the best allrounder settings, but if you want to tweak it to get that classic American New Color look from the ’70’s, there are some adjustments you should make.” Fujifilm recommended, when using the Nostalgic Neg. film simulation, to set everything to 0, Off, or Auto, except for three things: shift Auto White Balance to +2 Red & -3 Blue, adjust Shadow to -2, and reduce Color to -2. Additional to that, I recommend using -4 High ISO NR.
I’m not a huge fan of Nostalgic Neg. set to factory defaults. It’s not bad, but it’s not what it purports to be, which is a vintage 1970’s aesthetic inspired by Eggleston, Shore, Sternfeld, and Misrach. I think Fujifilm should have had the courage to make their recipe the default, and not worry so much that it wasn’t the “best allrounder” film simulation. Fujifilm’s suggested adjustments do improve Nostalgic Neg. and bring it closer to a ’70’s vibe, but I felt I could improve it just a little more. Of course, that’s all subjective, and you might prefer factory default Nostalgic Neg., or Fujifilm’s recommended recipe, or something different altogether—in other words, when I say that this is “improved” it’s perfectly alright to disagree with that assessment, but hopefully many of you will agree that this is indeed better—at least a little, as my adjustments to Fujifilm’s recipe are pretty subtle. This particular recipe seems to be especially versatile, and can be used for many different genres of photography and in various light conditions—it looks good most anytime of the day or night.
This Timeless Negative Film Simulation Recipe is only compatible with (as of this writing) the Fujifilm X-T5, X-H2, and X-H2S. I assume that the GFX100S and GFX50S II can also use this recipe, but that it will render slightly different—I don’t have either of those cameras to test it to know for certain. Unless Fujifilm gives X-Trans IV cameras the Nostalgic Neg. film simulation, which I doubt they will do, this recipe is only for X-Trans V cameras, and maybe the latest GFX, too; however, Nostalgic Neg. isn’t too dissimilar from Eterna, so perhaps consider the Arizona Analog, SantaColor, Eterna V2, and Polaroid recipes as potential alternatives for those with X-Trans IV models.
Film Simulation: Nostalgic Neg. Grain Effect: Weak, Small Color Chrome Effect: Strong Color Chrome FX Blue: Off White Balance: Auto, +2 Red & -3 Blue Dynamic Range: DR400 Highlight: +2 Shadow: -2 Color: -3 Sharpness: 0 High ISO NR: -4 Clarity: -2 ISO: Auto, up to ISO 6400 Exposure Compensation: -2/3 to +1/3 (typically)
Example photographs, all camera-made JPEGs using this “Timeless Negative” Film Simulation Recipe on my Fujifilm X-T5:
Dark Coffee – Buckeye, AZ – Fujifilm X-T5
Night Train – Williams, AZ – Fujifilm X-T5
Color Behind Frosted Glass – Williams, AZ – Fujifilm X-T5
Hot Hot Hot – Williams, AZ – Fujifilm X-T5
Sleigh Bell – Williams, AZ – Fujifilm X-T5
Round Trip Ticket – Williams, AZ – Fujifilm X-T5
Dusk Train – Williams, AZ – Fujifilm X-T5
Keep Off – Williams, AZ – Fujifilm X-T5
Please… Use RitchieCam – Williams, AZ – Fujifilm X-T5
Barricades – Williams, AZ – Fujifilm X-T5
ATSF Caboose – Williams, AZ – Fujifilm X-T5
Route 66 Gift Shop – Williams, AZ – Fujifilm X-T5
Car Above, Coke Below – Williams, AZ – Fujifilm X-T5
UnAmerican Experience – Williams, AZ – Fujifilm X-T5
Stop Route 66 – Williams, AZ – Fujifilm X-T5
Los Angeles, 1978 – Buckeye, AZ – Fujifilm X-T5
Looney Tune – Buckeye, AZ – Fujifilm X-T5
Backyard Trumpet Blossoms – Buckeye, AZ – Fujifilm X-T5
Comparison
Factory default Nostalgic Neg., except High ISO NR set to -4.
Nostalgic Neg. with Fujifilm’s suggested adjustments.
This new Timeless Negative Film Simulation Recipe.
Nobody pays me to write the content found on fujixweekly.com. There’s a real cost to operating and maintaining this site, not to mention all the time that I pour into it. If you appreciated this article, please consider making a one-time gift contribution. Thank you!
Wow! It’s been crazy the last several days. Fujifilm released the X-T5 on the 17th. Not everyone got their orders.
Let’s back this up. Amazon apparently listed the X-T5 too early on announcement day. By contract, everyone is supposed to go live no earlier than a certain time, but Amazon jumped the gun. I preordered an X-T5 on Amazon because I had reward points that I wanted to use. When the 17th came around, some people received their preorders that day. For others it shipped that day, and arrived in the next day or two. For me? Nothing. Those who ordered on Amazon were left in the dark. What I didn’t know is that Fujifilm decided to punish Amazon for their sins and not give them any cameras to sell; sadly, only Fujifilm photographers who ordered through Amazon were actually punished. Is it Amazon’s fault? Yes. Is it Fujifilm’s fault? Sure—they could have done something else to teach Amazon a lesson, while still allowing people to receive the cameras they ordered. Is it my fault? No. Is it your fault? No. But you and I didn’t get our gear when others did. I know this is a first-world problem, and in the grand scheme of things it doesn’t matter, but it is something that many people have experienced.
Amazon is a huge company, and Fujifilm sales are a tiny drop in a massive bucket. If Fujifilm stopped selling to Amazon altogether, it wouldn’t hurt Amazon in any way, shape, or form. I get that Fujifilm has to hold them accountable. I get that it wasn’t fair to their other retail customers. But let’s be real: crap rolls down hill. Who ended up with the crap? Me. You, if you, too, ordered through Amazon. Fujifilm’s customers are who got punished, not Amazon. I’m sure Amazon gave two seconds to this situation, and hasn’t cared one iota since. When they get their cameras, they’ll sell every single copy, and it will have such a small impact on the bottom line that you need a powerful magnifying glass just to see it. Those trying to be patient with their Amazon preorders might have to be extremely patient—I’ve heard that it might be sometime in January before orders are shipped. I don’t know that for a fact, but it’s what I have heard, and it may or may not be true—I hope it isn’t true.
So how did I get my X-T5? I called around to local camera stores, and I found one in stock. Luckily, Foto Forum in Phoenix had a body-only copy, plus one bundled with the 18-55mm f/2.8-f/4 kit zoom. I purchased the one with the lens. If you are still waiting for yours to ship, maybe call around to local camera stores to see if they still have an X-T5 in stock, and if so purchase from them instead.
That’s my story. What about you? Did you buy a Fujifilm X-T5? Did it arrive or are you still waiting?
People have already begun asking me for my impressions on this camera. I think a number of you are waiting to learn a little more about it before spending so much money. It’s way too soon to provide you with anything valuable. I’ll tell you my way-too-soon initial impressions, but please take them with a large grain of salt. I’ve only barely begun to use the camera and really haven’t had a chance to properly test it. I’ll give a full review later.
First, let’s talk about megapixels. Do you need 40? If you crop deeply, print posters, or just love to pixel-peep, then maybe. But if you don’t crop deeply, don’t print posters, or don’t pixel-peep, then you definitely don’t need 40mp—it’s way overkill. Fortunately, it doesn’t seem to negatively affect the speed of the camera or even the file transfer speed when using the Fujifilm Cam Remote app. Unfortunately, it does take up more space on the SD Card, phone/computer, and storage, and uploads to my cloud storage are noticeably slower. There’s pluses and minuses to 40mp; I don’t anticipate the pluses coming in handy for me very often. For some of you, though, it is an important upgrade.
I haven’t put the autofocus improvements to the test whatsoever, but through three days of shooting, I haven’t noticed it being any more snappy than my X-E4. The only thing I noticed is that face detection locked onto a face that was far away, which I wouldn’t expect to happen on my X-E4. Since I wasn’t trying to photograph the person, it actually wasn’t a positive thing, but I can see this being an improvement. I haven’t even attempted continuous tracking or anything like that yet, so I can’t speak of it.
I was really excited for HEIF, but discovered that it disables Clarity. That’s disappointing. No HEIF for me, since I use Clarity a lot. Speaking of Clarity, I was also very disappointed that it isn’t any faster on the X-T5, and the Storing pause is identical to X-Trans IV. Fujifilm should have spent some time speeding this up, in my opinion. Oh, and somehow I keep bumping the drive switch, and accidentally switching to CL or HDR, both of which disable Clarity—I’ll have to figure out how to not bump that switch.
While the X-T5 is smaller than the X-T4, and just a little bigger than the X-T1 and X-T30, it is definitely heavy. Seems like a similar weight to the X-T4—not sure if it is or isn’t, but it’s hefty. I personally prefer the weight of the X-T1 or X-T30, but if you use large lenses a lot, you might appreciate the solid base of the X-T5.
The reason that I purchased the Fujifilm X-T5 is because this camera has the new Nostalgic Neg. film simulation. What do I think of it so far? If Eterna and Classic Chrome had a baby, it would be Nostalgic Negative. It has some similarities to both of those film simulations, with soft gradations in the shadows similar to Eterna and with some Eterna-like colors (particularly the warm colors), and with contrast, saturation, and an overall palette more similar to Classic Chrome. I’m not a huge fan of default straight-out-of-the-box Nostalgic Neg.—I was actually initially disappointed—but with some adjustments it can become magical. I love it! Nostalgic Neg. is another analog-esque film sim from Fujifilm that’s sure to become a classic. Expect some recipes soon!
I don’t have any other observations yet. I hope to do some more serious experimentations soon, and when I do I’ll share those impressions with you. In the meantime, here are some straight-out-of-camera Nostalgic Neg. pictures that I captured with my Fujifilm X-T5:
Two Ducks – Lynx Lake, AZ – Fujifilm X-T5
311 – Lynx Lake, AZ – Fujifilm X-T5
Caution: Nature – Lynx Lake, AZ – Fujifilm X-T5
Believer – Lynx Lake, AZ – Fujifilm X-T5
Cat Clock – Prescott, AZ – Fujifilm X-T5
Dusk Blazer – Buckeye, AZ – Fujifilm X-T5
Spiderweb Rocks – Buckeye, AZ – Fujifilm X-T5
Don’t Shoot – Buckeye, AZ – Fujifilm X-T5
Warning – Buckeye, AZ – Fujifilm X-T5
Golden Light Chair – Buckeye, AZ – Fujifilm X-T5
Red & Gold – Prescott, AZ – Fujifilm X-T5
Going Out of Business – Prescott, AZ – Fujifilm X-T5
Hyundai – Prescott, AZ – Fujifilm X-T5
Short Train – Buckeye, AZ – Fujifilm X-T5
Around the Bend – Arlington, AZ – Fujifilm X-T5
Lakeview – Lynx Lake, AZ – Fujifilm X-T5
Log on the Lake – Lynx Lake, AZ – Fujifilm X-T5
Private Dock – Lynx Lake, AZ – Fujifilm X-T5
Can’t See the Forest – Lynx Lake, AZ – Fujifilm X-T5
Irrigation Mist – Buckeye, AZ – Fujifilm X-T5
This post contains affiliate links, and if you make a purchase using my links I’ll be compensated a small amount for it.
This is the third and final installment of this series. As a reminder, I photographed only with my Fujifilm X-T1 from the announcement day of the Fujifilm X-T5 (November 2) until the release date (November 17). Why? First, even though the Fujifilm X-T1 is eight-years-old (and approaching nine), it is still such a great little camera. It took three years for Fujifilm to bring this model to the market because they wanted to get it right, and it was one of their most important cameras ever released. The Fujifilm X-T1 was one of the first, if not the first, Fujifilm cameras that widely appealed to professional photographers. It was Fujifilm’s most successful model at the time—outselling all the previous cameras—and launched the extremely successful X-T line. The X-T5 is the latest iteration. This project was intended to give me a better understanding of how the X-T5 has evolved from the original model. It also allowed me to demonstrate that previous models, including the original X-T1, are still really good.
I wanted to try some things with the X-T1 that I wasn’t able to do in the first 10 days, including wildlife and low-light. I had been sick, which made this a much more difficult project than I had anticipated, so I tried to make the most of the last five days. In the end I didn’t do everything that I wanted, but I was able to do a lot, and I’m happy with how it all came together.
I was really impressed with the Fujifilm X-T1—even in 2022, it is an excellent body that’s quite capable of capturing beautiful photographs. I thoroughly enjoyed shooting with it, more than I thought I would. The only shortcoming that I encountered was in dim light, the autofocus tended to hunt. This didn’t prevent me from getting the pictures, but it did make me work a little harder to do it. Otherwise, the camera performed exceptionally well in a whole host of situations. If you have one, it’s definitely a keeper. If you are in the market for a used Fujifilm model, this is one that I have no problems recommending. Is the X-T5 better? Sure. Is the X-T4 better? Yeah. Is the X-T3 better? Affirmative. Is the X-T2 better? I’m certain that it is. But, the X-T1 is still really good, and the newer iterations aren’t miles ahead—each new model is marginally better than the previous, which means that the latest is only four small steps ahead; ahead indeed, but the ol’ X-T1 holds its own surprisingly well.
I hope that you enjoyed this short-term project as much as I did!
When should you use which Film Simulation Recipes on your Fujifilm X-Trans III camera? With so many recipes to choose from, it can be difficult to know what recipe you should select in a given situation, and this article is intended to help you with that. If you haven’t read Part 1, it’s important to do so because it explains what exactly we’re doing—the backstory—which is important to understand. There’s a video to watch in that article, too. Take a moment right now to hop on over to Part 1 (click here) before continuing on with this post, if you haven’t viewed it already. Also, check out Part 2 (click here) if you missed that.
Like Part 2, I set out to recommend seven recipes, one for each C1-C7 Custom Preset, that don’t share the same white balance type, because X-Trans III cameras—X-Pro2, X100F, X-E3, X-T2, X-T20 & X-H1—cannot remember a White Balance Shift within the C1-C7 Custom Presets. If two recipes share the same white balance type but not the same shift, then when you switch presets you must remember to adjust the shift, too. That can be inconvenient and frustrating, so my best solution is to program recipes that use different white balance types and/or share the same white balance type and shift. The user experience is much improved, but you might not be able to program all of your favorite recipe at the same time, which is the one downside to doing this. It was a difficult task, but I think I came up with a good set for you.
If you have a Fujifilm X-T3 or X-T30, you can use these recipes, too, by simply setting Color Chrome Effect to Off. Also, if you have a newer X-Trans IV camera (or X-Trans V), you can use these recipes by additionally setting Color Chrome FX Blue to Off, Clarity to 0, and choosing a Grain size (either Small or Large).
For sunrise or sunset photography, this “Improved Velvia” Film Simulation Recipe is one of your best bets! It’s great anytime of the day or night when you need vibrant colors, so it has a lot of versatility, but it is especially nice during “golden hour” when the sun is low to the horizon. This recipe uses the Auto white balance type; if I wasn’t concerned about white balance type, I’d probably still choose this recipe.
Pear Blossom Day – Farmington, UT – Fujifilm X-T30 – “Kodak Gold 200”
“Midday” is simply daylight conditions outside of when the sun is low to the horizon, and for this category I’m recommending Kodak Gold 200. Even though this is a recipe for the X-T3/X-T30, it is fully compatible with X-Trans III cameras. It’s great for sunny conditions—midday or otherwise—and is good for landscapes and portraits. If you have this programmed into your camera, you’re going to use it a lot, perhaps more than any of the others. It uses the Daylight white balance type; if I wasn’t concerned about white balance type, I’d still choose this one, although each in the alternatives list are excellent options, too.
Pink Rose Blossom – Ogden, UT – Fujifilm X-T30 – “Ektachrome E100GX”
If it’s a rainy, overcast day, the Ektachrome E100GX is an excellent Film Simulation Recipe to try. It’s also great for many daylight situations, so it offers good versatility. This recipe uses the Fluorescent 2 white balance type; if I wasn’t concerned about white balance type I would choose Fujicolor Superia 800 instead, but this is a close second-best, and I feel good about recommending it anyway.
Cameras and Coffee – South Weber, UT – Fujifilm X-T30 – “Color Negative”
For natural light indoor photography, I recommend the Color Negative Film Simulation Recipe, which is another one that’s intended for the X-T3/X-T30, but is fully compatible with X-Trans III cameras. It uses the Fluorescent 1 white balance type; if I wasn’t concerned about white balance type I would choose Agfa Optima 200 instead, but this is still a solid option.
For nighttime or indoor artificial light situations, try the Fujicolor NPL 160 Tungsten Film Simulation Recipe. It does especially well for “blue hour” photography at dusk or dawn, when the sun is below the horizon. This recipe uses the Fluorescent 3 white balance type; if I wasn’t concerned about white balance type, I would choose CineStill 800T instead, but this is a good second-best.
Suburban Abstract – Buckeye, AZ – Fujifilm X-H1 – “Xpro”
There aren’t very many options for this category, but the Xpro recipe is an excellent recipe, producing a cross-process aesthetic. It uses the Kelvin white balance type; if I wasn’t concerned about white balance type, I would probably choose the Cross Process recipe instead, but this is quite similar, so you can’t go wrong either way.
Alternatives for “alternative process” photography:
Doll – Bountiful, UT – Fujifilm X-H1 – “Analog Monochrome”
Last but certainly not least is black-and-white, and for that I recommend the Analog Monochrome Film Simulation Recipe. This recipe is really good for most situations. It uses the Incandescent white balance type; if I wasn’t concerned about white balance type, I would be happy with this recipe or any in the alternatives list below, which are all good.
The Nostalgic Negative film simulation hasn’t received the fanfare of Classic Chrome or especially Classic Negative. Not even as much as Acros or Eterna. Maybe about as much as Eterna Bleach Bypass. Maybe. I think it’s because of poor marketing strategies by Fujifilm.
Nostalgic Negative was introduced by Fujifilm about a year-and-a-half ago on the GFX100S. I know that some people use film simulations and shoot straight-out-of-camera on GFX, but it is a much smaller percentage, I think, than the X system. I don’t know the numbers, but (just throwing something out there) if 20% of Fujifilm X owners use Film Simulation Recipes, the number of GFX owners is maybe 5%. So Nostalgic Negative is something that, for the most part, GFX owners don’t even care about. Besides, I’m pretty sure that GFX models sell a lot fewer copies than X series cameras, so the number of people actually using this film simulation on a GFX100S is pretty small. The next camera to get Nostalgic Negative was the GFX 50S II—kind of the same story. The first X camera to get Nostalgic Negative was the X-H2S, followed very quickly by the X-H2. Interestingly, this film simulation isn’t found anywhere in the promotional material for those two cameras. Yes, they have Nostalgic Negative, but it’s clear that Fujifilm didn’t think it would be a selling point for those two models. That makes sense, since these two “flagship” cameras aren’t intended for or marketed to long-time Fujifilm photographers, but for those with other camera systems (Canikony) looking to make a change. I suspect that many of those buying the X-H2S and X-H2 are generally less aware of, and less open to using, film simulations and recipes and such.
That brings us to the Fujifilm X-T5, the first X series camera where Fujifilm is actually promoting the Nostalgic Negative film simulation… barely. It’s mentioned in the promotional material, but without much fanfare, and not stated as a new feature, or with a good explanation of what it’s intended to resemble and what makes it special.
According to Fujifilm, the Nostalgic Negative film simulation is based on “American New Color” photography of the 1970’s. They studied photographs by William Eggleston, Stephen Shore, Joel Sternfeld and Richard Misrach in order to create it. Eggleston and Sternfeld largely shot on Kodachrome—II and X in the early 1970’s, 25 and 64 in the late ’70’s—while Shore shot mostly Kodacolor, and Misrach shot a lot of Vericolor. All of those are Kodak emulsions, but with different aesthetics. These four photographers had different styles and different darkroom processes, and they each had a unique look; the commonality that Fujifilm found was an “overall atmosphere based on amber.” That’s a basic explanation of what Nostalgic Negative is. While not mentioned by Fujifilm, I think this film simulation might be closer to aesthetic of Saul Leiter than the ones Fujifilm stated they studied. Saul Leiter used a whole bunch of different films over the years, including Kodachrome and Anscochrome, but apparently he didn’t mind using generic drug store brands, either. Nostalgic Negative is a divergent approach for Fujifilm, I think, in that it isn’t intended to mimic a certain emulsion (or the “memory color” of a specific film stock), but instead tries to mimic the “memory color” of a certain decade (the 1970’s), or perhaps elicit a nostalgic emotional response.
The Fujifilm X-T5 is the cheapest camera with Nostalgic Negative. It’s the 5th camera to get it, and at $1,700, it’s somehow the cheapest! I don’t think this film simulation will really “catch on” until it’s available on a more affordable body. And this is where I think Fujifilm goofed. If they had introduced Nostalgic Negative on the X-T5, and followed it up with an X-T40, X-S20, X100VI (or whatever it will be called), X-Pro4, and X-E5 in the coming couple of years, it would be a selling point. People would be super-excited about it right now. But because Fujifilm first put it on four models that are expensive and where the users aren’t as eager about film simulations, it lost a lot of its luster. Nobody’s really talking about Nostalgic Negative anymore. While I don’t think I’ll appreciate this film simulation as much as Classic Negative, Classic Chrome, Eterna, or Acros, I do believe it has the potential for some very interesting recipes. I look forward to trying it. Heck, I’m spending $1,700 just for Nostalgic Negative—that’s crazy! Or dumb. It could go either way.
What about you? Are you excited for Nostalgic Negative? How much would you spend for it? If Fujifilm offered it as a paid firmware update for your X-Trans IV camera, would you buy it? Let me know in the comments!
This post contains affiliate links, and if you make a purchase using my links I’ll be compensated a small amount for it.
Preorder your Fujifilm X-T5 in black: AmazonB&H Preorder your Fujifilm X-T5 in silver: AmazonB&H
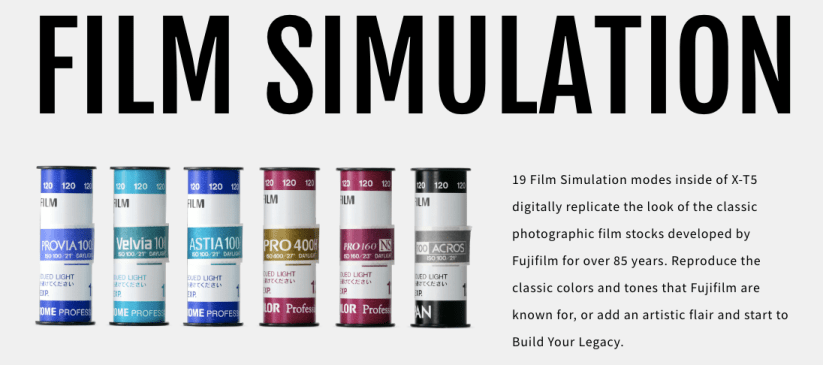
Interestingly, as a side note, if you look closely at the promotional statement by Fujifilm about film simulations on the X-T5, you’ll see this statement: “Reproduce the classic colors and tones that Fujifilm are known for, or add an artistic flair and start to Build Your Legacy.” First, I could be wrong, but I’m pretty sure it should be “is” and not “are”—after all, Fujifilm is known for reproducing classic colors and tones; for “are” to be correct, you’d need a conjunction, such as, “Reproduce the classic colors and tones that Fujifilm and Fuji X Weekly are known for….” Maybe they initially penciled that “and Fuji X Weekly” part in there, and erased it at the last minute, forgetting to change the “are” to “is” by accident. Second, Build Your Legacy seems to be Fujifilm’s new catchphrase for Film Simulation Recipes. It’s been a Fujifilm trademark for a few years, but I hadn’t seen it used in conjunction with film simulations. I wonder if Fujifilm has something up their sleeves that they’ll announce later. Perhaps it is even related to their upcoming app? I’m not sure, but it is definitely something to keep an eye on.
I had big plans for this project for these days, but life had other plans. Specifically, Covid. I know what you’re thinking: didn’t you just have the flu a few weeks ago? Yes, I did. Now I have Covid. Well, I’m almost recovered now, but I was very sick during the days that I captured these pictures, and I was limited to what I could capture in and around the house. Most of these photographs were taken in the backyard.
If you’re not sure what this short-term project is, the concept is simple: I’m photographing only with my Fujifilm X-T1 from the announcement day of the Fujifilm X-T5 (November 2) until the release date (November 17). Why? First, even though the Fujifilm X-T1 is eight-years-old (and approaching nine), it is still such a great little camera. It took three years for Fujifilm to bring this model to the market because they wanted to get it right, and it was one of their most important cameras ever released. The Fujifilm X-T1 was one of the first, if not the first, Fujifilm cameras that widely appealed to professional photographers. It was Fujifilm’s most successful model at the time—outselling all the previous cameras—and launched the extremely successful X-T line. The X-T5 is the latest iteration. This project will give me a better understanding of how the X-T5 has evolved from the original model. It also allows me to demonstrate that previous models, including the original X-T1, are still really good.
Hopefully, now that I’m not nearly so sick and my quarantine period has ended, I can do some of the photography that I was intending to do. I want to really see what the X-T1 is capable of, and with some luck I’ll be able to do that before this project comes to a close in the coming days. Once my X-T5 arrives in the mail, the X-T1 will be going back on the shelf, at least for a little while. I don’t expect the new camera to be wildly better than the first iteration, but soon enough I’ll know for sure just how much improved it is. And, of course, I’ll write all about it, so stay tuned!
Tiny Purple Blossoms – Buckeye, AZ – Fujifilm X-T1 – “Classic Kodak Chrome” – Day 5
In my article, Did I Buy the Fujifilm X-T5? Should You?, I mentioned that I began a new short-term photography project: photographing only with my Fujifilm X-T1 from the announcement of the Fujifilm X-T5, which was November 2, until the release date, which will be November 17. I’m not using any other camera during this 16 day period, only the X-T1.
Why am I doing this? First, even though the Fujifilm X-T1 is eight-years-old (and approaching nine), it is still such a great little camera. It took three years for Fujifilm to bring this model to the market because they wanted to get it right, and it was one of their most important cameras ever released. The Fujifilm X-T1 was one of the first, if not the first, Fujifilm cameras that widely appealed to professional photographers. It was Fujifilm’s most successful model at the time—outselling all the previous cameras—and launched the extremely successful X-T line. The X-T5 is the latest iteration. This project will give me a better understanding of how the X-T5 has evolved from the original model.
More importantly than any of that, the Fujifilm X-T1 was a good camera on the day it was released, and is still a good camera in 2022. There’s no reason that it cannot be used today. The image quality is excellent. The camera is pretty quick overall (look at the sports pictures!). It has one advantage over all other X-T cameras: 16mp. The files are smaller, which means I can capture more pictures on an SD card, it takes less time to transfer the pictures from the camera to my phone, the pictures take up less space on my phone, the pictures upload more quickly to my cloud storage, the pictures use less cloud data, and the pictures download from cloud storage more quickly. Less is more sometimes. I’ve really appreciated this quickness lately. The Fujifilm X-T1 is a camera that I’ve thoroughly enjoyed shooting with over the last week, and I think I’ll be a little sad when I put it back on the shelf after my X-T5 arrives in the mail.
Day 1
Birdcage on a Wall – Buckeye, AZ – Fujifilm X-T1 – “Classic Kodak Chrome” – Day 1
A Pink Rose in the Garden – Buckeye, AZ – Fujifilm X-T1 – “Classic Kodak Chrome”
Berry Behind the Baseball Diamond – Farmington, UT – Fujifilm X100V – “Fujichrome Provia 100F”
This Film Simulation Recipe is called “Fujichrome Provia 100F” after the film that it is intended to mimic. Fujifilm introduced Provia 100, a color reversal film, in 1994, and replaced it with the much improved Provia 100F in 2001. I’ve only shot a couple of rolls of Provia 100F. I remember that it had a cool color cast (especially when compared to Kodak films), it had a fair amount of contrast, moderate saturation, and tended to render blues strongly. This recipe has been in the works for awhile, with a lot of failed attempts. I think it does pretty well at reproducing the aesthetic of the film, but there are definitely a few compromises—more of the “memory color” that Fujifilm talks about than perhaps a 100% accurate rendition. Still, I believe that it turned out pretty well overall.
You might be surprised that this recipe doesn’t use the Provia film simulation as its base, but instead uses Classic Chrome. The Provia film simulation doesn’t actually resemble very well the film that it was named after—Fujifilm used it more as a marketing name on the X series than anything else. Velvia was the Fuji slide film that I most often shot with, but Provia was probably their most popular because it wasn’t nearly as wild as Velvia, and produced more true-to-life (yet still fairly vibrant) colors.
Actual Fujicolor Provia 100F 35mm film. Chicago, 2005.
This Fujicolor Provia 100F Film Simulation Recipe has been a Patron Early-Access Recipe on the Fuji X Weekly App since January, but it has been replaced by a new Early-Access Recipe, so now it’s available to everyone. It’s compatible with the Fujifilm X-Pro3, X100V, X-T4, X-S10, X-E4, and X-T30 II cameras. It should be fully compatible with X-Trans V cameras, but I’ve yet to be able to test it to know if it renders the same or not. Those with newer GFX cameras can use this recipe, too, but it will render slightly different.
Classic Chrome Dynamic Range: DR400 Highlight: -1 Shadow: +3 Color: +4 Noise Reduction: -4 Sharpening: -1 Clarity: -3 Grain Effect: Weak, Small Color Chrome Effect: Strong Color Chrome Effect Blue: Strong White Balance: Daylight, -2 Red & +5 Blue ISO: Auto, up to ISO 6400 Exposure Compensation: +1/3 to +1 (typically)
Example photographs captured using this “Fujichrome Provia 100F” film simulation recipe on my Fujifilm X100V and Fujifilm X-E4 cameras:
Mushos for 5$ – Buckeye, AZ – Fujifilm X-E4
Truck Dodging the Sunlight – Buckeye, AZ – Fujifilm X-E4
Sunlight Pouring on Leaves in Early Autumn – Buckeye, AZ – Fujifilm X-E4
Wasatch Front – Farmington, UT – Fujifilm X100V
Blue Sky Reeds – Farmington, UT – Fujifilm X100V
Branch Berries – Farmington, UT – Fujifilm X100V
Baseball Sky – Farmington, UT – Fujifilm X100V
Windsock – Farmington, UT – Fujifilm X100V
Field 3 – Farmington, UT – Fujifilm X100V
Skateboard & Runner – Farmington, UT – Fujifilm X100V
Creek Under Branches – Farmington, UT – Fujifilm X100V
Trail Through the Trees – Farmington, UT – Fujifilm X100V
Fence Along Path – Farmington, UT – Fujifilm X100V
Josh at the Court – Farmington, UT – Fujifilm X100V
Nobody pays me to write the content found on fujixweekly.com. There’s a real cost to operating and maintaining this site, not to mention all the time that I pour into it. If you appreciated this article, please consider making a one-time gift contribution. Thank you!